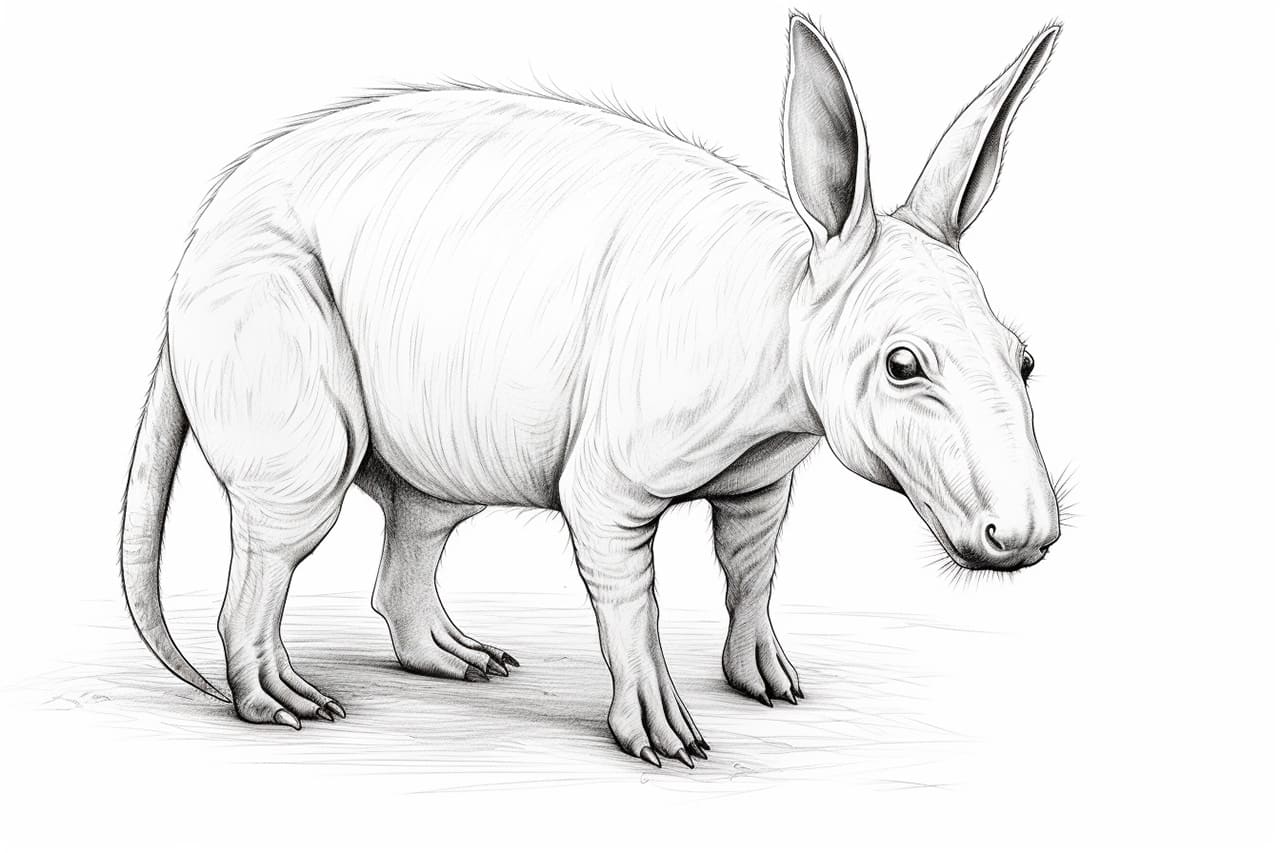
Welcome to this step-by-step guide on how to draw an aardvark! Whether you are an aspiring artist or simply love to doodle, this tutorial will provide you with clear and concise instructions on drawing this unique and fascinating creature. So grab your sketchbook and let’s get started!
Materials Required
Before we begin, gather the following materials:
- A sketchbook or drawing paper
- Pencils (preferably a range from HB to 6B)
- Eraser
- Fine-tip black marker or pen
- Colored pencils or markers (optional)
Now that you have your materials ready, let’s dive into the step-by-step process of drawing an aardvark.
Step 1: Basic Shapes
Start by lightly sketching the basic shapes that make up the aardvark’s body. Begin with an oval shape for the head, followed by a larger, elongated oval for the body. Connect the head and body with a curved line for the neck.
Step 2: Facial Features
Within the head oval, draw a horizontal line slightly below the center. This will be a guide for placing the aardvark’s eyes. Add two small circles on either side of this line for the eyes. Above the eyes, draw two rounded triangle shapes for the aardvark’s long ears. Next, sketch a small triangular shape for the nose at the bottom of the head oval.
Step 3: Snout and Mouth
Extend a curved line from the bottom of the head oval to create the aardvark’s snout. Add two small circles at the tip of the snout to represent the nostrils. Just below the snout, draw a slightly curved line to indicate the mouth.
Step 4: Body and Limbs
Refine the shape of the body by adding more curves and contours. Aardvarks have strong, muscular bodies, so make sure to emphasize this in your sketch. Connect the body to the head with a rounded neck. Draw four short lines extending from the body for the limbs. At the end of each line, draw rounded shapes for the aardvark’s feet.
Step 5: Details and Texture
Now it’s time to add some details and texture to your aardvark drawing. Start by sketching small lines along the body to represent fur. Pay attention to the direction of the fur, which generally follows the contours of the body. Add some lines on the ears to indicate the texture. Within the eyes, create small dots for the pupils and add some shading around them for depth.
Step 6: Finalize the Outline
Once you are satisfied with the overall shape and details, go over the final lines of your drawing with a fine-tip black marker or pen. Erase any unnecessary pencil marks, leaving only the clean, bold outline of your aardvark.
Step 7: Color (Optional)
If you prefer to add color to your drawing, now is the time to do so! Aardvarks have a unique coloration, typically ranging from pale yellowish-brown to gray. Use colored pencils or markers to bring your aardvark to life. Start with a base color and then add shading and highlights to create depth and dimension.
And there you have it! You have successfully drawn an aardvark. Now, take a moment to admire your masterpiece.
Conclusion
Drawing an aardvark may seem challenging at first, but by breaking it down into simple steps, you can easily create a stunning representation of this fascinating animal. Remember to practice regularly and experiment with different techniques to further develop your artistic skills. So keep on drawing, and have fun exploring the world of art!
Fun Facts About Aardvarks
- Aardvarks are the only living species in the order Tubulidentata, which means “tube toothed” in reference to their unique teeth structure.
- Despite their appearance, aardvarks are not related to anteaters or armadillos. They are actually more closely related to elephants.
- Aardvarks are nocturnal animals, meaning they are most active at night.
- Their long, sticky tongues can extend up to 12 inches to help them catch ants and termites, their primary food source.
- Aardvarks are excellent diggers and can excavate burrows with their powerful claws, which they use for shelter and protection.
- They have a keen sense of smell, which helps them locate ant and termite colonies underground.
- Aardvarks can consume thousands of insects in a single night, making them important for controlling insect populations in their habitat.
- Despite their solitary nature, aardvarks have been known to share their burrows with other animals, such as African wild dogs or hyenas.
- Female aardvarks give birth to a single offspring, called a calf, after a gestation period of about 7 months.
- Aardvarks are considered a vulnerable species due to habitat loss and hunting, particularly for their meat and scales, which are used in traditional medicine. Efforts are being made to protect aardvark populations and their habitats.
Suggestions for Scenes and Settings for Aardvark Drawings
Certainly! Here are some specific suggestions for scenes and settings for drawings of an Aardvark:
- Aardvark foraging for ants in a lush, green African savanna with a beautiful sunset in the background.
- Aardvark burrowing into the sandy soil of the Kalahari Desert, with desert plants and dunes in the distance.
- Aardvark peeking out of a burrow in a dense, tropical rainforest with vibrant foliage and exotic animals around.
- Aardvark standing near a termite mound in the African bushveld, with acacia trees and a herd of elephants in the background.
- Aardvark snuggled up in its burrow underground, surrounded by tunnels and roots, with a beam of sunlight shining through the entrance.
- Aardvark exploring a rocky outcrop in a semi-arid landscape, with a variety of desert plants and cacti.
- Aardvark in a zoo enclosure, interacting with a zookeeper or visitors, with enrichment items like logs and rocks for play.
- Aardvark in an urban setting, such as a city park or botanical garden, with skyscrapers and city lights in the background.
- Aardvark in a fantasy setting, like a magical forest with glowing mushrooms and whimsical creatures.
- Aardvark in a scientific illustration, showing its anatomy and adaptations for digging and feeding on ants and termites.