How to Draw a Mushroom in 7 Simple Steps
Learn how to draw with this step-by-step tutorial.
Materials You'll Need
- Drawing paper
- Pencil (HB or 2B)
- Eraser
- Colored pencils
- Markers
- Watercolor paints
Mushrooms are one of nature's most intriguing and whimsical creations. From fairy tale toadstools to realistic forest fungi, these fascinating organisms come in a variety of shapes, sizes, and colors, making them an exciting subject to draw. Whether you're a beginner looking for a fun and simple drawing exercise or an experienced artist aiming to refine your skills, this step-by-step guide will teach you how to draw a mushroom on paper.
In this tutorial, we'll cover:
-
Basic mushroom shapes to get you started
-
How to add texture and shading for a more realistic effect
-
Ways to personalize your mushroom by adding details like grass, gills, or even a magical glow ✨
So grab your pencils, find a cozy spot, and let's bring a mushroom to life on paper!


Materials Required
Before we begin, make sure you have the following materials at hand:
How to Draw a Mushroom Step-by-Step
Step 1: Sketch the Basic Outline
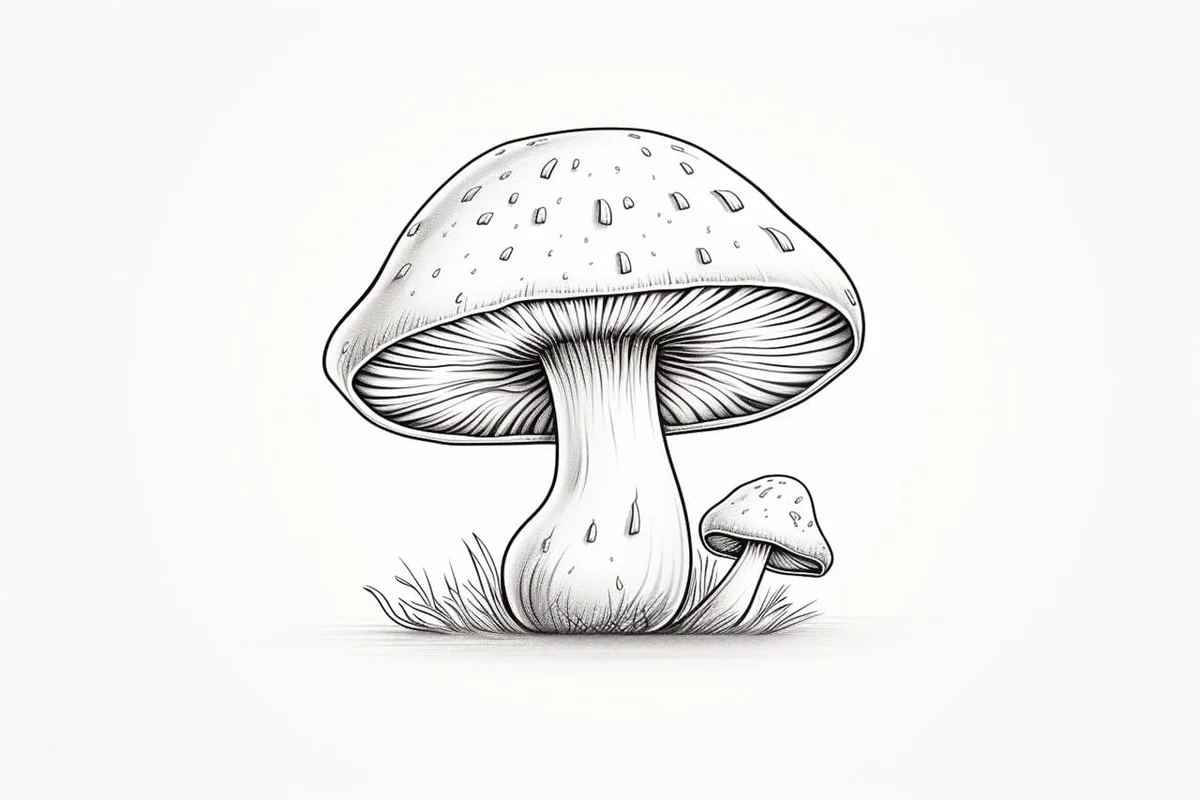
Begin by lightly sketching the basic shape of your mushroom using a pencil. Start with a large oval for the cap, placing it near the center of your page. This oval will serve as the mushroom's top, so adjust its size depending on whether you want a tall, narrow mushroom or a wide, rounded one.
Next, draw a vertical line extending downward from the oval's center—this will serve as a guide for the stem. Keep your lines light and sketchy, as you'll refine them later on.
Step 2: Draw the Stem and Cap
Now, shape the stem of the mushroom by drawing two slightly curved vertical lines extending down from the cap. The stem can be thick or thin, depending on the type of mushroom you want to draw. Give the base of the stem a gentle outward curve to create a more natural look.
For the cap, draw a curved line above the oval, connecting both ends smoothly. You can experiment with different cap styles—some mushrooms have flatter caps, while others are more rounded or bell-shaped. Keep in mind that mushrooms aren't perfectly symmetrical, so don't be afraid to add slight irregularities!
Step 3: Add Texture to the Stem and Cap
To make your mushroom more realistic, it's time to add texture and natural imperfections.
-
For the stem, draw subtle vertical lines running along its length to create a rough, fibrous texture. These lines should be slightly curved and uneven to mimic the natural grooves and ridges found in mushroom stems.
-
For the cap, add gentle curved lines to give it a folded, organic look. If you want to draw a classic toadstool mushroom (Amanita muscaria), you can add small circular spots across the cap.
Step 4: Draw the Gills or Pores
The underside of the mushroom cap contains either gills or pores, which are key features of many mushroom species.
-
For gills, draw evenly spaced, radiating lines that extend from the underside of the cap towards the stem. These lines should be curved slightly inward as they move toward the stem, giving the illusion of depth.
-
For pores, create a bumpy, uneven texture on the underside of the cap by using tiny circles or dots to replicate the sponge-like pores found on mushrooms like boletes.
This step will add realism and dimension to your mushroom drawing!
Step 5: Refine the Details
Tip: To enhance your mushroom drawing, consider using reference images of real mushrooms to study their unique shapes, textures, and colors. Observing different species will help you capture the intricacies of their forms and details, allowing you to add realistic features like irregularities in the cap and stem, as well as the specific patterns of gills or pores. This practice can significantly improve your artistic representation and creativity in depicting various types of mushrooms.
Now, let's refine the overall look of the mushroom by enhancing the textures and adding intricate details.
-
Add shading along the cap to indicate light and shadow.
-
Darken the underside of the cap slightly to emphasize its shape.
-
Draw small cracks, dents, or folds on the stem to make it look more organic.
-
If you want to create an environment, sketch grass, moss, or fallen leaves around the mushroom's base.
This step allows you to personalize your drawing and make it unique.
Step 6: Erase Unnecessary Guidelines
Once you're satisfied with the structure of your mushroom, go over the final lines with a darker pencil or ink pen to make them bold and crisp. Then, carefully erase any construction lines or excess marks.
At this stage, you can choose to keep the drawing as a black-and-white sketch or move on to adding color.
Step 7: Add Color and Shading (Optional)
To bring your mushroom to life, use colored pencils, markers, or watercolors to enhance its natural tones.
-
Caps can be red, brown, yellow, white, or even purple, depending on the species.
-
Stems are usually beige, light brown, or gray, with subtle variations in shading.
-
For added depth, use layered shading techniques to create realistic highlights and shadows.
If your mushroom is part of a scene, consider adding a soft background of grass, forest floor textures, or even a tiny insect for added charm.
Wild Inspiration: Imagine transforming your mushroom drawing into a fantastical world where the fungi serve as portals to other dimensions! Picture a giant mushroom with a cap that morphs into a swirling galaxy, complete with tiny stars and planets nestled within its glow. Surround your central mushroom with smaller, bioluminescent fungi that illuminate the forest floor, creating a mystical atmosphere filled with vibrant colors. Add whimsical creatures peeking out from behind the stalks—like tiny fairies or curious woodland animals—interacting with this magical ecosystem. Let your imagination run wild as you blend realism with surrealism, pushing the boundaries of what a simple mushroom can represent in your art!
Conclusion: Mastering the Art of Drawing Mushrooms
Congratulations! You have successfully completed your mushroom drawing! Whether you've created a realistic forest mushroom, a whimsical fairy toadstool, or an exotic fungi species, you've captured the fascinating world of mushrooms on paper.
Want to improve even more? Try drawing mushrooms from different angles, experimenting with various textures and patterns, or even creating a magical mushroom landscape. With practice, you'll be able to master organic forms and add beautiful botanical elements to your artwork.
So keep sketching, keep experimenting, and most importantly—enjoy the creative process!