Welcome to this step-by-step guide on how to draw a strawberry! Whether you’re a beginner or an experienced artist looking to improve your skills, this tutorial will teach you how to create a realistic and vibrant strawberry drawing.
Materials Required
Before we begin, make sure you have the following materials ready:
- Pencil (HB or 2B)
- Eraser
- Drawing paper
- Colored pencils or watercolors (optional)
Now that we have our materials ready, let’s dive into the process of drawing a delicious strawberry!
Step 1: Draw the Basic Shape
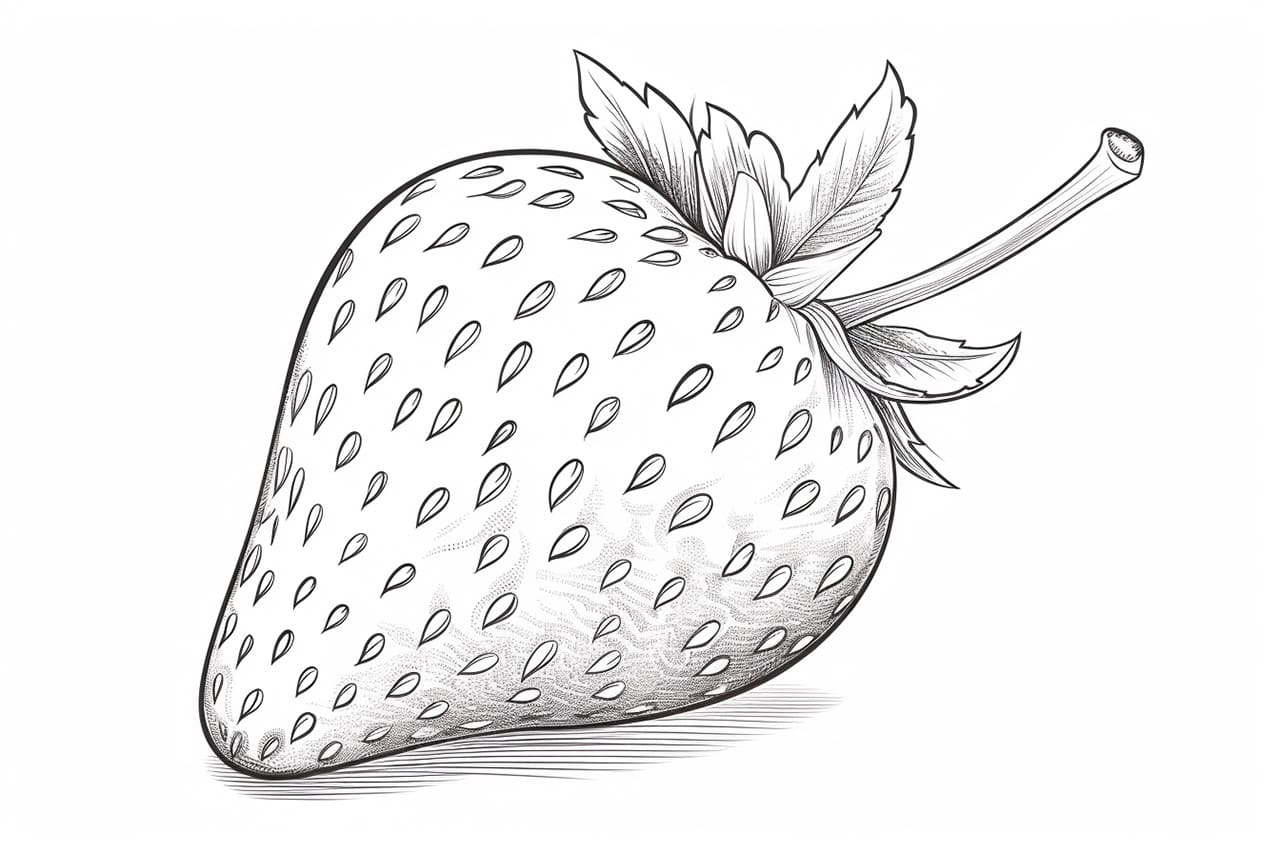
Start by drawing a medium-sized oval shape in the center of your paper. This oval will serve as the base of our strawberry.
Step 2: Add the Top and Bottom
Extend two small curved lines from the top and bottom of the oval shape. These lines will represent the stem and the bottom part of the strawberry.
Step 3: Draw the Leaves
On top of the stem, draw a cluster of small, pointed shapes to resemble the strawberry leaves. Remember to make the leaves slightly uneven to give them a more natural appearance.
Step 4: Create the Seeds
Draw tiny dots randomly scattered across the strawberry’s surface to represent the seeds. These dots can be irregular in shape and varying in size to add more realism to your drawing.
Step 5: Add Details to the Leaves
To make the leaves look more three-dimensional, draw small curved lines along the edges of each leaf. This will create the illusion of shadows and highlights.
Step 6: Shade the Stem
Using your pencil, shade the stem and the bottom part of the strawberry to give them a more realistic appearance. Start by lightly shading and gradually build up the darkness as needed.
Step 7: Enhance the Seeds
To make the seeds stand out, darken them slightly using your pencil. You can also use a brown or black colored pencil to add depth to the seeds.
Step 8: Add Color (optional)
If you want to add color to your drawing, use red, green, and brown colored pencils or watercolors. Lightly apply red to the strawberry to create a base color. Then, add darker shades of red or brown to areas that would naturally have shadows. For the leaves, use different shades of green to make them look more vibrant.
Step 9: Blend and Shade (optional)
To create a smooth and blended look, use a blending tool or a tissue to softly blend the colors together. This will give your drawing a more realistic and polished appearance.
Step 10: Final Touches
Look at your drawing and make any necessary adjustments or additions to enhance the overall look. Add more shading, refine the shape, or make any other changes that will make your strawberry drawing stand out.
And there you have it! You’ve successfully drawn a realistic strawberry. With practice and patience, you’ll be able to create even more detailed and lifelike drawings.
Conclusion
In this tutorial, we learned how to draw a strawberry step by step. By following these instructions and using the suggested materials, you can create a beautiful and realistic strawberry drawing. Remember to practice regularly and experiment with different techniques to improve your skills. Happy drawing!