Welcome to this step-by-step tutorial on how to draw a hog. Whether you’re an aspiring artist or simply looking for a fun and creative activity, drawing a hog can be a great way to unleash your artistic skills. In this guide, we will walk you through the process, providing clear instructions and helpful tips along the way. So let’s get started and bring these adorable creatures to life on paper!
Materials Required
Before we begin, gather the following materials:
- Pencil: A good quality pencil will allow you to easily make changes and add details as you progress.
- Eraser: A soft eraser will help you correct any mistakes or lighten your sketch.
- Paper: Choose a smooth, sturdy paper that can handle the pressure of your drawing tools.
- Drawing Pens (optional): If you prefer to outline your final drawing with ink, have some drawing pens ready.
Now that you have your materials, let’s dive into the step-by-step process of drawing a hog.
Step 1: Basic Shapes
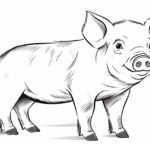
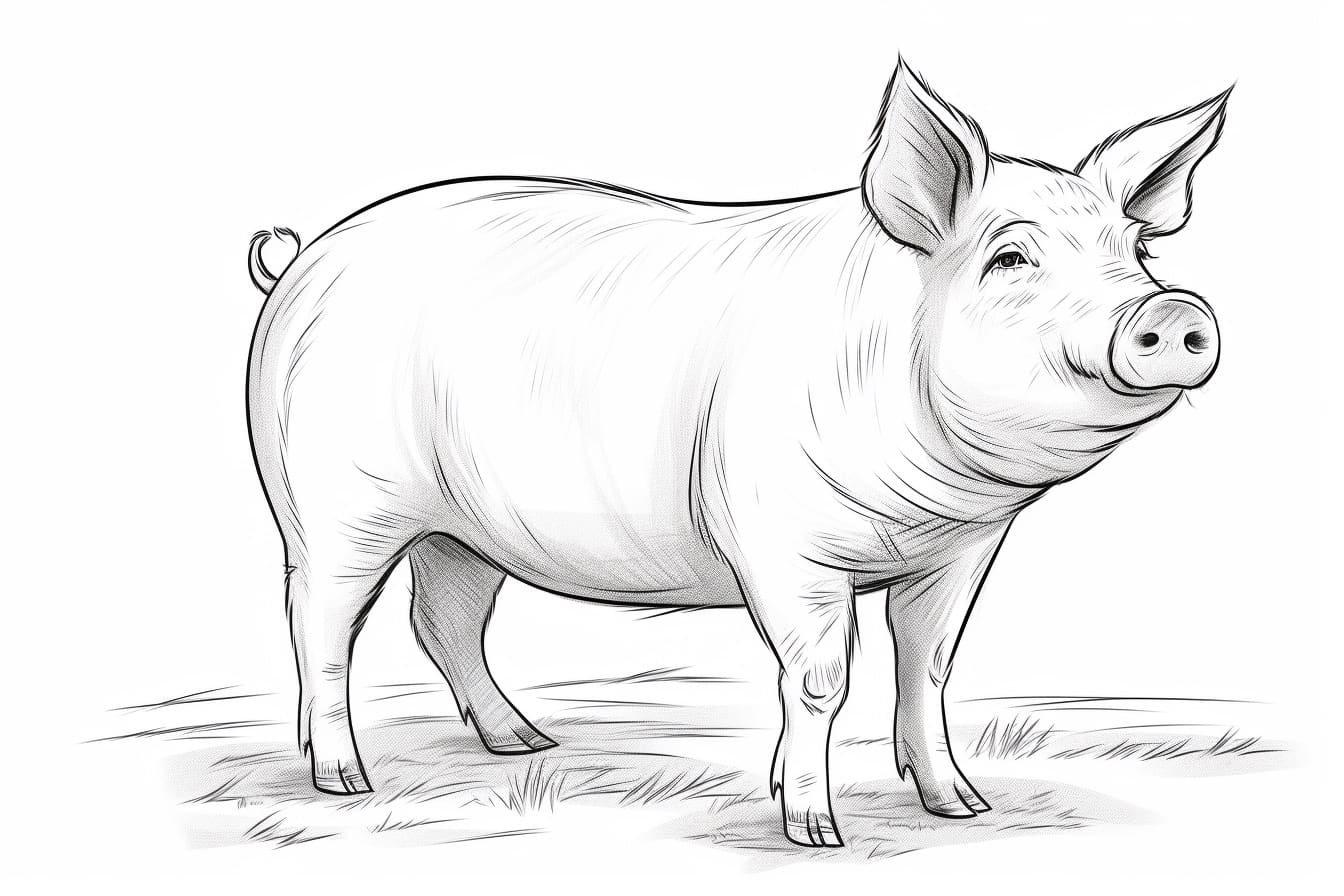
Start by sketching the basic shapes that form the foundation of your hog drawing. Begin with an oval shape for the body, slightly tilted to one side. Then, add a circle for the head, overlapping with the oval. Position the head towards the front of the oval, leaving space for the snout.
Step 2: Snout and Ears
From the front of the head circle, extend a triangular shape to represent the snout. Add two small circles at the upper part of the head for the ears. Don’t worry about the details just yet; we’ll refine them in the following steps.
Step 3: Eyes and Nostrils
Inside the head circle, draw two small circles for the eyes. Place them in the upper area of the head, leaving some space between them. Just below the snout, sketch two small ovals for the nostrils.
Step 4: Body and Legs
Connect the oval body to the head with a slightly curved line. Then, starting from the bottom of the body, draw two short lines that curve outwards for the front legs. Repeat the process for the hind legs, making them slightly longer to imply perspective.
Step 5: Tail and Feet
Extend a curved line from the back of the body to form the hog’s tail. It can be curly or straight, depending on your preference. Add small ovals at the end of each leg to represent the feet. Keep the feet simple, as they will be mostly hidden by the hog’s body.
Step 6: Facial Features
Refine the shape of the snout by adding more details, such as a curved line for the mouth and a small curve at the tip for the nose. Add curved lines above the eyes to indicate eyebrows, and draw small dots inside the eyes to represent pupils.
Step 7: Ears and Tusks
To make the ears more defined, add some curves and lines within them. If you like, you can also add curved lines on the snout to represent the hog’s whiskers. Next, draw two slightly curved lines coming out from the upper jaw to depict the hog’s tusks.
Step 8: Textures and Details
To give your hog drawing more texture, add some small lines on the body to represent fur. Use short, curved strokes to create these lines. You can also add some shading to certain areas, such as under the body or around the eyes, to add depth and dimension.
Step 9: Outline
Once you are satisfied with the overall shape and details of your hog drawing, you can go over the lines with a pen or darken them with a pencil. This will bring out the final details and make your drawing stand out.
Conclusion
Congratulations! You have successfully learned how to draw a hog from scratch. By following these step-by-step instructions, you have created a charming hog drawing that showcases your artistic talent. Remember, practice makes perfect, so keep honing your skills and exploring different techniques. Enjoy the process of drawing and let your creativity flourish. Happy drawing!