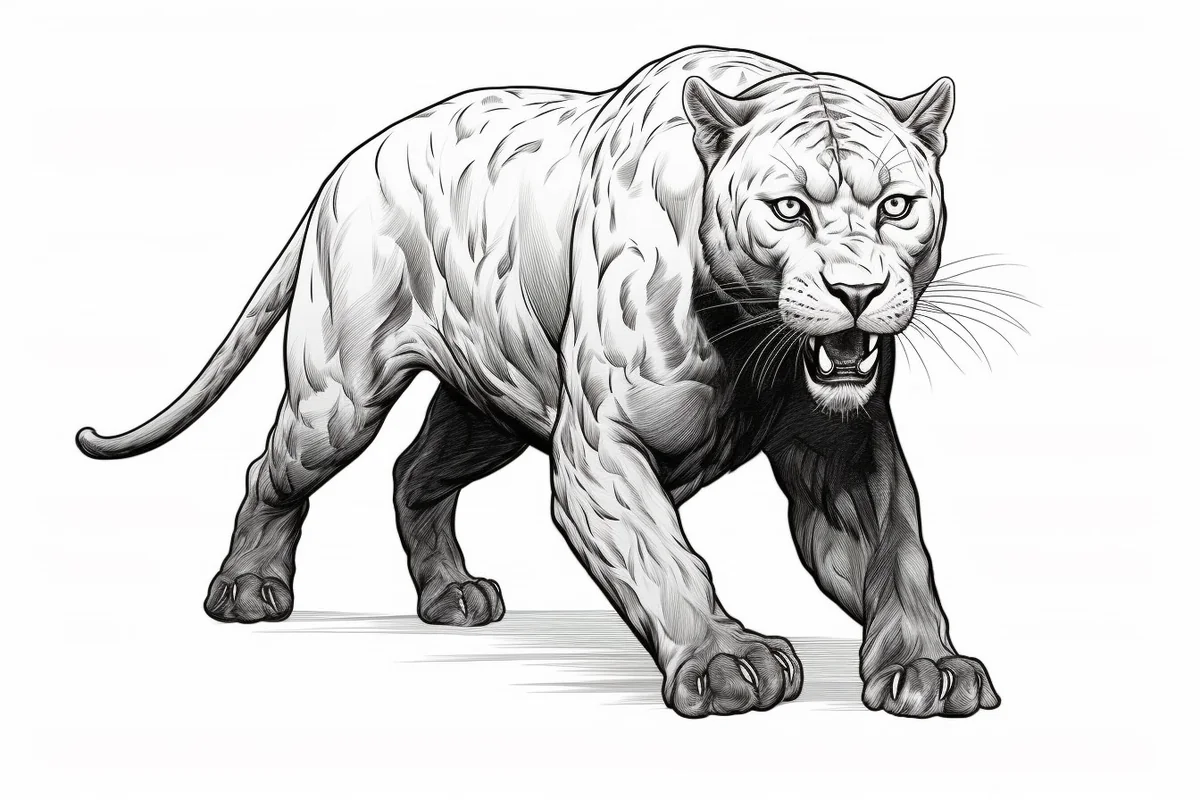
How to Draw a Panther Easy in 8 Steps
Learn how to draw with this step-by-step tutorial.
Materials You'll Need
- Drawing paper
- Pencil (HB or 2B)
- Eraser
- Colored pencils
- Markers
- Blending stump
Welcome to this exciting tutorial on how to draw a panther, one of nature's most magnificent and awe-inspiring creatures. Known for their sleek, muscular bodies and mysterious presence, panthers embody both grace and power, making them a favorite subject for artists. Whether perched on a tree branch, stalking through dense jungle foliage, or poised for action, panthers exude a captivating elegance that's thrilling to bring to life on paper.
In this step-by-step guide, we'll walk you through the process of drawing a realistic and dynamic panther. From sketching the basic anatomy to refining its distinctive features, like its piercing eyes and glossy coat, you'll learn techniques to create an artwork that captures the essence of this majestic predator.
Whether you're new to drawing or a seasoned artist, this tutorial is designed to inspire creativity and help you develop your skills. So grab your pencils, embrace the challenge, and let's create a stunning portrait of the mighty panther!


Materials Required
Before we begin, make sure you have the following materials:
-
Drawing paper (preferably a heavier weight paper)
-
Pencil (preferably a mechanical pencil with different lead thickness options)
-
Eraser (preferably a kneaded eraser)
-
Black ink pen (optional for outlining)
-
Colored pencils or markers (optional for adding color)
Now that you have gathered your materials, let's dive into the step-by-step process of drawing a panther.
Step 1: Sketching the Basic Shapes
Start by lightly sketching the basic shapes that form the body of the panther. Begin with an oval for the head, a larger oval for the body, and long ovals for the limbs. Keep the shapes simple and loose; focus on proportions rather than details at this stage.
Step 2: Defining the Body Proportions
Using the basic shapes as a guide, refine the proportions of the panther's body. Add more detail to the head, elongate the body, and shape the limbs by adding curves and angles. Pay attention to the natural pose of a panther, with its strong and agile physique.
Step 3: Adding Facial Features
Now it's time to bring the panther's face to life. Sketch in the eyes, nose, and mouth. Pay close attention to the shape and placement of these features, as they greatly influence the overall expression of the panther. Remember, panthers have distinctive eyes and a sleek snout.
Step 4: Outlining the Body
With the basic structure in place, use a darker pencil or black ink pen to outline the shape of the panther. Start from the head and work your way down, carefully tracing the contours of the body. Take your time and ensure smooth lines that follow the natural curves of the panther's form.
Step 5: Detailing the Features
Now, let's focus on adding more specific details to the panther. Begin by sketching in the fur texture, using short, curved lines to create the illusion of sleek and shiny fur. Pay attention to the direction of the fur growth, following the contours of the body. Add facial details such as whiskers and small dots for the nose.
Step 6: Shading and Adding Depth
To give your drawing dimension and depth, it's time to add shading. Observe the light source and imagine where shadows would fall on the panther's body. Use your pencil to create gradual transitions from light to dark areas, utilizing different pencil pressures and blending techniques to achieve a realistic effect.
Step 7: Refining the Details
Take this opportunity to refine the details of your panther drawing. Add more definition to the facial features, such as the eyes and mouth, by using a sharper pencil or ink pen. Pay attention to the small nuances that make a panther unique, such as the shape of the ears and the muscular structure.
Step 8: Optional Coloring
If you prefer a colored drawing, now is the time to bring your panther to life with colored pencils or markers. Start by lightly layering the base color of the fur, gradually adding darker shades and highlights. Be mindful of adding subtle variations and textures to achieve a realistic appearance.
Tip: To effectively capture the panther's sleek and powerful form, start by using a soft graphite pencil, such as a 4B or 6B, which allows for smooth lines and easy shading. Focus on the basic shapes first—use light pressure to sketch the outline of the body, head, and limbs, ensuring proportions are accurate. Once you're satisfied with the structure, gradually build up the details, especially around the eyes and the muscle definition, using reference images to guide you.
For texture, consider using a blending stump or your finger to soften the edges and create the illusion of the panther's glossy coat, and don't forget to incorporate varied shading techniques like hatching and cross-hatching for depth. Lastly, revisit your initial outlines with a sharper pencil or fine liner to enhance the final details, giving your panther a striking and lifelike appearance.
Conclusion
Congratulations! You have successfully learned how to draw a stunning panther from start to finish. Drawing animals can be challenging, but with patience and practice, you can create remarkable artworks. Remember to start with basic shapes, refine the proportions, pay attention to details, and add shading for depth.
We hope you enjoyed this tutorial and found it helpful in honing your artistic skills. Now it's your turn to unleash your creativity and create your own unique panther masterpiece!
Gallery of Panther Drawings


Bonus: Tips and Tactics for How to Draw a Black Panther
Drawing a black panther presents unique challenges and opportunities compared to drawing other big cats. The distinctive dark coat requires special attention to light, shadow, and texture to create a realistic and striking illustration.
Understanding Black Panther Anatomy
Black panthers are melanistic leopards or jaguars, meaning they have an overproduction of melanin that creates their signature dark coat. However, if you look closely, you can still see the underlying rosette patterns beneath the black fur. This subtle detail can add authenticity to your drawing.
Working with Dark Tones
Start with a Mid-Tone Base: Unlike lighter-colored animals, begin your black panther with a medium gray base rather than starting with white paper. This gives you room to work both darker and lighter.
Preserve Your Highlights: Since you're working predominantly with dark tones, it's crucial to plan and preserve your light areas from the beginning. Use an eraser to lift graphite and create highlights on the nose, eyes, and areas where light naturally hits the muscular form.
Layer Gradually: Build up the darkness slowly using multiple layers of graphite. Start with a 2H or H pencil for initial shading, then progress to 2B, 4B, and even 6B for the deepest shadows.
Creating Realistic Black Fur Texture
Direction is Key: Black panther fur lies flat against their muscular body. Use short, controlled strokes that follow the natural growth pattern of the fur, typically flowing from the spine outward and down the sides.
Vary Your Pressure: Create depth in the black coat by varying pencil pressure. Light pressure creates the illusion of fur catching light, while heavy pressure depicts deep shadows between fur layers.
Use Cross-Hatching Sparingly: For the darkest areas, employ controlled cross-hatching, but avoid overdoing it as this can make the fur appear rough rather than sleek.
Emphasizing the Eyes
Black panther eyes are particularly striking against their dark coat. Use bright highlights and pay special attention to the golden or green iris color if adding color to your drawing. The contrast between the bright eyes and dark fur is what makes black panthers so captivating.
Capturing the Muscular Definition
The dark coat actually helps emphasize the panther's powerful musculature. Use subtle variations in tone to define muscle groups:
-
Lighter tones on raised muscle areas
-
Deeper shadows in muscle separations
-
Gradual transitions to show the roundness of the body
Working with Light Sources
High Contrast: Black panthers create dramatic high-contrast images. Don't be afraid to use pure white highlights against deep black shadows.
Rim Lighting: Consider adding rim lighting effects where light catches the edge of the panther's form, creating a subtle glow that separates the animal from the background.
Reflected Light: Even in shadow areas, add subtle reflected light to prevent your panther from becoming a flat silhouette.
Common Mistakes to Avoid
-
Making the entire panther uniformly black without tonal variation
-
Forgetting to include the subtle rosette patterns that are still visible in black panthers
-
Overworking the fur texture, which can make it appear coarse instead of sleek
-
Neglecting the powerful muscle structure that should be visible even through the dark coat
Color Considerations for Black Panthers
If you're adding color to your black panther drawing:
-
Use cool blacks (with blue undertones) for shadow areas
-
Warm blacks (with brown undertones) for areas catching warm light
-
Add subtle purple or blue highlights to suggest the iridescent quality of healthy black fur
-
Golden or amber eyes create beautiful contrast against the dark coat
By following these specialized techniques for drawing black panthers, you'll be able to capture not just the physical appearance but also the mysterious and powerful presence that makes these magnificent creatures so compelling to artists and viewers alike.
Fun Facts About Panthers
-
Panthers are not a separate species but are usually melanistic forms of other big cats, like leopards and jaguars.
-
The term "panther" is often used to describe black leopards in Asia and Africa or black jaguars in the Americas.
-
Due to their dark coat, panthers are sometimes called "the ghost of the forest" because they are hard to spot in the wild.
-
Their dark fur is a result of a genetic mutation that causes an overproduction of melanin, the pigment responsible for coloration.
-
Panthers are solitary animals, primarily active during the night, which aids in their stealthy hunting habits.
-
Although commonly associated with black coats, panthers can also be other colors; the term 'panther' is sometimes used for cougars, which are tawny.
-
Panthers have a wide range of habitats, including jungles, swamps, grasslands, and forests.
-
They are excellent swimmers and climbers, which adds to their versatility as predators.
-
Black panthers are celebrated in many cultures and often symbolize mystery, power, and elegance.
-
Panthers have keen senses, making them effective hunters capable of ambushing prey with great precision.
Suggestions for Scenes and Settings for Panther Drawings
-
Jungle Camouflage: Illustrate a panther expertly blending into the shadowy depths of a dense jungle, with only its gleaming eyes visible.
-
Moonlit Hunt: Capture the scene of a panther prowling silently under a full moon, casting a mystic shadow on the forest floor.
-
River Crossing: Depict a panther gracefully swimming across a river, with reflections of stars and the night sky on the water's surface.
-
Tree Perch: Draw a panther perched high in a tree, peering down with an air of silent authority over its territory.
-
Misty Swamp: Create an eerie setting in a misty swamp, where a panther moves stealthily among the mangroves and cypress trees.
-
Serene Sunset: Paint a tranquil scene of a panther resting on a rock, silhouetted against a vibrant sunset in the savanna.
-
Mountain Majesty: Design a landscape scene with a panther gazing over a vast mountainous range, exuding strength and independence.
-
Waterfall Ambush: Imagine a fresh scene of a panther poised near a waterfall, waiting patiently to pounce on unsuspecting prey.
-
Urban Jungle: Illustrate a panther mysteriously navigating an urban jungle at night, exploring alleys and rooftops with silent agility.
-
Panther Patrol: Picture a pair of panthers patrolling their territory in tandem, exemplifying teamwork and kinship.