Do you love cats? Do you want to learn how to draw a fluffy cat? Look no further! In this step-by-step guide, I will show you how to create a beautiful and realistic drawing of a fluffy cat. With just a few materials and some patience, you will be able to capture the essence of these adorable creatures on paper. So let’s get started on our artistic journey!
Materials Required
Before we begin, let’s gather the materials you will need for this drawing:
- Pencil – A medium-soft graphite pencil (HB or 2B) is ideal for sketching and shading.
- Eraser – A kneaded eraser works best for lightening areas and creating texture.
- Drawing Paper – Choose a smooth and heavy-weight paper that can handle shading and blending techniques.
- Blending Stump – A blending stump or tortillon is useful for blending and smudging graphite.
- Reference Image – Find a high-quality photo or reference image of a fluffy cat to guide your drawing.
Now that we have our materials ready, let’s dive into the step-by-step process of drawing a fluffy cat.
Step 1: Observe and Sketch the Basic Shapes
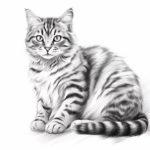
Take a few moments to observe your reference image. Notice the overall shape of the cat’s body, head, and ears. Begin by lightly sketching these basic shapes on your drawing paper using a pencil. Remember to keep your lines light and loose.
Step 2: Add Details to the Head and Face
Next, focus on the head and face of the cat. Observe the placement of the eyes, nose, and mouth. Add these details to your sketch, paying attention to proportions and symmetry. Use gentle, curved lines to create a realistic and expressive face.
Step 3: Define the Body and Legs
Move on to defining the body and legs of the cat. Notice the curves and angles in the cat’s stance. Use light, flowing lines to capture the graceful movement of the body. Pay attention to the placement of the paws and the length of the legs. Take your time to get these proportions right.
Step 4: Sketch the Tail and Ears
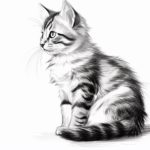
Now it’s time to add the tail and ears to your drawing. Observe the shape and texture of the cat’s fluffy tail. Use quick, light strokes to create the illusion of fur. Pay attention to the direction of the fur and create soft, feathery lines. Add the ears, carefully observing their size and placement on the head.
Step 5: Refine the Features and Fur
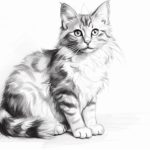
Take a step back and evaluate your drawing so far. Use your reference image as a guide to refine the features and fur of the cat. Pay attention to the details, such as the shape and color of the eyes, the texture of the fur, and any unique markings on the cat’s coat. Take your time to add shading and texture, building up layers of graphite to create depth and dimension.
Step 6: Enhance the Fur with Shading and Blending
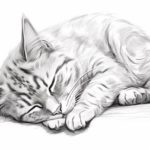
To make the cat look truly fluffy, focus on enhancing the fur with shading and blending techniques. Use your pencil to create light and dark areas, mimicking the shadows and highlights on the cat’s coat. Take a blending stump or tortillon and softly blend these areas to create a smooth, seamless effect. Experiment with different strokes and pressure to achieve the desired level of fluffiness.
Conclusion
Congratulations! You have successfully learned how to draw a fluffy cat. By following these step-by-step instructions and practicing regularly, you can improve your drawing skills and create beautiful artwork of these beloved pets. Remember to be patient with yourself and enjoy the process of bringing a fluffy cat to life on paper. Happy drawing!