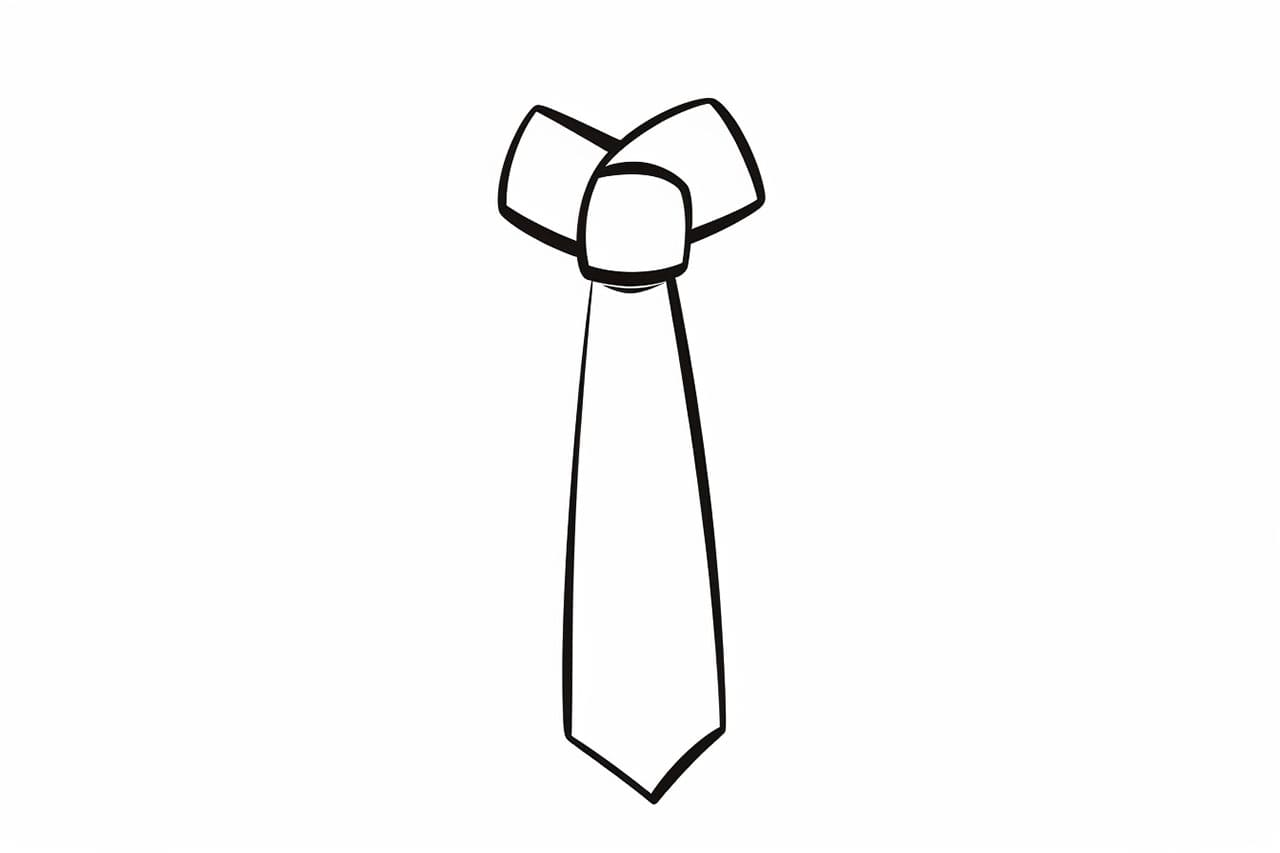
Ties are a classic symbol of style, professionalism, and personality. From sharp business looks to playful patterns and bold fashion statements, a well-drawn tie can elevate any illustration—whether it’s a formal character sketch, a fashion design, or a stylized portrait. But despite their simple shape, ties require a good sense of proportion, symmetry, and subtle detail to get them just right.
In this step-by-step tutorial, you’ll learn how to draw a tie from the basic knot and collar down to the flowing tail and pointed tip. We’ll explore the structure of a standard necktie, tips for adding folds and shading, and ideas for customizing your design with patterns or textures. Whether you’re a beginner sharpening your skills or an experienced artist looking to fine-tune your fashion drawings, this guide will help you create a clean, confident tie illustration. So grab your pencils, and let’s tie it all together—one line at a time!
Materials Required
To draw a tie, you will need the following materials:
Now that you have your materials ready, let’s dive into the step-by-step instructions.
Step 1: Draw the Outline of the Tie
Start by drawing a straight vertical line down the center of your paper. This line will serve as the backbone of your tie. Adjust the length of the line according to how long you want your tie to be.
Step 2: Add the Wide End of the Tie
At the bottom of the vertical line, draw a horizontal line that extends to the right. This line will represent the wide end of the tie. Make sure to leave some space at the end for the tip.
Step 3: Shape the Wide End
Now, draw two diagonal lines that connect the wide end of the tie to the center line. These lines should start at the bottom corners of the wide end and slant inward toward the center. Imagine you are drawing an elongated triangle.
Step 4: Form the Narrow End
Next, draw a slightly curved line that starts from the top of the center line and extends diagonally to the left. This line will form the narrow end of the tie. Make sure to leave some space at the end for the tip, just like you did with the wide end.
Step 5: Add Depth to the Tie
To give your tie more dimension, draw two parallel lines that run along the edges of the wide end. These lines should gradually converge as they reach the center line, creating a tapered effect.
Step 6: Create the Tie Tip
At the end of both the wide and narrow ends, draw a small triangle to represent the tips of the tie. Make the tips slightly rounded for a more realistic look.
Step 7: Incorporate Patterns or Texture
If you want to add some personality to your tie, now is the time to get creative with patterns or texture. You can draw stripes, dots, or any other design element that you like. Use your imagination and have fun with it!
Step 8: Refine and Erase
Go over your drawing and refine any rough edges or lines that need improvement. Pay attention to the overall shape and proportions of the tie. Once you are satisfied with the result, use an eraser to remove any unnecessary guidelines or mistakes.
Step 9: Color the Tie (Optional)
If you want to take your drawing to the next level, you can add some color to your tie. Use colored pencils or markers to bring your design to life. Experiment with different color combinations and shading techniques to make your tie look more realistic.
Conclusion
Drawing a tie may seem daunting at first, but with the right techniques, it can be an enjoyable and rewarding experience. By following the step-by-step instructions in this tutorial, you can create a stylish and well-proportioned tie design. Remember to practice regularly and have fun with your drawings. Now go ahead and show off your new skills by incorporating ties into your fashion illustrations or creating unique tie designs of your own!
Fun Facts About Tie
- The modern necktie originated from the cravat, a style popularized by Croatian mercenaries in the 17th century.
- The world’s longest tie measures over 808 feet and was created in Croatia, earning a spot in the Guinness World Records.
- There are more than 177,000 ways to tie a necktie, according to a mathematical study published in Nature.
- The Windsor knot, one of the most popular tie knots, was named after the Duke of Windsor, who favored a wide, symmetrical knot.
- Silk is the most common material for high-quality ties due to its durability and sheen.
- In the business world, red ties are often called “power ties” because they symbolize confidence and authority.
- The bolo tie is the official neckwear of Arizona, New Mexico, and Texas.
- During the 1920s, tie designs became more colorful and expressive, reflecting the Art Deco movement.
Suggestions for Scenes and Settings for Tie Drawings
- A tie draped over the back of a chair in a cozy home office.
- An elegant tie displayed on a mannequin in a high-end boutique window.
- A tie swirling in the wind, caught on a tree branch in a park.
- A stack of colorful ties neatly arranged in an open dresser drawer.
- A tie being knotted in front of a mirror for a special occasion.
- A superhero tie with a cape, bringing personality to a classic accessory.
- A tie paired with a creative pattern, such as stars or musical notes, sketched on a sketchpad.
- A tie resting atop a neatly folded suit on a bed, ready for a big interview.
- A playful scene with pets tangled up in a pile of ties.
- A tie as part of a whimsical character costume, like a magician or a clown.