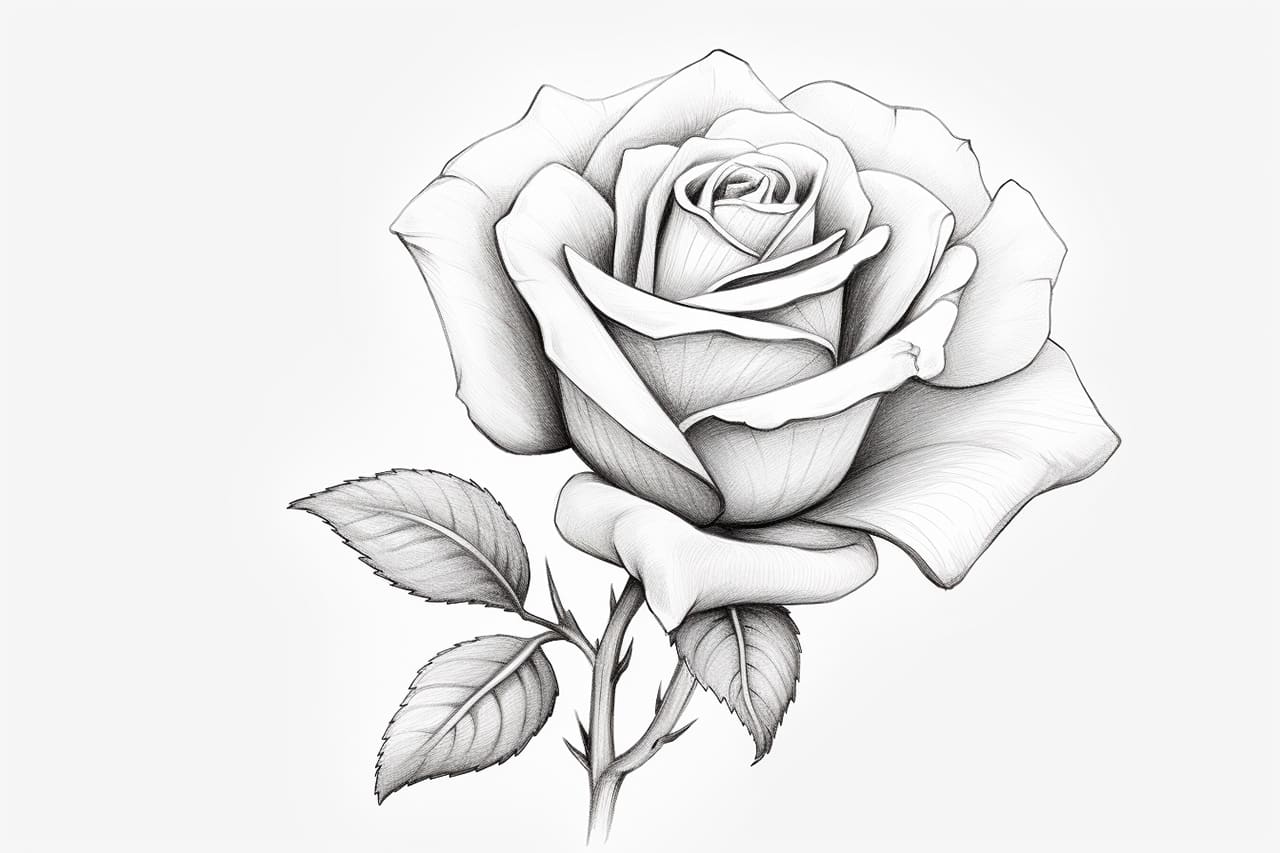
Are you interested in learning how to draw a beautiful traditional rose? Roses are a classic subject in art, representing love, beauty, and elegance. Drawing a traditional rose can seem daunting at first, but with a step-by-step approach and some practice, you can create your own stunning rose artwork. In this article, I will guide you through the process of how to draw a traditional rose, from the initial outline to adding intricate details. So, grab your drawing materials, and let’s get started!
Materials Required
Before we begin, make sure you have the following materials ready:
- Paper: Choose a smooth, heavyweight paper that is suitable for drawing. A size of 9×12 inches works well for most drawings.
- Pencils: You will need a range of pencils with different hardness levels for shading and adding details. The most commonly used ones are 2H, HB, 2B, 4B, and 6B.
- Eraser: Have a good quality eraser, preferably a kneaded eraser, for making corrections and lightening areas.
- Pencil Sharpener: Keep a sharpener handy to maintain a fine point on your pencils.
- Ruler: A ruler will help you create straight lines when needed.
- Reference Image: Find a clear reference image of a traditional rose to use as a guide. This can be a photograph or a printed illustration.
Now that you have all the necessary materials, let’s dive into the step-by-step process of drawing a traditional rose.
Step 1: Outline the Basic Shape
Start by lightly sketching the basic shape of the rose using an HB pencil. Begin with a small circle for the center of the flower and then draw curved lines extending outward to create the outer petals. Keep the lines loose, and don’t worry about any details. Use light pressure on the pencil so these initial lines can be easily erased later.
Step 2: Add Detail to the Center
In this step, focus on adding more detail to the center of the rose. Draw a smaller circle within the initial circle to represent the stamen. Add some curved lines radiating from the stamen to indicate the petals that are tucked inside the bud. These lines should be gentle and soft, as you want to convey the delicate nature of the rose.
Step 3: Draw the Outer Petals
Now, it’s time to draw the outer petals of the rose. Use the initial curved lines as a guide and add more curved lines to create the first layer of petals. Remember that rose petals have a distinct shape, with a rounded base and a tapered tip. As you add more petals, make sure they overlap slightly to create a sense of depth and dimension. Vary the size and shape of the petals to make the rose look more natural.
Step 4: Create the Inner Petals
Continue drawing more layers of petals, gradually making them smaller as you move towards the center. The inner petals will be more tightly packed and may have a slightly different shape compared to the outer petals. Pay attention to the reference image and observe how the petals fold and curve. This will help you capture the realistic details of the rose.
Step 5: Refine the Outline
Now that you have established the overall shape of the rose, it’s time to refine the outline and make any necessary adjustments. Use an eraser to remove any unwanted lines from the initial sketch. Then, go over the main outline of the rose with a darker pencil, such as a 2B or 4B, to define the shape more clearly. Take your time with this step, as a well-defined outline will give your rose a polished look.
Step 6: Shade the Petals
Shading is an essential technique for creating depth and dimension in your drawing. Start by identifying the light source in your reference image. This will determine where the highlights and shadows fall on the rose petals. Use a softer pencil, like a 2B or 4B, to create the initial shading. Begin by lightly shading the areas in shadow, gradually building up the darkness. Use hatching or cross-hatching techniques to create texture and add depth to the petals.
Step 7: Add Details and Texture
To make your traditional rose drawing more realistic, add details and texture to the petals. Pay close attention to the reference image and observe how the petals have veins, wrinkles, and subtle patterns. Use a sharp pencil, like a 2H or HB, to precisely draw these details. Be patient and take your time; this step requires careful observation and a steady hand.
Step 8: Finalize the Drawing
Take a step back and assess your traditional rose drawing. Make any final adjustments or additions as needed. Darken the shadows and refine the highlights to create a sense of realism. Remember that art is a creative process, so feel free to add your own unique touches and style to the drawing. Once you are satisfied with the result, carefully erase any remaining pencil lines that are not part of the rose.
Conclusion
Drawing a traditional rose may take some practice, but with determination and patience, you can achieve stunning results. Remember to start with a light sketch, gradually build up the details and shading, and pay attention to the subtle nuances of the rose. Keep practicing, experiment with different techniques, and soon you’ll be able to create realistic and beautiful rose drawings. So, pick up your pencils, follow the step-by-step instructions, and enjoy the process of drawing a traditional rose.