How to Draw a Princess Dress in 9 Simple Steps
Learn how to draw a princess dress step-by-step with this expert tutorial. Explore the process, materials required, and unleash your creativity in fashion illustration.
Materials You'll Need
- Pencil
- Paper
- Eraser
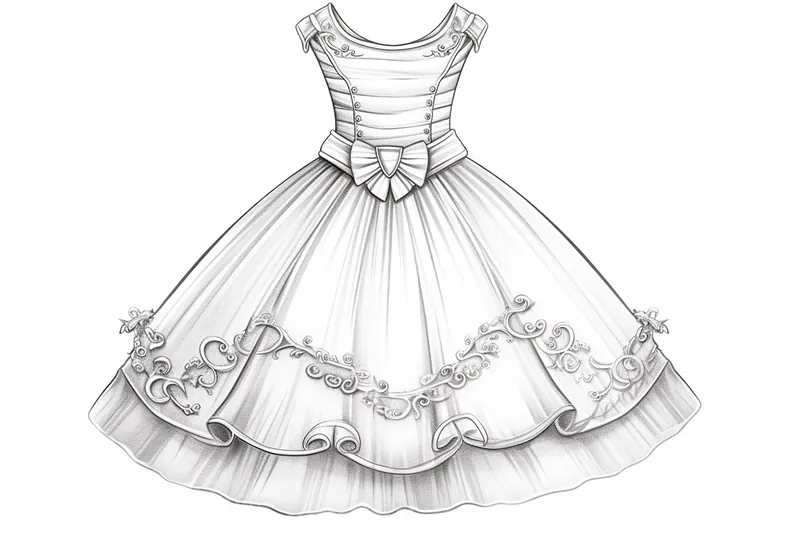
![]() Drawing is a wonderful medium for expressing creativity, and there's something inherently magical about bringing characters and their attire to life on paper. Among the many enchanting subjects you can tackle, the princess dress stands out as a beloved favorite—its elegant lines, flowing fabric, and intricate details invoke a sense of fantasy and grace. Whether you're an aspiring artist or just someone who enjoys doodling, learning how to draw a princess dress can be both fun and rewarding.
Drawing is a wonderful medium for expressing creativity, and there's something inherently magical about bringing characters and their attire to life on paper. Among the many enchanting subjects you can tackle, the princess dress stands out as a beloved favorite—its elegant lines, flowing fabric, and intricate details invoke a sense of fantasy and grace. Whether you're an aspiring artist or just someone who enjoys doodling, learning how to draw a princess dress can be both fun and rewarding.
In this step-by-step guide, we will delve into the fascinating world of princess dresses, equipping you with the skills to capture their beauty in your artwork. From the early sketches to the finer details that make each dress unique, we'll explore each phase of the drawing process. By the end of this tutorial, you'll have the tools and inspiration to create your own stunning designs and truly let your imagination shine on the page.
So, gather your materials and get ready to embark on this artistic journey with us! With a little patience and practice, you'll be able to create enchanting outfits that will sweep anyone off their feet. Let's dive into the world of drawing and start crafting the perfect princess dress!
Materials Required:
Before we begin, make sure you have the following materials handy:
Now that we have everything we need, let's dive into the process of drawing a stunning princess dress!
Step 1: Sketch the Torso
Start by lightly sketching a vertical line near the center of your paper. This line will serve as a guideline for the torso. Then, draw a small oval shape at the top of the line to represent the head. Add two slightly curved lines extending downwards from the oval, creating the sides of the torso.
Step 2: Define the Waist
Using your ruler, draw a horizontal line across the torso where you want the waistline to be. This line will help you proportion the dress properly. Make sure it is in harmony with the figure you have drawn.
Step 3: Create the Dress Flares
From the waistline, draw a curved line on each side, extending outwards to create the flare of the dress. Imagine the dress flowing down and billowing around the figure. You can make the flares as wide or as narrow as you like, depending on the style you have in mind.
Step 4: Add Sleeves or Straps
Decide on the style of sleeves or straps you want for the princess dress. Draw them lightly with curved lines, either covering the shoulders or leaving them bare. Feel free to experiment with different designs to find the one that suits your vision.
Step 5: Design the Neckline
For the neckline, you can choose from various options such as a sweetheart, V-neck, or boat neck. Sketch the desired shape lightly, ensuring it complements the overall design of the dress. Remember to add details like lace or embellishments if desired.
Step 6: Outline the Dress
Now that the basic structure of the dress is complete, use your pencil to outline the final shape with more defined lines. Add extra curves and contours to enhance the flow and elegance of the dress. Take your time and make sure the lines are smooth and refined.
Step 7: Add Details
This is the step where you can truly make the princess dress come to life. Add intricate details such as ruffles, lace, or embroidery to make the dress extraordinary. You can also embellish the dress with gems or other accessories. Be creative and have fun with this step!
Step 8: Refine and Erase
Take a moment to evaluate your work so far. Make any necessary adjustments to the proportions, curves, or details of the princess dress. Once you are satisfied with the overall look, use your eraser to remove any unnecessary sketch lines, leaving behind only the final, refined outlines.
Step 9: Color the Dress (Optional)
If you wish to add color to your drawing, now is the time. Use colored pencils or markers to bring your princess dress to life. Consider the color scheme you want to use and how it complements the design of the dress. Experiment and have fun with different shades and combinations.
Tip: When drawing a princess dress, focus on the flow and structure of the fabric to give it a realistic appearance. Start with light pencil strokes to outline the basic silhouette and gradually refine the curves and layers that give the dress its elegance. Pay attention to how the fabric falls and gathers, especially around the waist and hemline; using reference images can be incredibly helpful here. For added depth, consider using colored pencils or markers to create shading, allowing for highlights on the folds and shadows in the creases, which will enhance the three-dimensional feel of your dress. Remember to embrace your unique style and add personal touches—whether it's embellishments or patterns—that reflect your artistic vision!
Conclusion
Drawing a princess dress can be a delightful and rewarding experience, allowing you to unleash your creativity and imagination. Following these step-by-step instructions, you can create a stunning garment that captivates viewers and brings your princess to life. Remember to enjoy the process and let your artistic instincts guide you. Happy drawing!