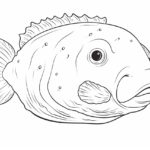
Welcome to this step-by-step guide on how to draw a lionfish. In this article, I will guide you through the process of creating a realistic and detailed drawing of this fascinating marine creature. Whether you are a beginner or an experienced artist, this tutorial will provide you with the knowledge and techniques needed to capture the beauty and uniqueness of the lionfish on paper.
Materials Required
Before we begin, let’s gather the necessary materials for this drawing:
- Drawing paper
- Pencil (preferably a set of drawing pencils with varying degrees of hardness)
- Eraser
- Fine-tip markers or pens (optional, for inking)
- Colored pencils or markers (optional, for coloring)
Now that we have all the materials ready, let’s get started on our lionfish drawing!
Step 1: Sketch the Basic Shape
Start by lightly sketching an oval shape for the lionfish’s body. This will serve as a guideline for the overall proportions and position of the fish. Don’t worry about making it perfect at this stage; we will refine the shape later.
Step 2: Add the Fins and Tail
Next, add in the fins and tail of the lionfish. Use long, curved lines to represent the pectoral fins and the dorsal fin. The tail should be fan-shaped with long, flowing rays. Take your time and observe the reference images to ensure accuracy.
Step 3: Sketch the Facial Features
Now, let’s focus on the lionfish’s face. Draw a small circle for the eye and add a curved line for the mouth. The lionfish has a distinctive pattern of lines and dots on its face, so carefully sketch those details using short, curved lines.
Step 4: Refine the Body Shape
Go back to the body and refine the shape using your initial sketch as a guide. Add more curves and details to create a more rounded and textured appearance. Pay attention to the way the body curves and tapers toward the tail.
Step 5: Add the Fin Details
Now, let’s work on the fins. Start with the pectoral fins and add the delicate, feathery texture using short, curved lines that extend from the base of each fin ray. The dorsal fin should have a spiky appearance, so use short, jagged lines to represent the fin rays.
Step 6: Define the Details
At this stage, it’s time to add more details to our lionfish drawing. Use thin, light lines to outline the scales on the body and fins. Remember that lionfish have a series of colorful stripes and bands, so carefully sketch those patterns using reference images as a guide.
Step 7: Ink or Finalize Your Drawing
Once you are satisfied with your pencil sketch, you can finalize your drawing by inking over the lines with markers or pens. This step is optional but can add more definition and impact to your artwork. Use a fine-tip pen to carefully trace over the refined lines and details.
Step 8: Add Color (Optional)
If you prefer a colored lionfish drawing, you can use colored pencils or markers to add vibrant hues. These fish come in a variety of colors, so feel free to get creative with your color choices. Start by layering light colors and gradually build up the intensity and depth by adding darker shades.
Conclusion
Congratulations! You have successfully learned how to draw a lionfish. By following the step-by-step instructions and using the materials listed, you have created a detailed and realistic representation of this magnificent creature. Remember to practice and experiment with different techniques to further develop your drawing skills. Enjoy the process and keep creating!