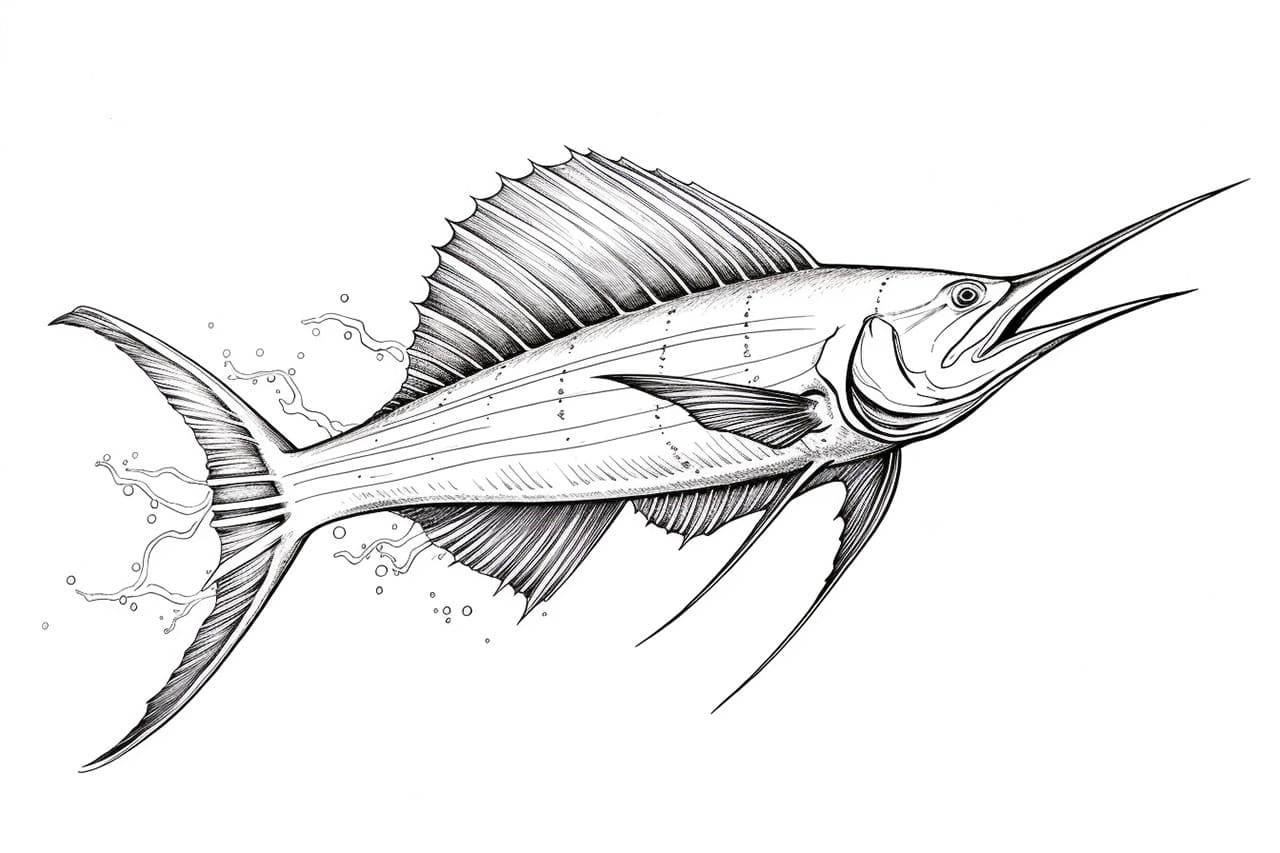
Welcome to our step-by-step guide on how to draw a sailfish! With its sleek body and distinctive sail-like dorsal fin, this fish is both beautiful and challenging to capture on paper. But fear not, as an expert artist and drawing instructor, I am here to guide you through the process in a clear, clean, and concise style. So let’s dive in and bring this magnificent creature to life!
Materials Required
Before we get started, let’s gather the materials you will need for this drawing:
- Drawing paper or sketchbook
- Pencils (HB, 2B, 4B)
- Eraser
- Fineliner pen or thin marker
- Colored pencils or markers (optional)
Now that we have everything we need, let’s move on to the step-by-step instructions.
Step 1: Basic Outline
Begin by lightly sketching the basic outline of the sailfish. Start with a long, curved line for the body. Then, add a triangle shape at the front for the head. Next, draw a slightly curved line extending from the head to form the sail. Finally, add a tail at the back, using long and flowing lines.
Step 2: Define the Body
Using a darker pencil (2B or 4B), go over the basic outline to define the body of the sailfish. Pay attention to the curves and contours of the fish, capturing its streamlined form. Add a slightly curved line to indicate the mouth and a small circle for the eye.
Step 3: Details of the Head
Focus on the head of the sailfish now. Start by adding the mouth, which has a sharp, pointed shape. Then, draw a line across the eye to represent the stripe that extends along the fish’s body. Add a tiny circle within the eye to indicate the pupil. Finally, sketch the gill slits on the side of the head with a few short lines.
Step 4: Add the Sail
Now, let’s move on to the sail, which is the most distinctive feature of the sailfish. Sketch a series of long, curved lines that follow the shape of the sail. These lines should extend from the top of the head to the back of the sailfish. Make sure to space them evenly and maintain a smooth flow.
Step 5: Draw the Fins and Tail
Next, draw the fins and tail of the sailfish. Add two triangular-shaped pectoral fins on each side of the body, slightly below the head. Then, sketch the dorsal fin, which is located at the back of the fish, just in front of the tail. The dorsal fin should be tall and pointed. Finally, draw the tail using long and flowing lines, giving it an elegant and powerful appearance.
Step 6: Refine the Outline
Go back to the body of the sailfish and refine the outline, making it smoother and more defined. Use a darker pencil (4B or softer) to carefully go over the lines, erasing any unnecessary guidelines as you progress. Pay attention to the details of the fish, ensuring that the curves and proportions are accurate.
Step 7: Add Texture and Details
It’s time to bring your sailfish drawing to life by adding texture and details. Start by adding scales along the body of the fish. Draw small, curved lines running horizontally across the body, parallel to each other. Be patient and take your time with this step, as the scales contribute to the realistic appearance of the fish.
Step 8: Finalize the Drawing
Take a step back and evaluate your drawing. Make any necessary adjustments to the lines and proportions to ensure accuracy. Once you’re satisfied with the overall look and feel of your sailfish, use a fineliner pen or thin marker to ink over the final lines. Let the ink dry, then erase any remaining pencil marks for a clean and finished drawing.
Conclusion
Congratulations on successfully drawing a sailfish! By following our step-by-step instructions, you have captured the grace and beauty of this incredible creature. Remember, practice makes perfect, so don’t be discouraged if your first attempt doesn’t turn out exactly as you imagined. Keep honing your skills and experimenting with different techniques, and you’ll soon be creating stunning artwork that showcases your talent. Enjoy the process and happy drawing!