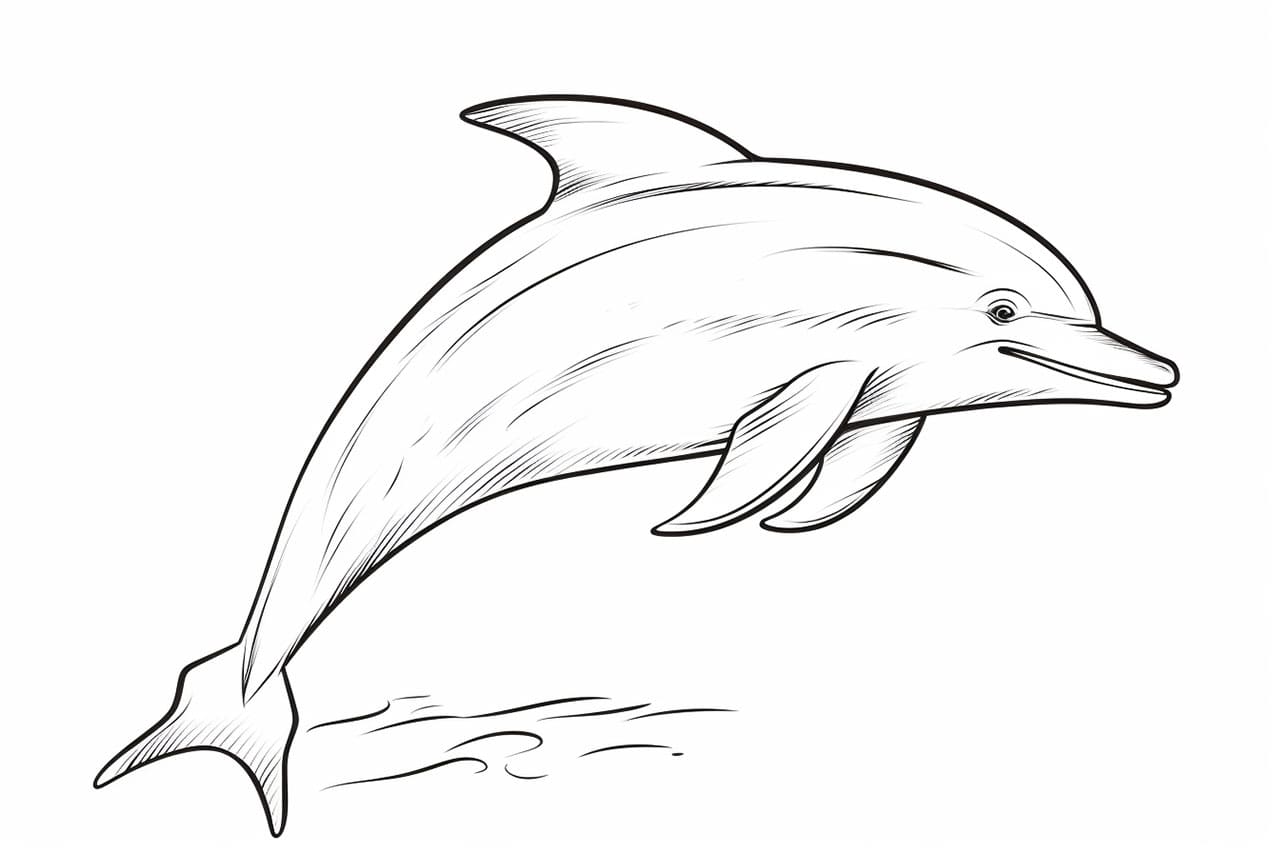
Welcome to this step-by-step guide on how to draw a dolphin! Dolphins are intelligent, playful creatures that inhabit the oceans, captivating the hearts of many. By following these simple instructions, you’ll be able to create a beautiful depiction of a dolphin on paper. So grab your drawing materials and let’s get started!
Materials Required
Before we dive into the drawing process, make sure you have the following materials ready:
Now that you have your materials set up, let’s begin our dolphin drawing adventure!
Step 1: Outline the Body
To start, draw a horizontal oval shape on your paper. This will form the dolphin’s main body. Don’t worry too much about making it perfect, as we can refine the shape later.
Step 2: Add the Head and Snout
At the upper left end of the oval shape, draw a smaller circle for the dolphin’s head. Connect the head to the body with a curved line, forming the snout. Make sure the line is slightly curved to give it a smooth and natural look.
Step 3: Define the Tail
Moving on to the tail, extend a curved line from the bottom right end of the body. This line will represent the upper portion of the dolphin’s tail. Now, draw another curve starting from the bottom left end of the body, slightly curving upwards. These two lines should meet at a point, forming the dolphin’s tail.
Step 4: Outline the Fins
Dolphins have two fins on each side of their body. To draw the first fin, extend a curved line from the top left side of the body. Continue the line towards the tail, curving it slightly downwards. Repeat this step on the other side to draw the second fin.
Step 5: Add the Eye and Mouth
Now it’s time to give our dolphin some facial features! Draw a small circle near the top of the head for the eye. Just below the eye, draw a curved line for the mouth.
Step 6: Refine the Body Shape
Take a moment to refine the shape of the dolphin’s body. Look for any areas that may need adjusting or smoothing out. Erase any unnecessary lines and make sure the body flows smoothly from the head to the tail.
Step 7: Draw the Details
To bring your dolphin to life, it’s time to add some details. Starting from the top of the head, draw a slightly curved line to represent the dolphin’s back. Continue this line towards the tail, gradually curving it downwards. This line gives a sense of volume to the dolphin’s body.
Step 8: Enhance the Tail and Fins
Now, let’s add some details to the tail and fins. Draw a series of curved lines across the tail to give it a textured appearance. For the fins, add some small triangular shapes along the edges to indicate the individual sections.
Step 9: Add Internal Features
To make the dolphin look more realistic, draw a small curved line inside the head, starting from the eye and ending near the snout. This represents the dolphin’s mouth line. You can also add a small circular shape inside the eye to indicate the pupil.
Step 10: Refine and Erase
Take another look at your drawing and make any necessary refinements. Check for any stray lines or areas that require smoothing out. Once you’re satisfied with the overall look, carefully erase any remaining unnecessary pencil marks.
Step 11: Add Color (Optional)
If you prefer a colored drawing, now is the time to grab your markers or colored pencils. Choose your desired colors and carefully color in your dolphin drawing. Remember to use shading techniques to create depth and dimension.
Conclusion
Congratulations on completing your dolphin drawing! By following these step-by-step instructions, you have successfully created a beautiful depiction of this enchanting creature. Keep practicing and experimenting with different techniques to further improve your artistic skills. Enjoy and have fun drawing more dolphins!