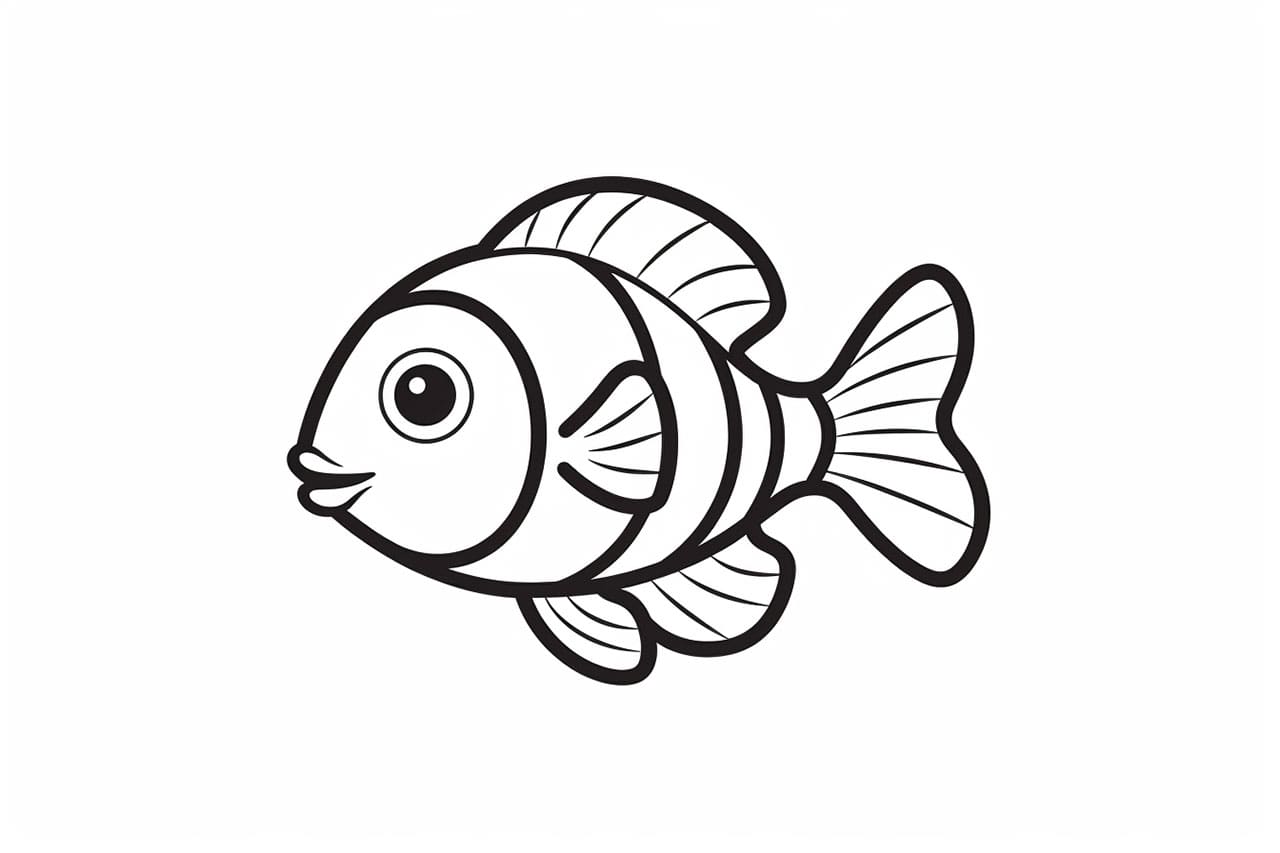
Welcome to this step-by-step guide on how to draw a clownfish! In this article, we will explore the techniques and tips necessary to create a realistic and eye-catching representation of this beautiful creature. Whether you are an experienced artist or just starting out, these instructions will help you bring your artwork to life. So grab your pencil, paper, and let’s get started!
Materials Required
Before we begin, make sure you have the following materials:
- Drawing paper
- Pencils of varying hardness (2H, HB, 2B, 4B, and 6B)
- Eraser
- Pencil sharpener
- Fine tip black pen or marker (optional)
- Colored pencils or watercolor paints (optional)
Having these materials handy will allow you to follow along with the steps and add your personal touch to the final piece.
Step 1: Basic Shapes
To kickstart our clownfish drawing, let’s start by sketching the basic shapes that form its body. Begin with a large oval shape in the center of your paper. This oval will represent the body of the clownfish. Keep it light and loose, as we will be refining it later.
Next, draw a smaller oval shape above the larger one, towards the front. This will be the clownfish’s head. Connect both ovals with a slightly curved line, forming the neck area. Lastly, add a similarly shaped but smaller oval near the back of the body—this will serve as the clownfish’s tail.
Step 2: Fins and Tail
Now that we have our basic shapes in place, let’s move on to the fins and tail. Starting from the middle of the body, extend two curved lines downwards to create the pectoral fins. These fins are what the clownfish uses for swimming. Add a small, triangular fin on top of the body near the head—known as the dorsal fin.
For the tail, begin by extending two slightly curved lines from the tail oval. These lines should converge and come to a point. This shape imitates the unique shape of the clownfish’s tail. Take your time with this step to get the curves right.
Step 3: Eyes and Mouth
Now that the body and fins are taking shape, let’s move on to the facial features. Starting with the eyes, draw two almond-shaped ovals on the clownfish’s head. Add a smaller circle inside each eye to represent the iris. Leave a small white highlight in each eye to bring it to life.
Beneath the eyes, draw a gentle, curved line to create the clownfish’s smiling mouth. Give it a slightly protruding upper lip to add depth and character. Leave a small gap in the line to show the separation between the two sides of the mouth.
Step 4: Patterns and Details
The clownfish is known for its vibrant and distinct patterns, so let’s add those next. Begin by drawing three vertical lines across the body. These lines will serve as a guide for the clownfish’s stripes. Then, with short, slightly curved strokes, add the stripes following the shape of the body.
Next, sketch a series of small, irregular shapes around the head and body to represent the clownfish’s scale patterns. Keep these shapes organic and varied. Add some smaller shapes near the tail as well.
Step 5: Fins and Facial Details
Now let’s focus on adding more details to the fins. Start by drawing a line across the pectoral fins to represent the inner structure. Add some curved lines within the fins to create a sense of movement. For the dorsal fin, sketch a line down the middle to give it a textured look.
Moving on to the facial details, draw a tiny circle inside each eye to represent the pupil. Add a curved line above each eye to indicate the clownfish’s eyebrows. With light, sketchy lines, indicate the clownfish’s gill covers on both sides of the head.
Step 6: Refine and Finalize
Now that we have all the major elements in place, it’s time to refine our drawing. Using a softer pencil (4B or 6B), go over the lines you want to emphasize—the outline, details, and shadows. Erase any unnecessary guidelines and make any adjustments to achieve the desired proportions.
If you prefer a cleaner look, you can outline your pencil drawing with a fine tip black pen or marker. This step is optional but can give your drawing a more polished appearance.
Step 7: Adding Color (Optional)
If you want to take your clownfish drawing to the next level, this step is for you. You can use colored pencils or watercolor paints to add vibrant colors to your artwork. Clownfish are typically orange with black and white stripes, but feel free to experiment with different color variations.
Start by layering your colors gradually, building up the intensity and blending where necessary. Pay attention to the shading and highlights to create a more three-dimensional appearance. Take your time and enjoy the process of bringing your clownfish to life with color.
Conclusion
Congratulations on completing your clownfish drawing! By following the step-by-step instructions provided in this guide, you have created a beautiful representation of this fascinating marine creature. Remember to be patient and practice regularly to improve your skills further.
We hope you enjoyed this tutorial on how to draw a clownfish. With practice and dedication, you can apply these techniques to draw other sea creatures as well. So grab your art supplies and keep exploring the wonderful world of drawing!