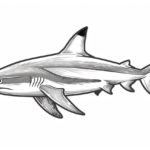
Are you fascinated by orcas, also known as killer whales? Their sleek bodies and striking black and white coloring make them a captivating subject to draw. In this step-by-step guide, I will provide you with clear instructions on how to draw an orca in a clean and concise style. So grab your materials and let’s get started!
Materials Required
Before we begin, make sure you have the following materials:
- Drawing paper
- Pencil (preferably HB or 2B)
- Eraser
- Fine-tip black marker
- Colored pencils or markers (optional)
Now that we have everything we need, let’s dive into the process of drawing an orca!
Step 1: Sketch the Basic Shape
Start by lightly sketching a simple oval shape on your drawing paper. This will serve as the main body of the orca. Remember to keep your pencil lines faint so you can easily erase them later on.
Step 2: Add the Tail
Extend a curved line from the bottom of the oval shape to create the orca’s tail. Orcas have distinct, elongated tails that are one of their most recognizable features.
Step 3: Draw the Head
Next, sketch a rounded shape at the front of the oval to represent the orca’s head. Pay attention to the proportions and position it slightly above the body.
Step 4: Define the Eyes and Mouth
Within the head shape, draw two small circles for the eyes. Leave a small amount of white space within the circles to indicate the light reflecting in the orca’s eyes. Just below the eyes, add a curved line to represent the mouth.
Step 5: Outline the Body and Tail
Using the basic shapes as a guide, begin outlining the body of the orca. Emphasize the sleek and streamlined form of the creature. Connect the head, body, and tail, making sure to maintain the distinct curve of the orca’s back.
Step 6: Add the Dorsal Fin
On the top of the orca’s back, draw a tall, triangular shape for the dorsal fin. This fin is an iconic feature of orcas and plays a crucial role in their movement through the water.
Step 7: Detail the Face
Refine the facial features of the orca by adding a small curved line for the lower jaw and a tiny triangle for the nose. Pay attention to the placement and proportions to capture the likeness of an orca.
Step 8: Draw the Pectoral Fins
On each side of the orca’s body, draw two triangular-shaped pectoral fins. These fins aid in steering and balance while the orca swims.
Step 9: Erase Unnecessary Guidelines
Now that you have the main structure of your orca, use an eraser to carefully remove any unnecessary guidelines and faint pencil lines. Make sure to retain the essential outlines of the orca’s body.
Step 10: Add Details and Texture
To make your orca drawing more realistic, add some details and texture. Darken the eye with a black pencil or marker and shade the area around it to create depth. You can also add shading to the body and tail, emphasizing the contrasting black and white colors of the orca.
Step 11: Optional – Color your Orca
If you prefer a colored drawing, you can use colored pencils or markers to bring your orca to life. Orcas typically have a black and white coloration, with a grayish-white underside. Experiment with different shades and blending techniques to achieve a more vibrant and realistic look.
Conclusion
Congratulations! You have successfully learned how to draw an orca. By following these step-by-step instructions, you can create a beautiful representation of this magnificent creature. Remember to practice and experiment with different techniques to further develop your drawing skills. Happy drawing!


