Do you love ice cream and want to learn how to draw it? Drawing ice cream in a cone is a fun and tasty way to explore your artistic skills. In this step-by-step tutorial, I will guide you through the process of drawing a delicious ice cream cone that will make your drawings look cool and refreshing. So grab your pencils and let’s get started!
Materials Required
To create your own mouthwatering ice cream cone drawing, you’ll need the following materials:
- Drawing paper
- Pencils (HB and 2B)
- Eraser
- Ruler
- Colored pencils (optional)
Now that you have all the necessary materials, let’s dive into the step-by-step instructions!
Step 1: Sketch the Cone
Start by drawing a small triangle shape at the center of your paper. This will be the base of the ice cream cone. Make sure to leave enough space at the top for the ice cream scoop.
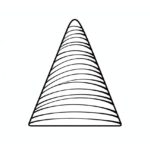
Step 2: Add Texture to the Cone
Use your pencil to add some texture to the cone. Draw diagonal lines across the triangle shape to create a crisscross pattern. This will give your cone a realistic look.
Step 3: Draw the Ice Cream Scoop
Now it’s time to draw the delicious ice cream scoop on top of the cone. Start by drawing a large curved shape above the cone. This will be the top of the scoop. Then, connect it to the cone by drawing a curved line on each side.
Step 4: Add Details to the Scoop
To give your ice cream scoop some texture, draw small curved lines across the surface. These lines will represent the swirls and ripples of creamy ice cream. Be creative and experiment with different patterns!
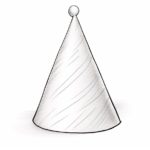
Step 5: Draw the Waffle Pattern (Optional)
If you want to add more detail to your ice cream cone, you can draw a waffle pattern on the cone. Use your ruler to draw small diagonal lines across the cone, creating a grid-like pattern. This will make your cone look even more appetizing!
Step 6: Erase Unnecessary Lines
Now that you’ve finished drawing the main elements of your ice cream cone, it’s time to clean up your drawing. Use your eraser to remove any unnecessary guidelines or overlapping lines. This will make your drawing look neat and polished.
Step 7: Color Your Drawing (Optional)
If you want to take your ice cream cone drawing to the next level, you can add some color! Use colored pencils or markers to bring your drawing to life. Experiment with different flavors and toppings to make your ice cream cone as delicious and vibrant as possible.
Conclusion
Congratulations! You’ve successfully learned how to draw a mouthwatering ice cream cone. By following this step-by-step tutorial, you’ve created a delicious treat on paper. Remember to have fun and be creative with your drawing. With practice, you’ll be able to draw ice cream cones that look good enough to eat! Enjoy your artistic journey and keep experimenting with different flavors and toppings.
Gallery of Ice Cream Cone Drawings