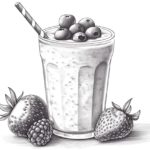
Whether you’re an experienced artist or just starting, drawing a delicious-looking milkshake can be a fun and rewarding challenge. In this step-by-step guide, I will teach you how to draw a milkshake drawing using simple techniques. So grab your pencils, and let’s get started!
Materials Required
Here are the materials you will need to complete this drawing:
- A pencil: You can use any type of drawing pencil, but a regular HB pencil should work fine.
- Paper: Choose a smooth, white drawing paper that is suitable for pencil drawings.
- Eraser: You’ll need an eraser to correct any mistakes or make adjustments to your drawing.
- Colored pencils or markers (optional): These can be used to add color to your milkshake drawing, but they are not necessary.
Now that you have your materials ready, let’s begin creating a mouth-watering milkshake drawing!
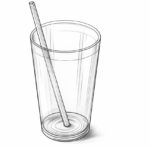
Step 1: Sketch the Glass
To start, lightly sketch the outline of the glass that will hold the milkshake. Begin by drawing a vertical line that represents the middle of the glass. Then, draw two curved lines on either side of the vertical line to create the shape of the glass. Make sure the top and bottom of the glass are slightly wider than the middle.
Step 2: Add the Base
Next, draw the base of the glass. Draw a horizontal line at the bottom of the glass shape to create the base. Make the base slightly wider than the glass.
Step 3: Draw the Straw
Now, let’s add the straw to our milkshake drawing. Start by drawing a thin rectangle shape coming out of the top of the glass. This will represent the straw. You can make the straw as long or short as you’d like. Feel free to add some curves or bends to make it look more natural.
Step 4: Outline the Milkshake
To complete the milkshake shape, draw a curved line around the glass and the straw, connecting them together. This will create the outline of the milkshake. Make the line slightly wavy to give the milkshake a more realistic appearance.
Step 5: Add Details
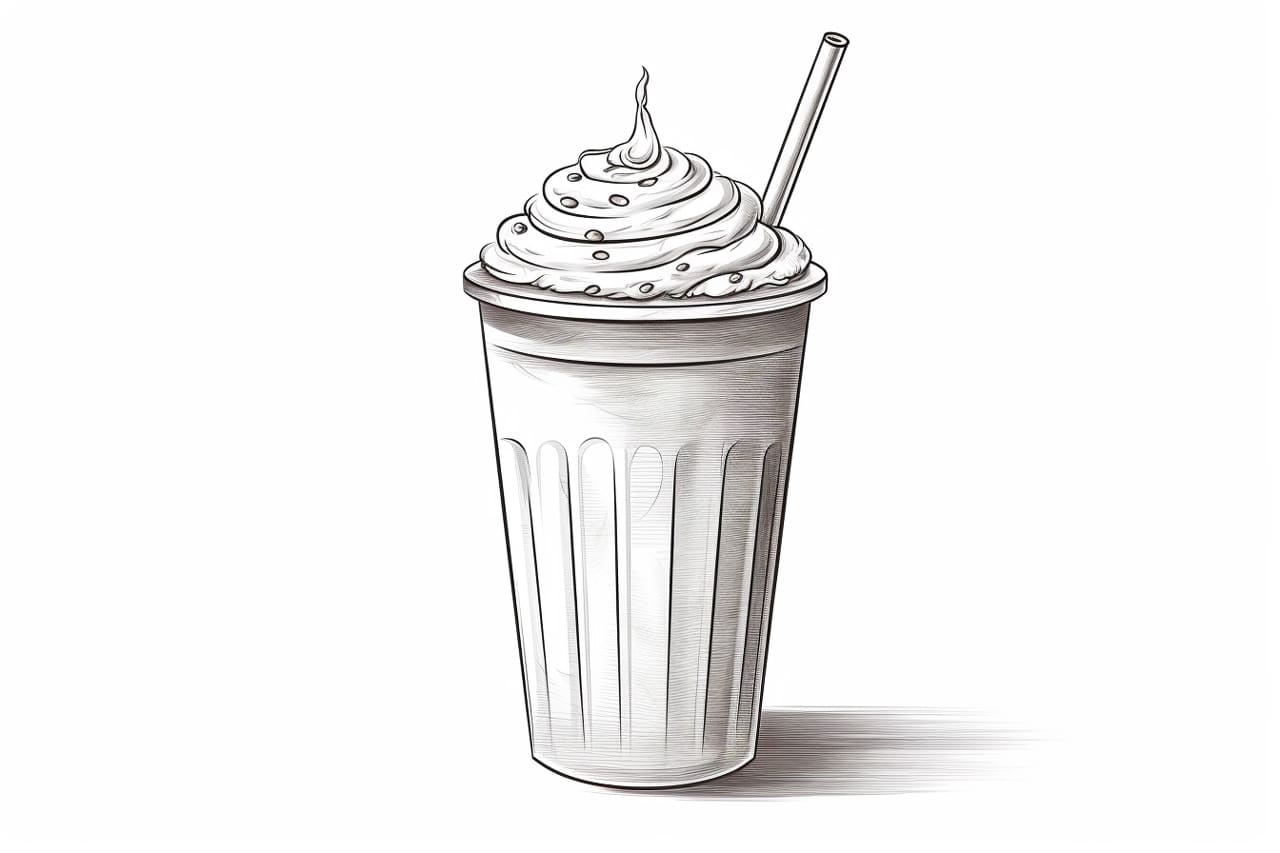
Now it’s time to add some delicious details to our milkshake drawing. Start by drawing a circle shape at the top of the glass, which represents the whipped cream. You can make the whipped cream as big or small as you’d like. Add some swirls or peaks to make it look fluffy.
Next, draw a cherry on top of the whipped cream. Draw a small circle shape and add a stem coming out of it. Place the cherry slightly off-center to make it look more natural.
Step 6: Shade the Glass
To give the glass some dimension, let’s add some shading. Start by shading the area below the milkshake outline. Use light, horizontal strokes to create a gradient effect from darker at the bottom to lighter at the top. This will give the glass a transparent appearance.
Step 7: Shade the Milkshake
Now, let’s add some shading to the milkshake itself. Start by shading the bottom part of the milkshake using light, circular motions. Gradually darken the shading as you move towards the bottom of the milkshake. This will create the illusion of depth and make the milkshake look more realistic.
Step 8: Add Shadows and Highlights
To make our milkshake drawing even more realistic, let’s add some shadows and highlights. Shade the side of the glass opposite the light source to create a shadow. Use light, diagonal strokes to indicate the shadows. Add some highlights to the glass and whipped cream by leaving some areas unshaded. This will create a sense of reflection and shine.
Step 9: Optional – Add Color
If you’d like to add some color to your milkshake drawing, now is the time to do it. Use colored pencils or markers to add hues to the whipped cream, cherry, and any other elements you’d like to highlight. Experiment with different colors to make your milkshake look even more delicious!
And there you have it, a mouth-watering milkshake drawing that looks good enough to drink!
Conclusion
Drawing a milkshake can be a fun and creative way to practice your artistic skills. By following these step-by-step instructions, you can create a realistic and appetizing milkshake drawing. Remember to take your time, be patient, and have fun throughout the process. I hope you enjoy creating your own milkshake masterpiece!