Welcome to this step-by-step guide on how to draw a cone. Whether you are an aspiring artist, a student, or simply someone who enjoys doodling, learning to draw basic shapes like cones is a great place to start. Cones are three-dimensional objects that can be found in various aspects of our daily lives, such as ice cream cones or traffic cones. By following these easy steps, you will be able to confidently draw a cone with precision and accuracy. So let’s get started!
Materials Required
Before we begin, let’s gather the materials you will need for this drawing tutorial:
- A pencil
- Paper
- An eraser
- A ruler (optional)
Ensure that you have all these materials within reach so you can easily follow along as we go through each step.
Step 1: Draw the Base Circle
Start by drawing a medium-sized circle near the middle of your paper using your pencil. Remember, the size of the circle will determine the overall size of your cone, so adjust accordingly. If you want a larger cone, draw a larger circle, and for a smaller cone, draw a smaller circle. Use your ruler if needed to help create a perfect circular shape.
Step 2: Draw the Vertical Axis
Next, draw a straight line passing through the center of the circle vertically. This line will serve as a guide to help us position the apex (tip) of the cone later on. It should extend both above and below the base circle, allowing enough space for the entire length of the cone.
Step 3: Connect the Axis to the Circle
Connect the ends of the vertical axis to the base circle, creating a triangle-like shape. Start at the bottom of the axis and draw two lines that slant towards the edges of the base circle. These lines represent the sides of the cone.
Step 4: Draw the Apex
At the top of the vertical axis, draw a small point or triangle to represent the apex of the cone. This is the pointed tip of the cone and helps create the illusion of a three-dimensional object.
Step 5: Add Depth and Dimension
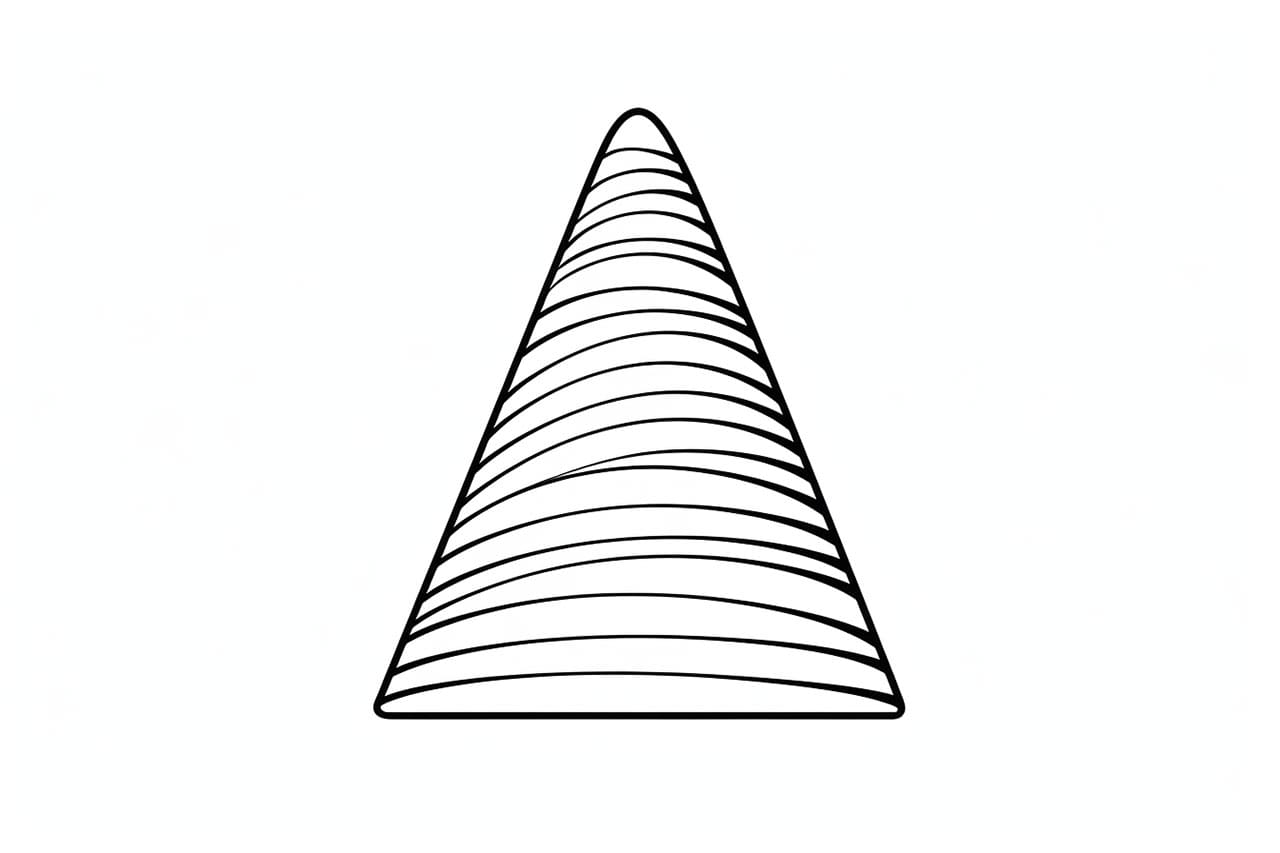
To make the drawing more realistic, we need to give our cone depth and dimension. Begin by drawing a curved line connecting the apex with the base circle. This line should have a gentle curve that slightly bulges outwards, mimicking the shape of a cone.
Step 6: Erase Unnecessary Lines
Now that the basic structure of the cone is complete, use your eraser to remove any unnecessary lines or guide marks that are no longer needed. This will leave you with a clean and refined cone shape.
Step 7: Shade the Cone
To add further realism to your drawing, we can shade the cone. Start by identifying the light source in your drawing, which will determine the areas of light and shadow. Typically, the light source comes from the top of the cone. Shade the lower part of the cone by adding darker tones, gradually getting lighter towards the top.
Step 8: Add Details (Optional)
If you want to add more detail to your cone drawing, you can create texture by lightly sketching diagonal lines from the top to the bottom. This will give the cone a ridged appearance, similar to the texture of an ice cream cone.
Conclusion
Congratulations! You have successfully learned how to draw a cone. By following these step-by-step instructions, you can create realistic and visually appealing cone drawings. Remember to practice regularly to improve your drawing skills and explore different variations of cones. Whether it be a classic ice cream cone or an elaborate traffic cone, the possibilities are endless. So grab your pencil and start drawing cones today!