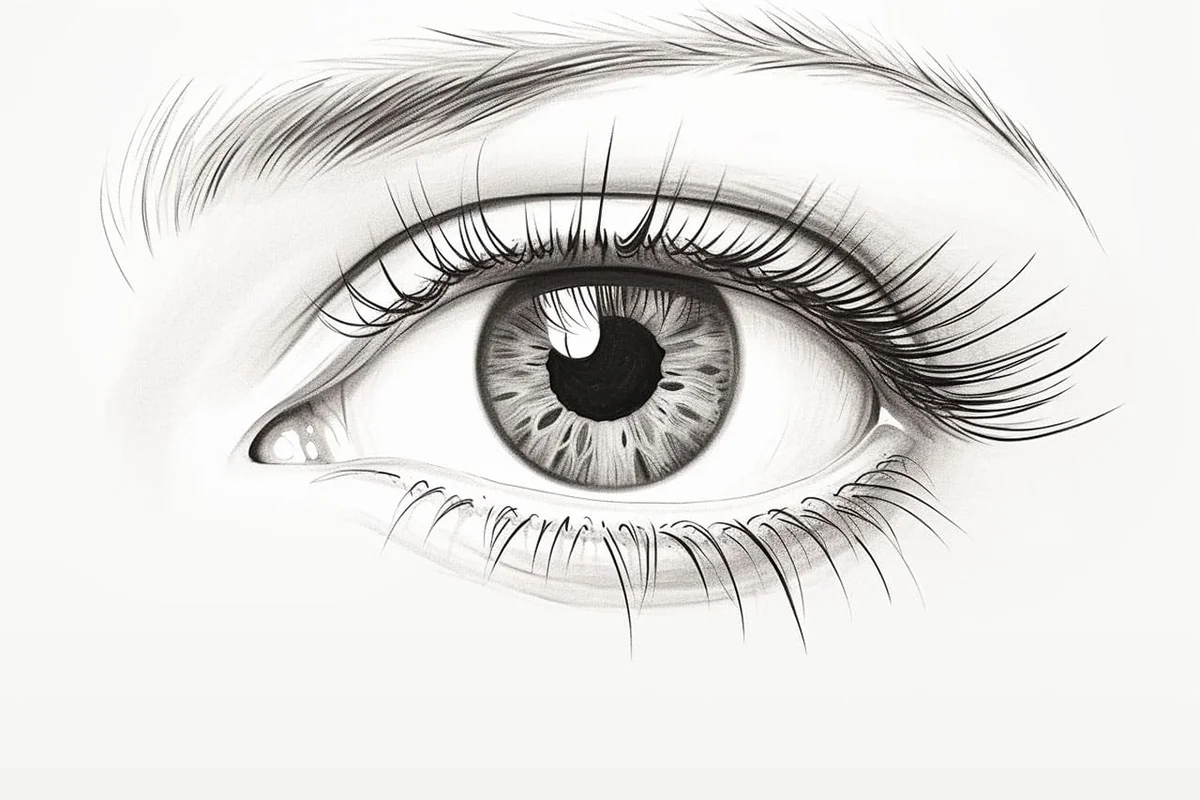
How to Draw Eyes
Learn how to draw with this step-by-step tutorial.
Materials You'll Need
- Drawing paper
- Pencil (HB or 2B)
- Eraser
Eyes are often referred to as the "window to the soul," and for good reason. In the realm of art, they stand out as one of the most compelling and expressive features to be depicted. No matter where you are on your artistic journey—whether you are just starting out or you are an experienced artist looking to hone your skills—drawing eyes effectively can breathe life into your portraits and convey a multitude of emotions.
In this comprehensive guide, we'll take you through a step-by-step process that demystifies the art of eye drawing. You will learn essential techniques for capturing the intricate details that make eyes so special. By dedicating some time to this tutorial, you'll gain the tools and knowledge required to create eyes that are not only realistic but also full of character and emotion.
Prepare to delve into the fascinating world of eye drawing! By the end of this tutorial, you'll have a newfound confidence in your ability to craft captivating eyes that speak volumes in your artwork. So gather your materials, and let's get started on this artistic endeavor!
Materials Required
Before we begin, let's gather the essential materials you'll need:
-
Pencil: A range of pencils with different lead hardness (e.g., 2H, HB, 2B) for various shading effects.
-
Eraser: A good quality eraser for correcting mistakes and refining details.
-
Drawing Paper: Choose a smooth and sturdy drawing paper that can handle the fine details of eye drawing.
-
Reference Images: Having reference images of eyes can be immensely helpful in understanding their structure and capturing realistic details.
Now, let's dive into the step-by-step process of drawing eyes.
Step 1: Sketch the Basic Eye Shape
Begin by lightly sketching the basic shape of the eye. Eyes come in various shapes, so decide whether you're drawing a round, almond-shaped, or another type of eye. The upper eyelid is usually more curved, while the lower eyelid is flatter. Keep in mind that eyes are not perfect ovals; they have subtle irregularities.
Step 2: Add the Iris and Pupil
Within the basic eye shape, draw a smaller circle to represent the iris—the colored part of the eye. Off-center the iris slightly to create a more natural and dynamic look. Inside the iris, add an even smaller circle for the pupil. The pupil is the black or dark center of the eye. Its size can vary depending on the lighting conditions and the emotional expression you want to convey.
Step 3: Define the Eyelids
Outline the upper and lower eyelids, following the shape you sketched in step 1. The eyelids have thickness, so add a subtle line just above the upper eyelid to indicate the crease where the eyelid folds. Pay attention to the eyelid's curvature, as it contributes to the eye's expressiveness.
Step 4: Draw the Eyelashes
Eyes often appear more striking with well-drawn eyelashes. To draw them, extend short, curved lines from the upper eyelid, especially near the outer corner of the eye. The eyelashes should gradually become shorter as you move toward the inner corner. For the lower eyelid, add a few shorter lashes, mainly on the outer side.
Step 5: Add Shading to the Iris
To give depth and dimension to the iris, add shading. Observe the reference image for guidance on where shadows fall within the iris. Typically, the top part of the iris is slightly darker, and the bottom part is lighter. You can use a softer pencil (e.g., 2B) for this step. Leave a small section at the top of the iris untouched to create a highlight.
Step 6: Shade the Pupil and Define Highlights
Darken the pupil using a soft pencil (e.g., 6B). The pupil should be the darkest part of the eye. Leave a tiny, bright highlight on the pupil to make the eye appear glossy and lifelike. You can use your eraser to carefully shape the highlight.
Step 7: Shade the Eyelids
To make the eyelids look more realistic, add shading to indicate the curvature. The upper eyelid usually casts a shadow over the iris and upper part of the eye. Use a soft pencil to shade the eyelids gently, and blend the shading for a smooth transition.
Step 8: Add Final Details and Reflections
Fine-tune your drawing by adding any additional details you see in your reference image. Pay attention to small highlights or reflections on the surface of the eye. These reflections add a sparkle and vitality to the eyes. You can also add subtle lines to define the texture of the iris further.
Step 9: Refine and Adjust
Take a step back and assess your eye drawing. Make any necessary refinements and adjustments to ensure symmetry and accuracy. Erase any stray lines or smudges and refine the shading to achieve a realistic and balanced look.
Tip: To capture the lifelike essence of eyes, focus on the interplay of light and shadow by using a variety of pencil grades. Start with a softer pencil (like 4B or 6B) to establish the deep shadows around the eye, particularly in the crease and the corners, where the skin folds create natural depth. Use a harder pencil (like HB or 2H) for finer details such as the iris texture and the reflection of light, which adds a captivating sparkle. Additionally, pay close attention to the eyelashes; they can enhance the eye's expression dramatically, so practice drawing them in clusters and varying their lengths for a more realistic effect. Lastly, consider using an eraser to lift highlights on the iris and create a glimmer that brings life to your artwork!
Conclusion
Congratulations! You've completed the journey of learning how to draw eyes. Eyes are a captivating and essential element in portrait art and convey a wealth of emotions. With practice and dedication, you can master the art of drawing eyes and infuse your artworks with depth and expressiveness. Remember that every eye is unique, and observation is key. Continue to explore different eye shapes, expressions, and lighting conditions to further refine your skills. Happy drawing!
Gallery of Eye Drawings


