Have you ever wanted to know how to draw a paw print but needed help figuring out where to start? Don’t worry, you’re not alone! Drawing a paw print may seem tricky, but anyone can create a realistic and beautiful representation of this iconic symbol with guidance.
In this tutorial, I will guide you through the step-by-step process of drawing a paw print. You don’t need to have any prior drawing experience to follow along. All you’ll need is some basic drawing materials and a willingness to learn.
Materials Required
- A pencil
- Drawing paper
- An eraser
- Black ink pen (optional)
- Colored pencils or markers (optional)
Now that you have your materials ready, let’s dive into the step-by-step instructions for drawing a paw print.
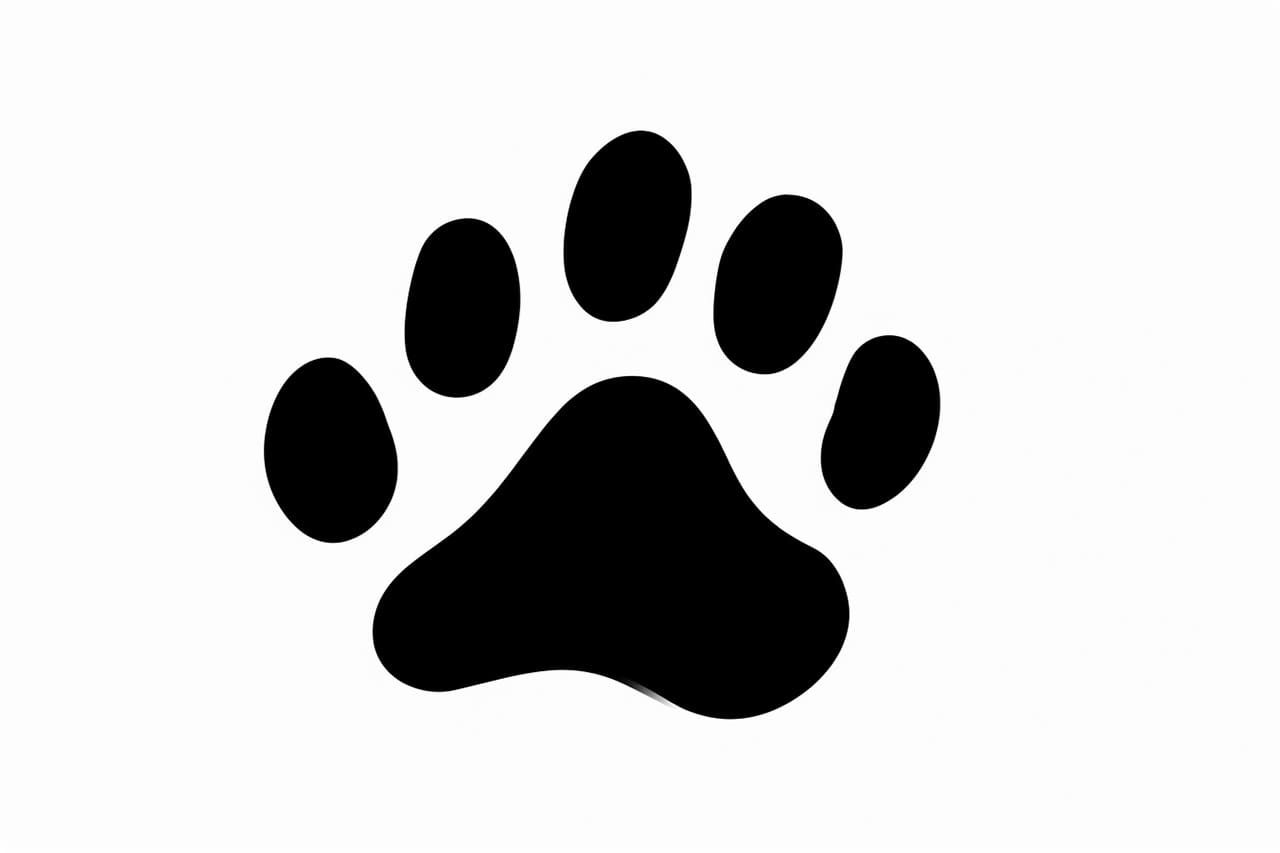
Step 1: Draw a Circle
Start by lightly drawing a circle in the center of your paper. This circle will serve as the central part of the paw print. Don’t worry about making it perfect, as you can always adjust it later.
Step 2: Add Curved Lines
Next, draw three slightly curved lines extending from the circle. These lines will represent the toes of the paw print. Make sure to give them a rounded shape to mimic the appearance of actual paw pads.
Step 3: Create the Toes
At the end of each curved line, draw a smaller circle or oval shape. These shapes will form the toes of the paw print. Again, do not worry about making them perfect at this stage.
Step 4: Connect the Toes
Connect the individual toes by drawing smaller curves that mimic the shape of the toes. This will create a more cohesive look for the paw print.
Step 5: Refine the Shape
Now it’s time to refine the overall shape of the paw print. Carefully go over your initial lines and adjust them to create smoother curves and more defined shapes. Erase any unnecessary guidelines or overlapping lines to clean up your drawing.
Step 6: Outline with Ink (Optional)
If you want to give your paw print a bolder and more defined appearance, you can go over your pencil lines with a black ink pen. Be mindful and confident in your strokes, as ink is less forgiving than pencil.
Step 7: Add Details (Optional)
To add more depth and realism to your drawing, you can include some additional details. For example, you can lightly shade the paw pads or use colored pencils or markers to add texture and color to your paw print.
Conclusion
Drawing a paw print may seem intimidating at first, but by following these step-by-step instructions, you can create a beautiful representation of this popular symbol. Remember to be patient with yourself and allow for some experimentation and creativity along the way.
I hope this tutorial has been helpful in guiding you through the process of drawing a paw print. With some practice, you’ll be able to create paw prints that are unique and full of personality. Happy drawing!