Welcome to this step-by-step guide on how to draw a cartoon eye. Whether you’re an aspiring artist or simply looking for a fun and creative activity, drawing cartoon eyes can be a great way to express your artistic skills. In this tutorial, we will break down the process into simple and easy-to-follow steps, so grab your materials and let’s get started!
Materials Required
Before we begin, make sure you have the following materials handy:
- Paper: Choose a smooth and sturdy paper to draw on.
- Pencil: A standard HB pencil or any graphite pencil will work fine.
- Eraser: Opt for a soft eraser to correct any mistakes.
- Fine-tipped pen: You may want to outline your drawing with a pen once you’re satisfied with the pencil sketch. This step is optional but can give your cartoon eye a more defined look.
Now that you have your materials ready, let’s dive into the steps of drawing a cartoon eye.
Step 1: Draw a Circle
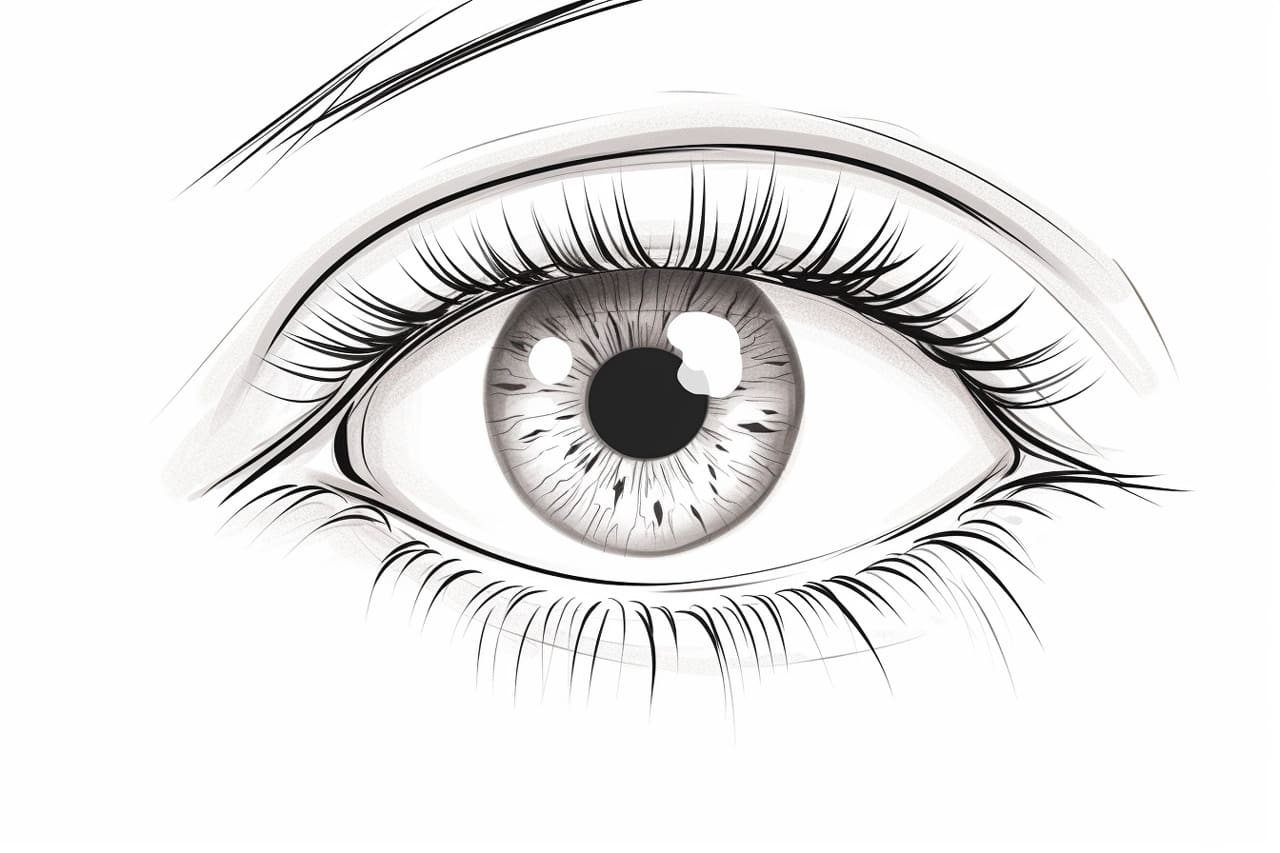
To start, create a perfect circle in the center of your paper. This will serve as the eyeball of your eye. Use gentle and light pencil strokes to keep the circle easily erasable if needed.
Step 2: Add the Iris
Within the circle, draw a smaller oval shape to represent the iris of the eye. The iris should be placed slightly off-center, leaving some space for the white of the eye. This will add depth and dimension to your cartoon eye.
Step 3: Create the Pupil
Inside the iris, draw a small circle to indicate the pupil. The pupil should be placed toward the center of the iris, giving your cartoon eye a focal point. This will help bring your drawing to life.
Step 4: Define the Eyelids
Next, it’s time to create the top and bottom eyelids. Starting from the edge of the circle, draw a curved line above the iris to represent the upper eyelid. Make sure the curve is smooth and has a gentle slope. Repeat this step below the iris to form the lower eyelid.
Step 5: Add Eyelashes
To make your cartoon eye more expressive, add some eyelashes on the upper eyelid. Draw short, curved lines extending outward from the outer edge of the upper eyelid. You can add as many or as few eyelashes as you like, depending on the style you prefer.
Step 6: Draw the Eyebrow
Above the eye, sketch a curved line to represent the eyebrow. The shape and thickness of the eyebrow can vary according to your preference. Experiment with different eyebrow styles to give your cartoon eye a unique look.
Step 7: Shade the Iris
To give your cartoon eye more depth, add shading to the iris. Start by lightly shading the entire iris, leaving the pupil untouched. Then, gradually darken the area around the iris to create a gradient effect. This shading will make your cartoon eye appear more realistic.
Step 8: Refine the Eyelids and Eyebrow
Go over the initial eyelid and eyebrow lines, making them more defined and smooth. Adjust the curves and angles as needed to achieve the desired shape. Take your time with this step to ensure the eyelids and eyebrow complement the overall look of your cartoon eye.
Step 9: Add Highlights
To make your cartoon eye shine, add highlights to the pupil and iris. Leave tiny white spaces in the pupil and iris, indicating the reflection of light. This will give your drawing a more lively and captivating appearance.
Step 10: Outline with Pen (Optional)
If you want to make your cartoon eye stand out even more, you can outline the pencil drawing with a fine-tipped pen. Go over the main lines, such as the eyelids, iris, and eyebrow, to create a bold and defined outline. This step is optional but can add a professional touch to your artwork.
Conclusion
Congratulations! You’ve successfully learned how to draw a cartoon eye. By following these step-by-step instructions and using your creativity, you can create endless variations of cartoon eyes. Experiment with different shapes, sizes, and expressions to further enhance your artistic skills. Remember, practice makes perfect, so keep honing your drawing abilities. Happy drawing!