Welcome to this step-by-step guide on how to draw a worm! Whether you’re a beginner or an experienced artist, this tutorial will help you create a detailed and realistic representation of a worm. Grab your pencils and paper, and let’s get started!
Materials Required
To draw a worm, you will need the following materials:
- Paper: Choose a clean and smooth surface to draw on. Sketching paper or drawing paper works well.
- Pencils: Have a range of pencils with different lead hardness (HB, 2B, 4B) to create different shades and textures.
- Eraser: A good quality eraser will be useful for correcting mistakes or adjusting details.
- Optional: You may also use colored pencils or markers to add some color to your worm drawing.
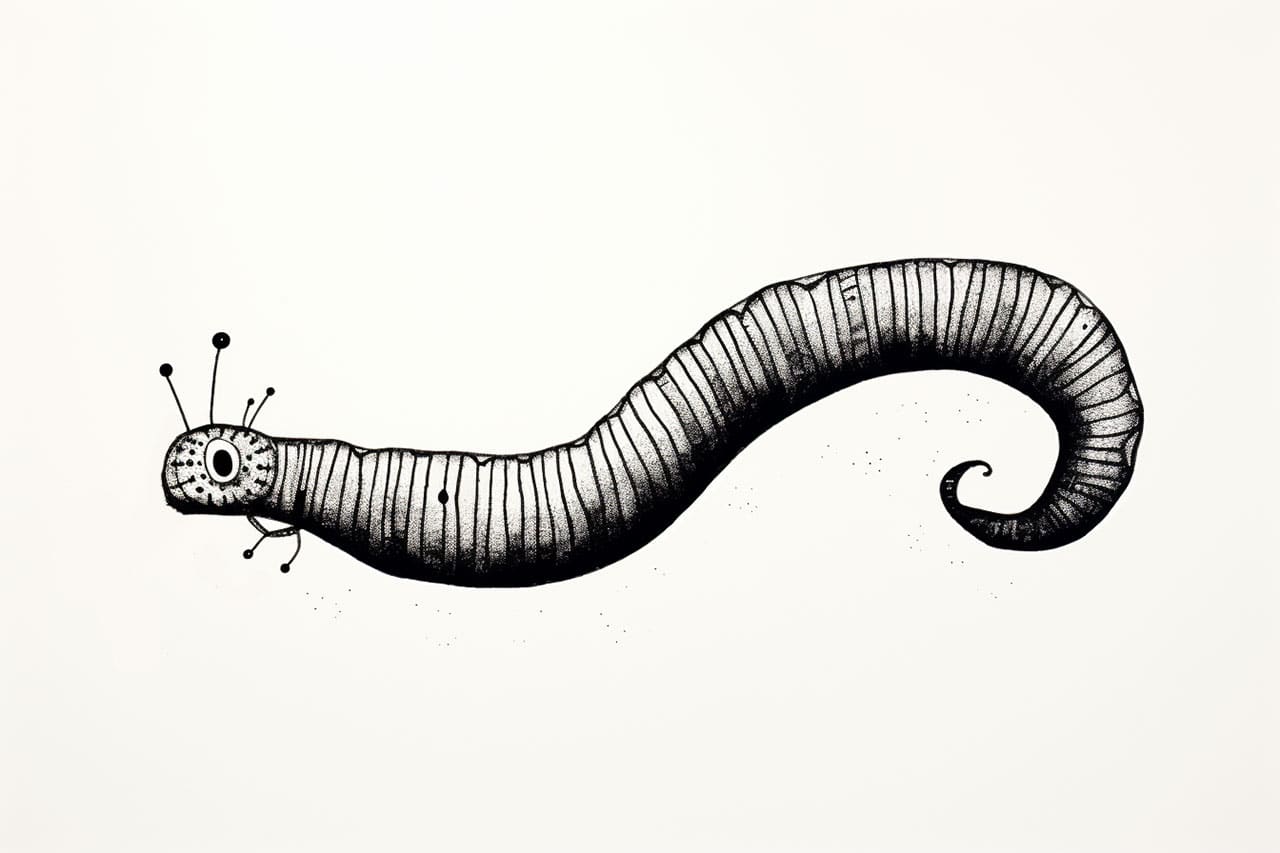
Step 1: Sketch the Basic Shape
Start by lightly sketching the basic shape of the worm. Begin with a curved line that serves as the central body of the worm. Keep in mind that worms are long and cylindrical, so make the length of the line longer than the height. This line will act as a guide for the body structure.
Step 2: Outline the Head and Tail
Next, add a smaller curved shape at one end of the central line for the head. The head should be slightly rounded. At the opposite end of the central line, draw a slightly pointed shape for the tail.
Step 3: Define the Body Segments
Using short, slightly curved lines, segment the body of the worm. Start from the head and draw segments all the way to the tail. These segments should be irregular and uneven in size, as this will add to the natural appearance of the worm.
Step 4: Add Texture and Details
To create a realistic texture, draw a series of tiny lines along the length of each body segment. These lines should curve slightly to follow the shape of the worm. This will give the impression of the worm’s skin, which is covered in small ridges.
Add a few small lines near the head to represent the mouth of the worm. Worms have a simple mouth with no distinct features, so keep these lines minimalistic.
Step 5: Enhance the Head and Tail
To add more definition to the head, draw a small circular shape for the eye. You can also add a hint of a smile by drawing a curved line under the eye.
For the tail, create a sense of depth by shading the area around it slightly darker than the rest of the body. This will help give the worm a three-dimensional appearance.
Step 6: Refine the Shape
Take a step back and evaluate your drawing so far. Look for any areas that need adjustments or refining. You can use your eraser to make any necessary corrections or erase any visible sketch lines that you no longer need.
Step 7: Add Shadows and Highlights (Optional)
If you want to take your drawing to the next level, you can add shadows and highlights to create depth and dimension. Identify a light source for your drawing, and imagine where the shadows would fall. Use a softer pencil, like a 4B, to darken those areas.
Similarly, imagine where the light would hit the worm and create highlights on its body. Use a harder pencil, like an HB, to lightly shade those areas.
Conclusion
Congratulations! You have successfully learned how to draw a worm. By following these simple steps, you can create a detailed and realistic representation of this fascinating creature. Remember to practice and experiment with different techniques to develop your skills further.
So, grab your art supplies, let your creativity flow, and have fun bringing worms to life on paper!