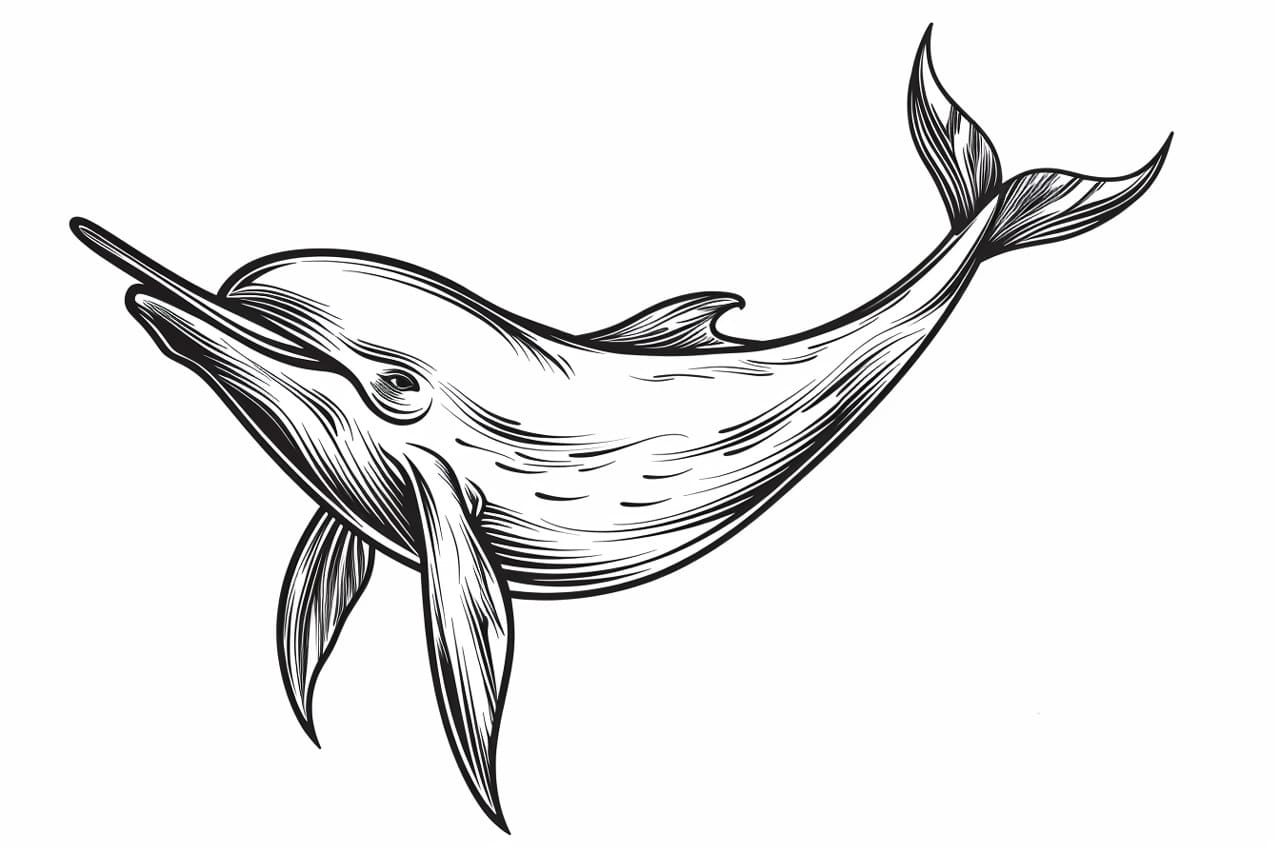
Welcome to this step-by-step tutorial on how to draw a narwhal! Narwhals are intriguing creatures known for their long tusks, which make them unique in the animal kingdom. In this guide, I will walk you through the process of creating a beautiful narwhal drawing. So grab your pencil, paper, and let’s get started!
Materials Required
To complete this drawing, you will need the following materials:
- A pencil
- Paper (preferably a drawing pad)
- Eraser
- Black pen or fine-marker
- Colored pencils or markers (optional)
That’s all you need! So let’s dive into the steps to create your narwhal masterpiece.
Step 1: Draw the Body
Let’s begin by drawing the body of the narwhal. Start with a rounded shape that resembles an oval. This will serve as the main body of the narwhal. Keep the pencil lines light, as we will refine them later.
Step 2: Add the Tail and Fins
Next, we will draw the tail and fins of the narwhal. Extend a curved line downwards from the body shape to create the tail. Then, add two small curved lines on either side of the body for the fins.
Step 3: Sketch the Head
Now, let’s move on to drawing the head of the narwhal. Begin by adding a curved line at the front of the body shape, extending it upwards to form the forehead. From the forehead, draw a long and curved line to create the snout. At the end of the snout, add a small circle to represent the narwhal’s mouth.
Step 4: Draw the Tusk
The tusk is the most distinctive feature of a narwhal. To draw it, start from the left side of the narwhal’s head and create a long, narrow shape that curves slightly. The tusk should extend beyond the mouth and point diagonally upwards. Take your time to get the shape just right.
Step 5: Add Details to the Face
Let’s add some details to the narwhal’s face. Draw a small eye on the right side of the head by adding a small circle. Then, using short and curved lines, create some texture around the eye to represent the skin of the narwhal.
Step 6: Refine the Outline
Now that we have the basic form of the narwhal, it’s time to refine the outline and add more details. Go over the sketch with darker and smoother lines, emphasizing the contours and curves of the body. Pay attention to the shape of the tail, the fins, and the tusk. Erase any unnecessary lines from the initial sketch.
Step 7: Add Texture and Shadows
To give your narwhal drawing more depth and realism, we’ll add some texture and shadows. Use short, curved lines to create a wrinkled texture on the body of the narwhal. Shade the areas under the body, tail, and fins with gentle strokes to indicate shadows. Add a bit of shading around the eye and the mouth as well.
Step 8: Consider Coloring
If you want to take your drawing to the next level, consider adding some color to your narwhal. Narwhals are typically grayish in color, but you can add your own artistic touch by using different shades of blue or experimenting with other colors. Gradually layer the colors to create a smooth and realistic effect.
Conclusion
Congratulations! You have successfully learned how to draw a narwhal. By following these step-by-step instructions, you should now have a beautiful narwhal drawing that showcases the unique characteristics of this magnificent creature. Remember to practice and have fun with your drawings. Happy creating!


