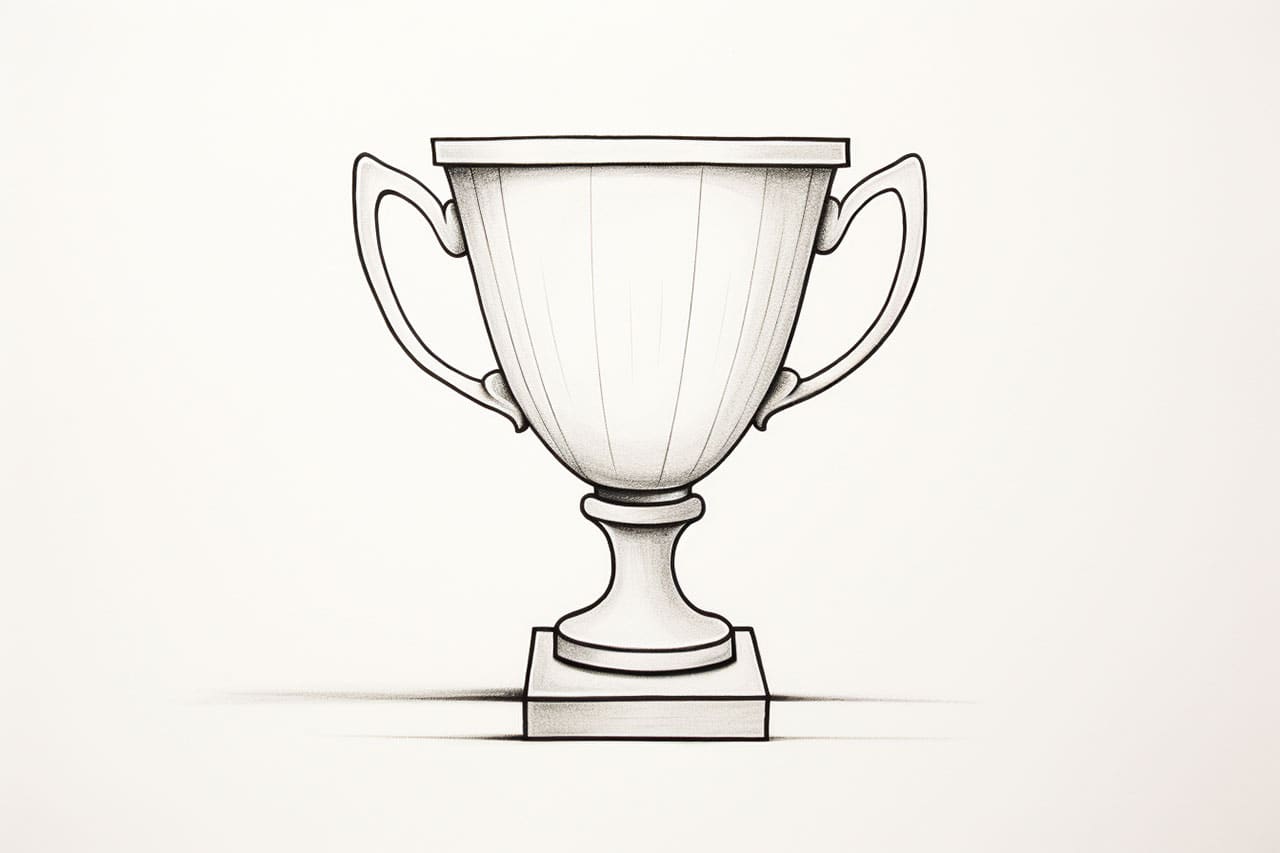
Welcome to this step-by-step guide on how to draw a trophy. Whether you’re a budding artist or just looking to try something new, drawing a trophy can be a fun and satisfying project. In this article, I will walk you through each step of the process, providing clear instructions and helpful tips along the way. So grab your pencil and paper, and let’s get started!
Materials Required
Before we begin, let’s gather all the materials you’ll need for this drawing:
- Paper: A smooth, heavyweight paper is ideal for this project. You can use either a sketchpad or loose sheets.
- Pencils: It is recommended to have a range of pencils with varying degrees of hardness, such as 2H, HB, and 2B. These will allow you to create both light and dark shades.
- Eraser: A soft eraser will come in handy for any mistakes or adjustments you may need to make.
- Ruler: A straight-edge ruler will help you draw clean and accurate lines.
- Compass (optional): If you want to draw a perfect circle for the base of the trophy, a compass will simplify the process.
Now that you have all your materials ready, let’s dive into the steps involved in drawing a trophy.
Step 1: Outline the Trophy Shape
Begin by lightly sketching an oval shape in the center of your paper. This will serve as the main body of the trophy. Use your ruler to guide you in creating symmetrical sides. Take your time with this step, as getting the proportions right is important.
Step 2: Add the Handles
Draw two curved lines extending from the sides of the trophy, slightly below the top. These lines will serve as the handles. Make sure they are symmetrical and positioned evenly on both sides.
Step 3: Draw the Base
Beneath the oval shape, draw a rectangle to represent the base of the trophy. The width of the rectangle should be slightly wider than the oval. Use your ruler to ensure straight lines and equal measurements.
Step 4: Add Depth to the Trophy
To make the trophy look three-dimensional, we’ll add some depth. On one side of the oval shape, draw a vertical line slightly curved inwards, from top to bottom. Repeat this on the other side. These lines will create the illusion of depth.
Step 5: Sketch the Details
Now it’s time to add some intricate details to the trophy. Draw a small circle at the top center of the oval shape. This will represent the opening of the trophy where the figurine is often placed. Below the circle, draw a rectangle to resemble a small plaque. You can also add additional decorative elements such as ribbons or engravings to customize your trophy.
Step 6: Refine the Outline
Using the initial sketch as a guide, refine the outline of the trophy. Darken the lines you want to keep and erase any unnecessary lines. Pay close attention to the curves and angles to ensure a polished look.
Step 7: Shade and Add Texture
To give your trophy a realistic look, we’ll add shading and texture. Start by identifying the direction of the light source. Using your pencils, add shading to the areas that would be in shadow. Gradually build up the layers of shading to create depth and dimension. You can also use a blending tool or your finger to smooth and blend the shading for a softer effect.
Step 8: Finalize the Details
At this stage, take your time to add the final touches to your drawing. Pay attention to the smallest details, such as engraved names, patterns, or reflections on the trophy’s surface. Use an eraser to refine any areas that need adjustment or highlight specific areas to create highlights.
Conclusion
Congratulations! You have successfully completed your trophy drawing. By following these step-by-step instructions, you were able to create a realistic and detailed representation of a trophy. Remember, practice makes perfect, so don’t be discouraged if your first attempt isn’t exactly as you envisioned. Keep honing your drawing skills, and soon you’ll be creating impressive artworks. Enjoy the process and have fun with your drawings!
Gallery of Trophy Drawings


Fun Facts About Trophies
- Trophies have been a symbol of victory and accomplishment since ancient times, with early versions made from animal horns or weaponry.
- The word “trophy” comes from the Greek word “tropaion,” used to describe battlefield prizes.
- One of the most famous trophies is the Stanley Cup, awarded annually to the NHL playoff champion and named after Lord Stanley of Preston.
- The FIFA World Cup Trophy, crafted from 18-carat gold, is one of the most recognized sports trophies globally.
- The Academy Awards Oscar statue is another iconic trophy, made of gold-plated bronze and given for excellence in filmmaking.
- The Heisman Trophy is awarded annually to the most outstanding player in college football in the United States.
- Trophies are not just for sports; they can also be awarded for achievements in areas like science, arts, or academics.
- In some cultures, trophies have been made from unusual materials, like the tusks of animals or rocks from significant locations.
- The tallest trophy ever made was over 22 feet (approximately 6.7 meters) high, created for a 2012 event in India.
- Trophy design can be a fine art, involving skilled craftsmanship and often incorporating elements significant to the culture or sport they represent.
Suggestions for Scenes and Settings for Trophy Drawings
- Award Ceremony Stage: Draw a glamorous stage with a spotlight on a collection of shining trophies arranged in a row.
- Champion’s Podium: Illustrate a scene of jubilant athletes standing on a podium, clutching their trophies with celebration in the air.
- Trophy Room Display: Create a detailed setting of a cozy room filled with an array of trophies, each telling a story of past victories.
- Historic Battlefield: Picture a scene from ancient times with warriors celebrating their victory beside a makeshift trophy of conquered banners.
- Underwater Treasure: Imagine an undersea world where sunken trophies rest among coral reefs and curious fish swim by.
- Fantasy Kingdom: Depict a grand hall in a fantasy castle where magical trophies gleam with enchanting lights and floating sigils.
- Galactic Champion: Design a futuristic scene where alien beings compete for a cosmic trophy amid distant planets and floating asteroids.
- School Talent Show: Illustrate an enthusiastic school venue where smiling children receive colorful trophies for varied talents.
- Renaissance Fairgrounds: Picture a lively fair with participants showcasing their medieval-themed trophies won in jousting contests.
- Trophy Workshop: Show a craftsman in their workshop, carefully crafting detailed trophies with tools scattered about and blueprints on the desk.