As an expert artist and drawing instructor, I will guide you through the process of how to draw a tiara step by step. Whether you are an aspiring artist or just seeking a creative outlet, this tutorial will help you create a beautiful tiara drawing. So grab your pencils and let’s get started!
Materials Required
To begin, gather the following materials:
- Drawing paper or sketchbook
- Pencils (HB, 2B, and 4B)
- Eraser
- Ruler
- Compass
- Fine-tip black pen (optional for outlining)
Now that you have all the necessary materials, let’s dive into the step-by-step process of drawing a tiara.
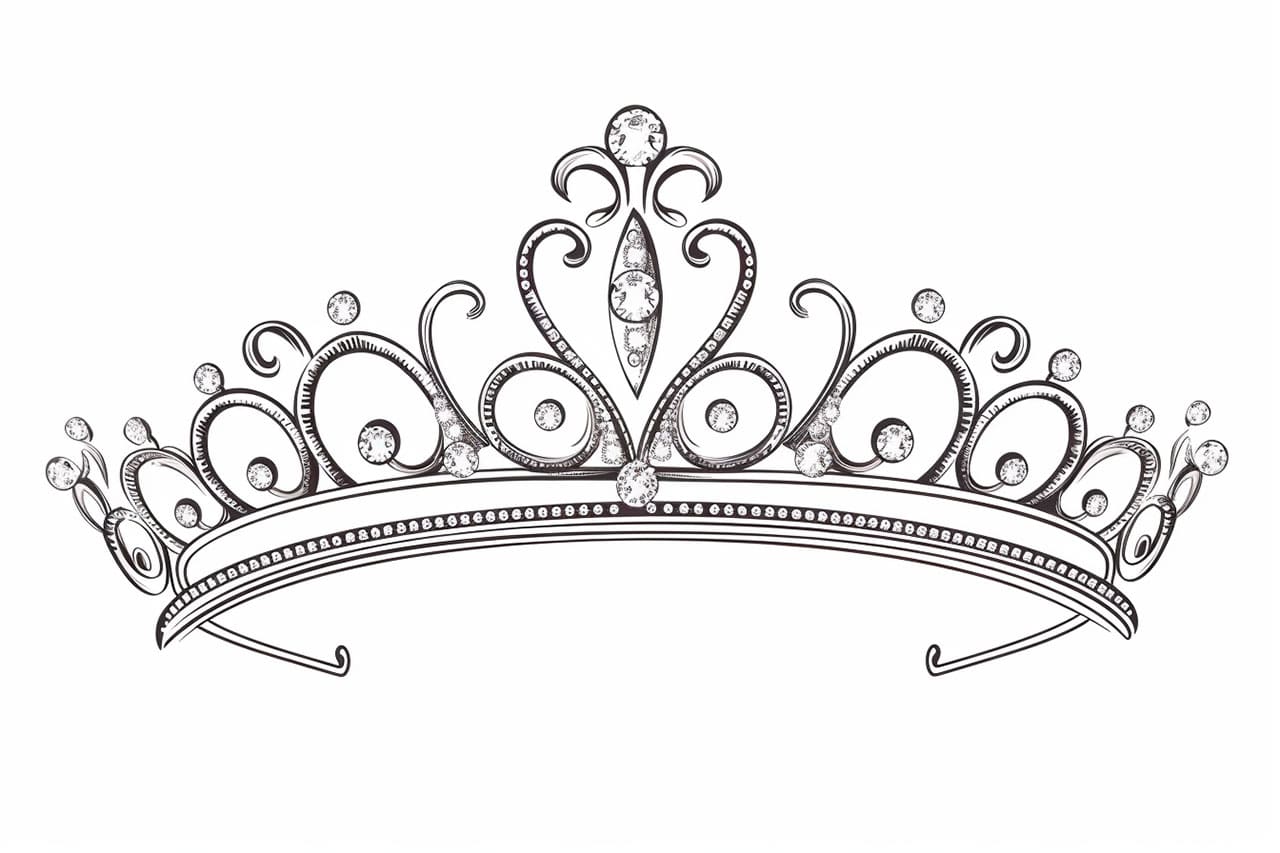
Step 1: Sketch the Tiara Base
Start by lightly sketching a curved line across the center of your paper. This line will act as the base of your tiara. Use the ruler to ensure it is straight and even.
Step 2: Add the Spikes
From the curved line, draw a series of small triangles that point upward. These will represent the spikes of the tiara. Make sure the triangles are evenly spaced along the base line. You can use the ruler to help with this if needed.
Step 3: Draw the Gemstones
Now, let’s add some sparkle to our tiara by drawing gemstones at the top of each spike. To do this, sketch small circles or ovals above the triangles. Play around with different shapes and sizes to create a varied and interesting design.
Step 4: Create Intricate Designs
Tiara designs often include intricate patterns or motifs. Let your creativity flow as you add these details to your drawing. You can incorporate swirls, hearts, flowers, or any other designs that inspire you. Use the ruler and compass to help create symmetrical patterns if desired.
Step 5: Define the Tiara Shape
To give your tiara more dimension, add depth to the spikes and base by shading the sides. Use a darker pencil (such as a 2B or 4B) to add shadows along the edges, creating a three-dimensional effect. Gradually build up the shading, starting lightly and gradually darkening it as you go.
Step 6: Outline the Tiara
If you want to make your tiara stand out even more, you can outline it with a fine-tip black pen. This step is optional, but it can add a polished look to your drawing. Be careful not to press too hard with the pen to avoid smudging the pencil lines.
Step 7: Erase the Guidelines
Once you are satisfied with your tiara drawing, erase any remaining pencil guidelines. Take your time and use a gentle touch to avoid damaging the paper or smudging your drawing.
Conclusion
Congratulations! You have successfully learned how to draw a tiara. By following these step-by-step instructions, using the recommended materials, and letting your creativity shine, you can create beautiful tiara drawings. Remember, practice makes perfect, so don’t be afraid to experiment with different styles and designs. Enjoy the process and have fun expressing your artistic talent through tiara drawings! And remember that a tiara looks great on a princess living in a castle.