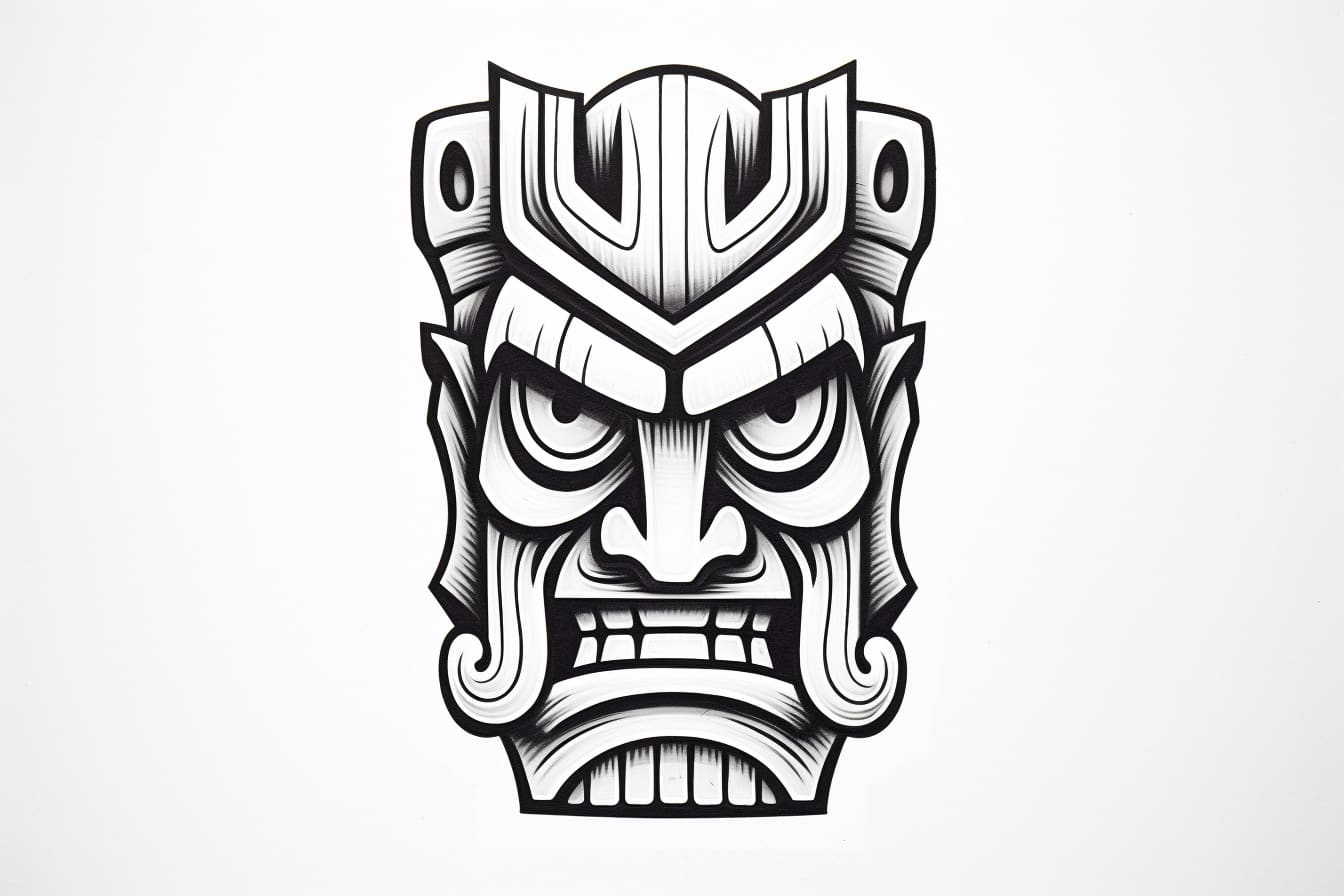
Welcome to this step-by-step guide on how to draw a tiki! Tikis are fascinating and intricate carvings often found in Polynesian and Hawaiian cultures. They come in a variety of designs and are typically carved from wood or stone. In this tutorial, we will explore the process of drawing a tiki using simple shapes and lines. Whether you are a beginner or an experienced artist, this guide will provide you with clear instructions to create your very own tiki masterpiece.
Materials Required
Before we begin, let’s gather the materials you will need for this drawing:
- Drawing paper or sketchbook
- Pencil
- Eraser
- Fine-tip pen or marker (optional)
- Colored pencils or markers (optional)
Now that you have everything ready, let’s get started!
Step 1: Basic Outline
Start by drawing a vertical line slightly off-center on your paper. This line will serve as the spine of your tiki. Next, add a horizontal line intersecting the vertical line towards the top. This horizontal line will be the eyebrow line of the tiki.
Step 2: Eyes and Nose
From the eyebrow line, draw two almond-shaped eyes on either side of the vertical line. These eyes can be elongated or round, depending on the style you prefer. Just above the midpoint of the vertical line, add a small rounded shape for the nose.
Step 3: Mouth and Teeth
Beneath the nose, draw a curved line to form the mouth of the tiki. The mouth can be either smiling or frowning, depending on the expression you want to give your tiki. Once you have the basic mouth shape, add triangular teeth along the upper and lower edges of the mouth. You can make the teeth large or small, sharp or rounded, to give your tiki a unique character.
Step 4: Facial Details
Now it’s time to add some intricate details to the tiki’s face. Start by drawing two curved lines above each eye to create the brows. These lines can be wavy or zigzagged to add texture. Next, draw small circular shapes within each eye to represent the irises. Add a small dot inside each iris to represent the pupils of the eyes. Above the nose, draw a curved line to create the bridge of the tiki’s nose, and add two short lines on either side to represent the nostrils.
Step 5: Decorative Elements
Tikis are often adorned with decorative elements such as tribal patterns and symbols. To add these details, draw curved lines or geometric shapes around the eyes, mouth, and cheeks of your tiki. These patterns can be as simple or as intricate as you like, so feel free to experiment and let your creativity shine.
Step 6: Body and Limbs
Extend the vertical line down to create the body of the tiki. Draw two curved lines on each side of the body to represent the arms. You can position the arms however you like – crossed, raised, or hanging down. For the hands, draw simple shapes such as triangles or rectangles at the ends of the arms to represent the fingers. Add curved lines for the tiki’s shoulder and elbow joints, giving it a more realistic appearance.
Step 7: Finishing Touches
Take a moment to evaluate your tiki drawing and make any necessary adjustments. Erase any unnecessary guidelines and refine the lines to create a clean and polished look. If you wish, you can outline the final drawing with a fine-tip pen or marker to make it stand out. Additionally, you can bring your tiki to life by coloring it with colored pencils or markers. Experiment with different colors and shading techniques to add depth and dimension to your artwork.
Conclusion
Congratulations! You have successfully learned how to draw a tiki. By following these step-by-step instructions, you have created a unique and captivating tiki drawing. Remember, practice makes perfect, so don’t be afraid to experiment and try different styles and designs. With time and patience, you can develop your own signature tiki drawings. Happy creating!