Welcome to this step-by-step guide on how to draw a margarita. Whether you’re an experienced artist or just starting out, this tutorial will help you create a deliciously refreshing margarita drawing. So grab your pencils and let’s get started!
Materials Needed
Before we begin, make sure you have the following materials:
- Drawing paper or sketchbook
- Pencils (HB or 2B recommended)
- Eraser
- Ruler
- Colored pencils or markers (optional)
Now that we have everything we need, let’s dive into the steps.
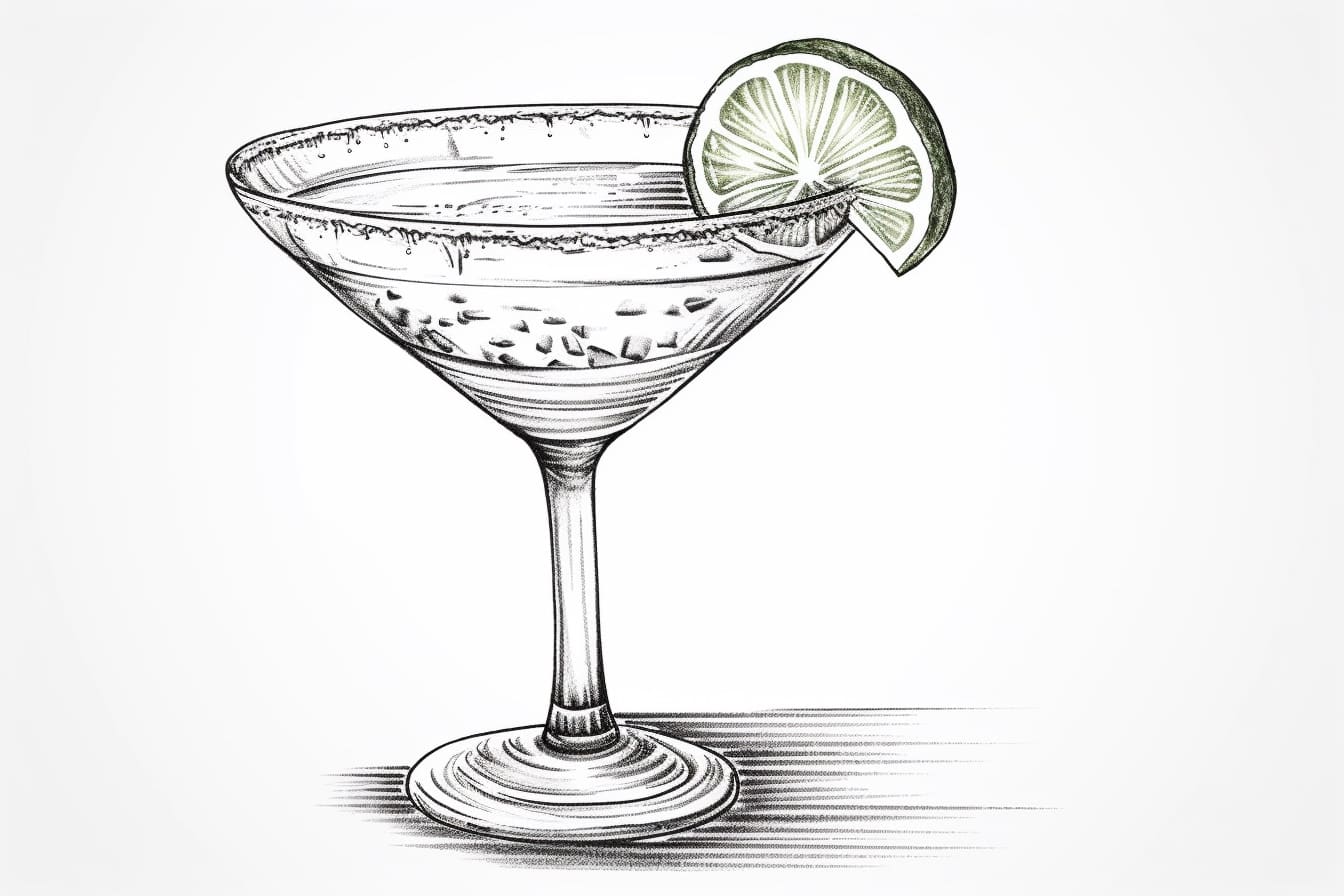
Step 1: Draw the Glass
Start by drawing the outline of the margarita glass. Using your ruler and a light pencil, draw a vertical line to represent the stem of the glass. At the top of the line, draw an oval shape to create the bowl of the glass. Make sure to leave some space at the top for the margarita itself.
Step 2: Add the Salt Rim
Next, we’ll add the signature salt rim to the margarita glass. Draw a curved line at the top of the bowl to indicate the rim. Then, use short, upward strokes to create a textured effect for the salt.
Step 3: Draw the Margarita
Now it’s time to draw the margarita itself. Start by drawing a curved line just below the salt rim to give the margarita a defined shape. Then, draw a series of curved lines within the shape to indicate the liquid. Add some small bubbles by drawing tiny circles throughout the margarita.
Step 4: Add a Lime Slice
A classic margarita often comes with a lime slice garnish. To draw the lime slice, start by drawing a small oval shape near the rim of the glass. Then, draw a curved line across the middle of the oval to create the slice. Add a couple of small dots to represent the seeds.
Step 5: Detail the Glass
To add some depth to the glass, draw two vertical lines from the rim down to the base. These lines will represent the sides of the glass. Then, draw a horizontal line near the base to create the bottom of the glass. Add some details like reflections or condensation droplets if you’d like.
Step 6: Shade the Margarita
Now that we have the basic outline, let’s add some shading to give the margarita drawing more dimension. Start by shading the areas of the margarita that are farther away from the light source. Use light, circular motions with your pencil to create a smooth gradient. Gradually darken the shading as you move closer to the bottom of the glass.
Step 7: Enhance the Lime Slice
To make the lime slice stand out, add some shading to it as well. Start by lightly shading the curved part of the slice to create a sense of volume. Then, add some darker shading along the edges and where the slice overlaps with the margarita. Blend the shading with a blending stump or a cotton swab to create a smooth transition.
Step 8: Add Colors (Optional)
If you’d like to add some vibrant colors to your margarita drawing, now is the time! Use colored pencils or markers to add color to the margarita, the lime slice, and even the glass if you wish. Experiment with different shades of green for the lime, and choose any color you like for the margarita itself. Don’t be afraid to get creative!
Conclusion
Congratulations, you have successfully drawn a margarita! This step-by-step guide has taken you through each stage, from drawing the glass and margarita to shading and adding colors. So whether you’re looking to enhance your artistic skills or simply have some fun, grab your art supplies and create your own deliciously refreshing margarita masterpiece.
Remember, practice makes perfect, so don’t be discouraged if your first attempt isn’t exactly what you envisioned. Keep drawing and experimenting, and soon you’ll be able to create stunning margarita drawings that will make your audience thirst for more.