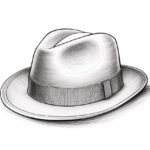
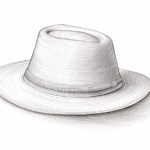
Whether you’re an aspiring artist or simply enjoy doodling, learning how to draw a beret can be a fun and rewarding experience. Berets are stylish and iconic headwear that can add a touch of sophistication to any character or fashion illustration. In this step-by-step guide, I’ll walk you through the process of drawing a beret, from creating the basic shape to adding realistic details. So grab your pencil and let’s get started!
Materials Required:
To draw a beret, you’ll need the following materials:
- Drawing paper or sketchbook
- Pencil (preferably a 2B or HB)
- Eraser
- Ruler
- Fine-tip marker or pen (optional for outlining)
Now that you have your materials ready, let’s begin the drawing process.
Step 1: Draw a Circle
Start by drawing a circle in the center of your paper. This will serve as the base of the beret. Use a pencil and lightly sketch the circle, as we will be adding details later on.
Step 2: Draw a Vertical Line
Draw a vertical line from the top of the circle to the bottom, intersecting it at the center. This line will help us create symmetry and ensure that the beret looks balanced.
Step 3: Create the Brim
From the bottom of the circle, draw a slightly curved line that extends outwards to create the brim of the beret. The brim can vary in size depending on your preference, so feel free to adjust the length of the line accordingly.
Step 4: Add Depth to the Brim
To give the beret a more three-dimensional look, add a curved line parallel to the brim, slightly below it. This will create the illusion of depth and make the beret appear more realistic.
Step 5: Draw the Top of the Beret
From the top of the circle, draw a curved line that slopes down towards the vertical line we drew earlier. This line will represent the top part of the beret.
Step 6: Refine the Shape
Using your pencil, refine the shape of the beret by adjusting the lines and curves as needed. Pay attention to the overall symmetry and proportions of the beret, ensuring that it looks well-balanced and aesthetically pleasing.
Step 7: Add Texture
To add texture to the beret, lightly sketch horizontal lines across the top part of the beret. These lines should follow the curve of the shape and create the illusion of fabric folds.
Step 8: Erase Unnecessary Lines
Carefully erase any unnecessary construction lines that you no longer need, such as the initial circle and vertical line. Be gentle with your eraser to avoid smudging or damaging the drawing.
Step 9: Outline the Beret
Once you’re satisfied with the shape and texture of the beret, you can outline it using a fine-tip marker or pen. This step is optional but can help make your drawing stand out and appear more polished.
Step 10: Add Details
Now it’s time to add some details to your beret. You can draw a small stem or button on the side of the beret to give it a more realistic look. You can also add shading or hatching to create depth and dimension.
Step 11: Shade the Beret (Optional)
If you want to take your drawing to the next level, you can add shading to the beret. This will give it a more three-dimensional look and make it appear more realistic. Shade the areas where the beret would naturally cast shadows, such as the underside of the brim and the folds on the top part.
Conclusion
Drawing a beret may seem challenging at first, but with practice and patience, you can master this stylish accessory. Follow the step-by-step instructions in this guide, and don’t be afraid to experiment with different shapes and sizes. Remember that practice makes perfect, so keep honing your drawing skills, and soon you’ll be able to create berets and other fashionable illustrations with ease.
So grab your sketchbook and pencil, and start drawing your very own beret masterpiece! Happy drawing!


