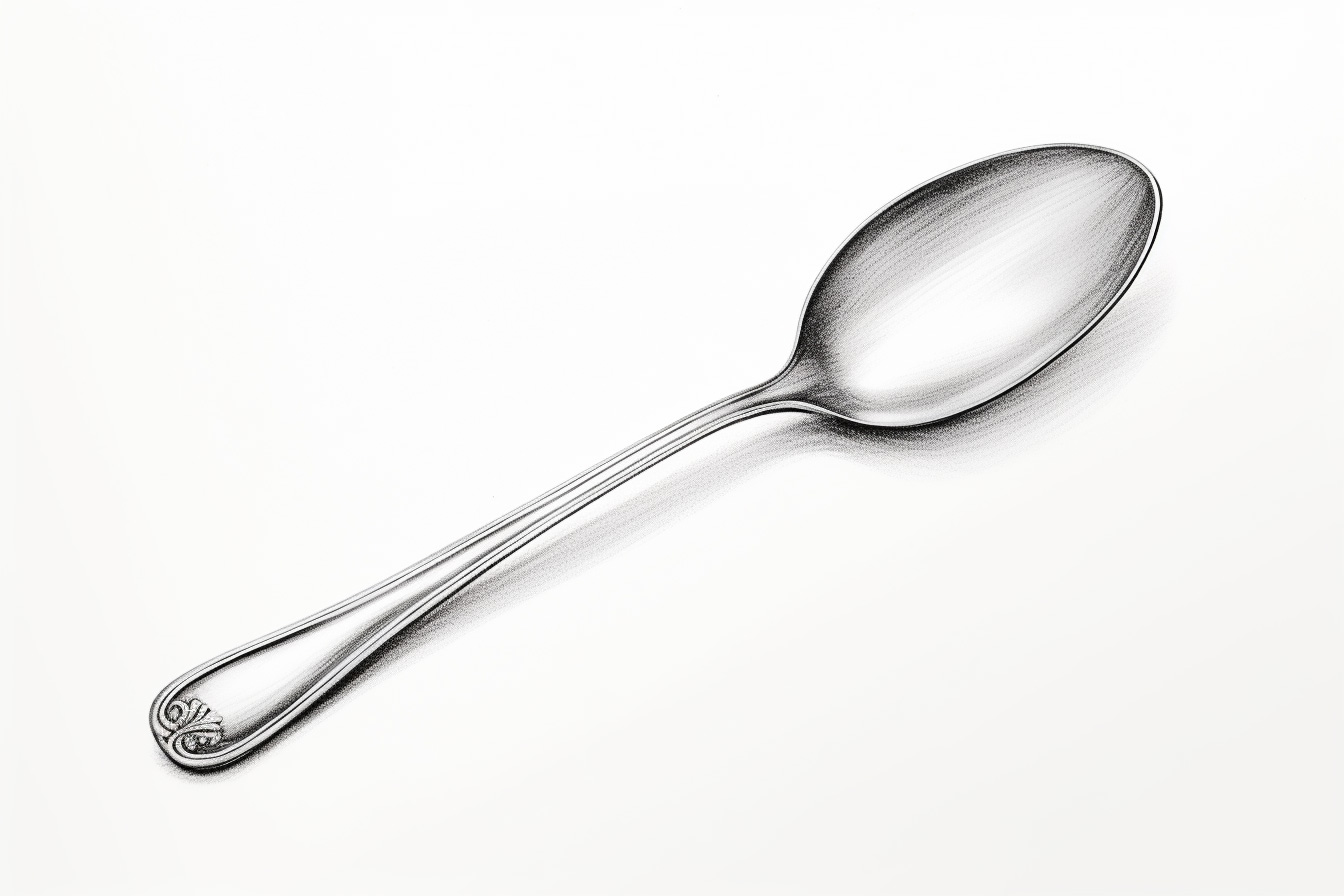
Welcome to this step-by-step guide on how to draw a spoon! Whether you are a beginner or an experienced artist, this tutorial will walk you through the process of how to draw a spoon. So grab your pencil, and let’s get started!
Materials Required
To complete this drawing tutorial, you will need the following materials:
- Paper: A smooth-surfaced paper such as sketch paper or Bristol board would work well.
- Pencil: Choose a medium-soft graphite pencil (HB or 2B) for sketching and shading.
- Eraser: A kneaded eraser or a vinyl eraser will be handy for correcting mistakes and adding highlights.
- Ruler: A straight edge will help you maintain proportion and draw straight lines.
Now that you have gathered your materials, let’s dive into the step-by-step process of drawing a spoon.
Step 1: Outline the Basic Shape
Start by lightly sketching a horizontal line across the middle of your paper. This line will act as a guideline for the handle of the spoon. Next, draw a slightly curved oval shape at the top of the guideline. This will be the bowl of the spoon. Remember to keep your lines light and loosely drawn at this stage.
Step 2: Refine the Handle
Using the guideline as a reference, sketch the handle of the spoon. Pay attention to the curve and thickness of the handle, making sure it is proportional to the bowl. Take your time to get the shape just right. You can also add some subtle curves or details to make the handle more interesting and realistic.
Step 3: Define the Bowl Shape
Now it’s time to refine the shape of the spoon bowl. Start by outlining the top edge of the bowl, following the oval shape you sketched earlier. Then, draw a curved line connecting the top edge to the bottom of the bowl. Make sure the bottom edge of the bowl aligns with the handle. Pay attention to the curves and proportions to create a symmetrical and balanced shape.
Step 4: Add Dimension
To add depth and dimension to your spoon, we need to create some shading. Identify the direction of your light source (e.g., top left corner) and imagine where the shadows would fall. Begin by shading the areas on the handle opposite the light source, using light, even strokes. Gradually build up the shading, making it darker as you move away from the light source. Use your pencil to blend the shading for a smooth transition.
Step 5: Add Details
Now that you have established the basic form of the spoon, it’s time to add some details. Start by adding the reflection on the spoon’s bowl. To do this, lightly shade a small oval shape inside the bowl but leave a small area unshaded to represent the reflection of light. This will give the spoon a shiny and reflective appearance.
Next, add a subtle highlight along the top edge of the spoon bowl and the top surface of the handle. Use your eraser to gently lift off some graphite in these areas, creating a contrast with the darker shading. This will enhance the three-dimensional look of the spoon.
Step 6: Refine and Finalize
Take a step back and assess your drawing. Look for any areas that need refinement or adjustment. You may want to darken some shadows, smoothen out any rough lines, or make small tweaks to the overall shape of the spoon. Make these adjustments using your pencil or eraser until you are satisfied with the final result.
Conclusion
Congratulations on completing your drawing of a spoon! By following these step-by-step instructions, you have learned how to create a realistic and detailed representation of a spoon. Remember to practice regularly to refine your skills and explore different techniques. With time and dedication, you will be able to draw various objects with confidence and precision.
So keep sketching, and enjoy the creative journey!