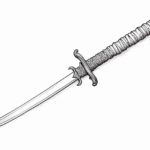
Welcome to this step-by-step guide on how to draw a dagger. Whether you are an experienced artist or just starting out, this tutorial will help you create a realistic and detailed drawing of a dagger. By following these instructions and using some basic art supplies, you’ll be able to bring this iconic weapon to life on paper. So let’s get started!
Materials Required
Before we begin, gather the following materials:
- Pencil
- Eraser
- Paper (preferably sketch paper)
- Fine-tip markers or pens (optional for outlining)
- Colored pencils or markers (optional for coloring)
Now that you have all the necessary supplies, let’s dive into the step-by-step process of drawing a dagger.
Step 1: Basic Dagger Shape
Start by drawing a long vertical line in the center of your paper. This line will act as the backbone of the dagger. Next, draw a short horizontal line near the top of the vertical line. This horizontal line will be the guard of the dagger. Connect the top of the vertical line to the end of the horizontal line with two diagonal lines to form the basic shape of the dagger’s blade.
Step 2: Handle
From the bottom end of the vertical line, draw a slightly curved line curving inward towards the center. This line will represent the handle of the dagger. Make sure to leave a small gap between the end of this line and the guard to create a visual separation. Add detail to the handle by drawing a series of short horizontal lines across it to resemble the texture or grip.
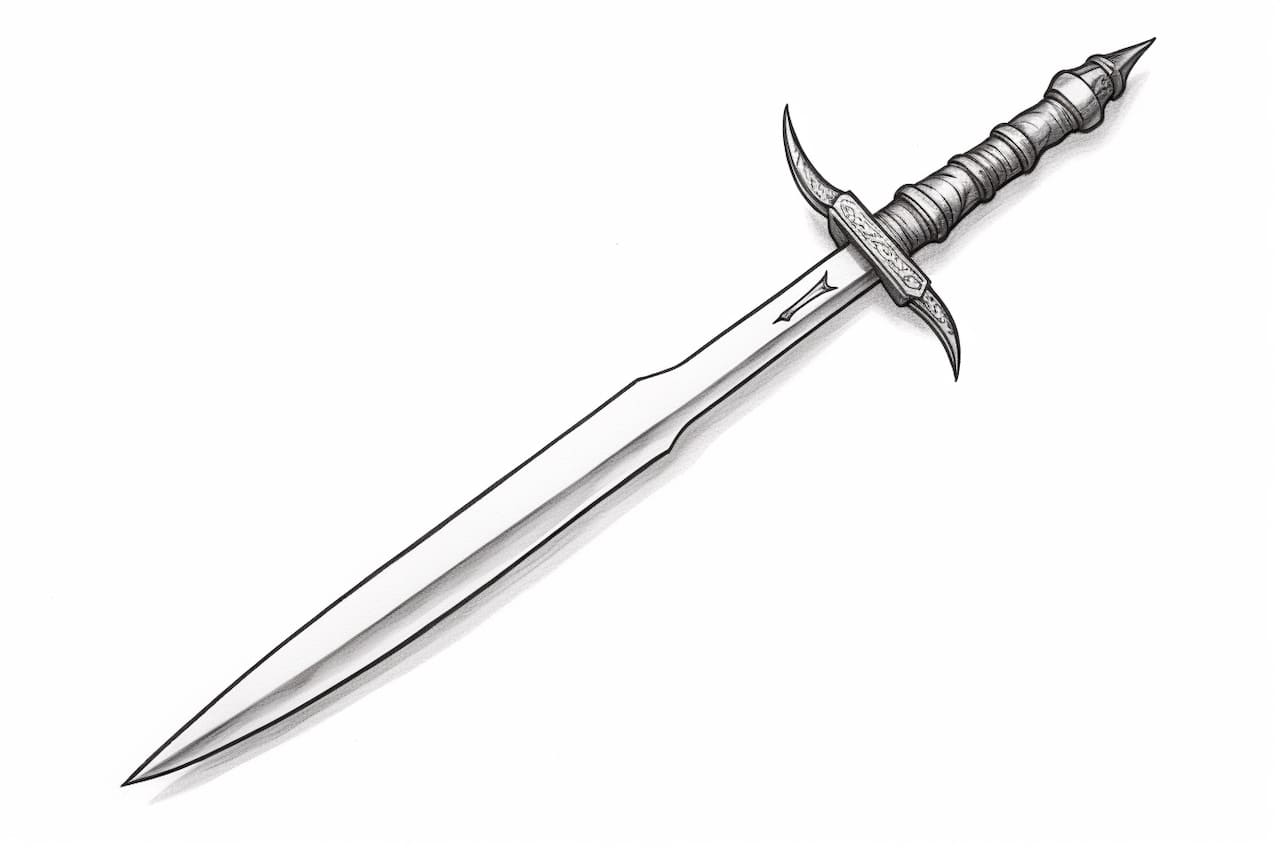
Step 3: Blade Details
To add more depth and realism to the dagger’s blade, draw a line bisecting the blade vertically from the center. This line will serve as a guide when adding the blade’s edge in the next step. Next, draw two diagonal lines in the opposite direction of the blade’s edges to create a beveled effect. These lines should start from the tip of the blade and connect with the vertical guide line you drew previously.
Step 4: Blade Edge
Using the guide line from the previous step, carefully draw the blade’s edge by following the shape of the dagger’s blade. The edge should start from the base of the blade, near the handle, and gradually taper to a sharp point at the tip. Make sure to give the edge a slightly curved shape to add a dynamic look to your drawing.
Step 5: Guard
Next, we’ll add some details to the dagger’s guard. Start by drawing two parallel horizontal lines that extend outward from either side of the handle. These lines should be shorter than the width of the blade. Connect the ends of these lines with two short vertical lines, forming a rectangular shape. To add more visual interest, you can draw small decorative patterns or designs on the guard.
Step 6: Hilt
The hilt is the part of the handle that connects the blade to the guard. To draw the hilt, start by extending the handle’s curved line downwards, past the guard. Curve the line slightly outward and then back in towards the center of the dagger. Finally, draw a small circle or oval shape at the end of the hilt to represent the pommel.
Step 7: Shading and Shadows
Now that we have the basic outline of the dagger, it’s time to add some shading and shadows to give it a three-dimensional look. Start by identifying the light source in your drawing. Typically, the light source comes from the top-left or top-right corner. Shade the areas of the dagger that are opposite the light source, creating a darker tone. Gradually blend the shading with the white areas using a blending tool or your pencil to create a smooth transition.
Step 8: Finalizing the Drawing
To give your drawing a polished look, you can outline the pencil lines with fine-tip markers or pens. This step is optional and can add more definition to your drawing. Once you’re satisfied with the outline, erase any remaining pencil marks to clean up your drawing. If you want to add color, you can use colored pencils or markers to bring your dagger to life.
Congratulations! You’ve successfully drawn a realistic dagger. With practice, you can further refine your skills and create more intricate and detailed drawings.
Conclusion
In conclusion, I hope this step-by-step guide has helped you learn how to draw a dagger. Remember to start with the basic shapes and gradually add details to bring your drawing to life. Don’t forget to experiment with different shading techniques and colors to make your drawing unique. So grab your art supplies and start creating your own masterpiece! Happy drawing!