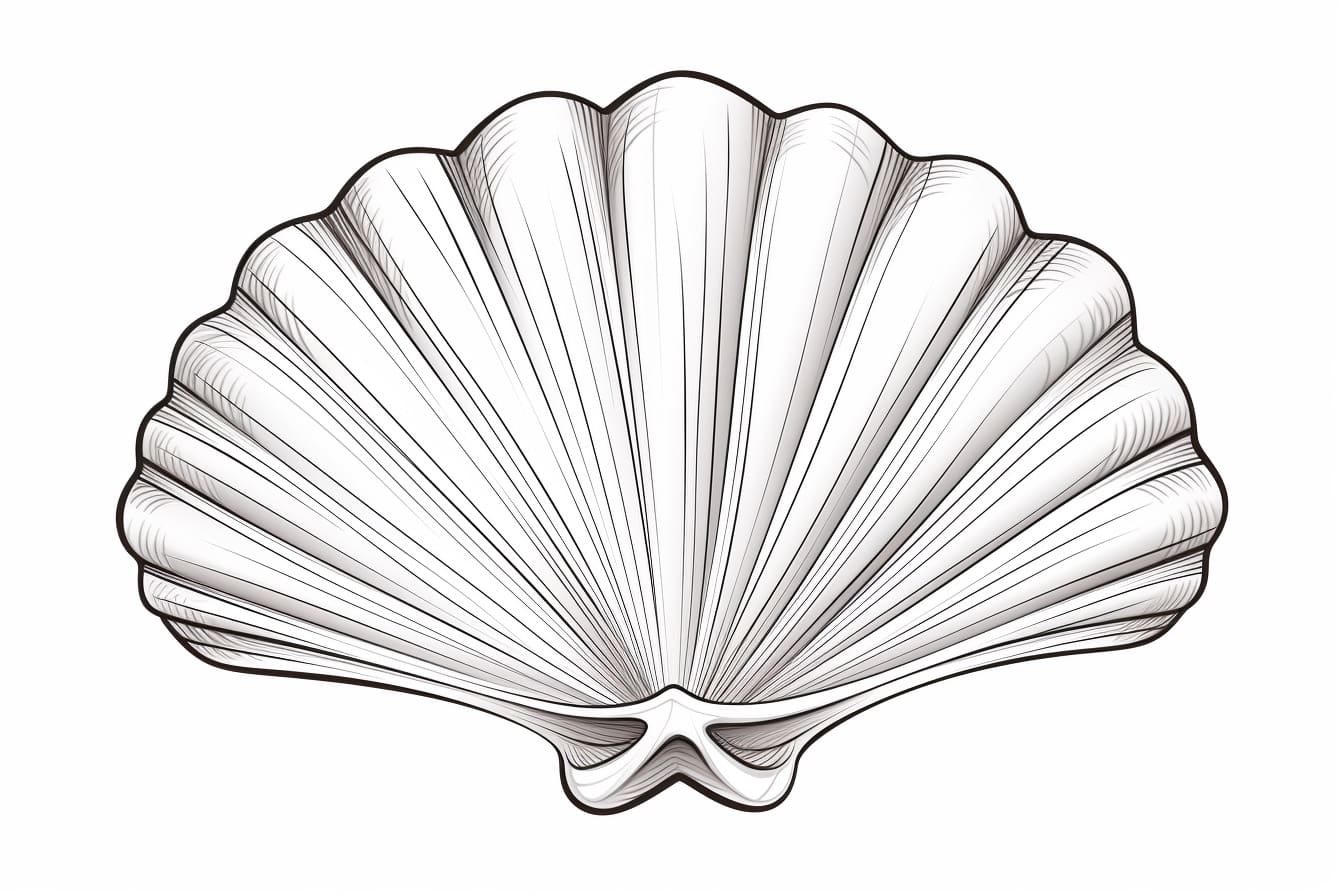
Are you a budding artist looking to expand your drawing skills? Drawing nature-inspired objects can be a great way to unleash your creativity. In this tutorial, we will learn how to draw a scallop, a beautiful and intricate sea creature. With step-by-step instructions, you’ll be able to create a stunning representation of this fascinating creature. So, let’s get started and dive into the world of drawing scallops!
Materials Required
To draw a scallop, you will need the following materials:
- Pencil: A good quality pencil that allows for smooth and precise lines.
- Paper: A clean sheet of paper to draw on. You can choose any type of paper, but a heavier weight paper will provide better results.
- Eraser: Select an eraser suitable for your drawing medium. Make sure it can erase pencil marks without smudging or damaging the paper.
- Fine-tip Pen (Optional): If you want to add more details or outline your drawing with a pen, a fine-tip pen will be useful.
Now that you have your materials ready, let’s move on to the step-by-step instructions.
Step 1: Basic Outline
Start by lightly sketching a large oval shape in the center of your paper. This will be the main body of the scallop. Keep the lines light and loose, as they will be erased later. Remember, the size of the oval will determine the overall size of your scallop.
Step 2: Add the Shell
Next, draw a curved line that connects the top and bottom of the oval shape. This line represents the scallop’s shell. Start from the top left of the oval and curve it gently towards the bottom right. Repeat the same curve on the other side, connecting the top right to the bottom left. The shape should resemble a semi-circle.
Step 3: Detail the Shell
To add more depth and realism to your scallop drawing, let’s add some detail to the shell. Start by drawing several curved lines, parallel to the outer edge of the shell. These lines represent the individual ridges on the shell. Space them evenly and make sure they follow the curve of the shell.
Step 4: Draw the Eye
Move on to drawing the eye of the scallop. Towards the top left of the oval shape, draw a small circular shape. This will be the eye. Inside the eye, add a tiny dot or pupil to give it more definition.
Step 5: Add Tentacles
Scallops have tentacles that extend from either side of their bodies. To draw these tentacles, start by drawing a curved line extending from the bottom left of the oval shape. Repeat the same on the other side, starting from the bottom right. These lines should curve slightly outward and then taper off towards the end.
Step 6: Detail the Tentacles
To add texture and detail to the tentacles, draw several small, curved lines along their length. These lines represent the small bumps or suckers found on the scallop’s tentacles. Vary the length and spacing of these lines to create a natural look.
Step 7: Erase Guidelines
Now that you have completed the basic structure and details of your scallop, it’s time to clean up your drawing. Take an eraser and carefully remove any unwanted pencil lines, including the initial oval shape and guidelines. Be gentle to avoid smudging or damaging your drawing.
Step 8: Add Finishing Touches
To give your drawing a polished look, you can now go over the pencil lines with a fine-tip pen. This step is optional but can add more definition and depth to your drawing. You can also use the pen to outline certain areas or add any additional details you desire.
Conclusion
Congratulations! You have successfully drawn a scallop. By following the step-by-step instructions and using your creativity, you have created a beautiful representation of this interesting sea creature. Remember, practice makes perfect, so don’t be afraid to experiment with different techniques and styles. Keep honing your drawing skills, and soon you’ll be able to tackle even more complex subjects. Happy drawing!