Drawing a human skull can be a challenging yet rewarding artistic endeavor. Whether you are an aspiring artist or simply looking to enhance your drawing skills, this step-by-step guide will help you create a realistic and accurate representation of a human skull. With a little practice and patience, you will be able to capture the intricate details and unique features of this complex skeletal structure.
Materials Required
Before we dive into the steps, let’s gather the necessary materials:
- Pencil: Use a graphite pencil with HB or 2B lead for sketching and initial outlines.
- Eraser: Keep a soft, kneaded eraser handy to correct mistakes and lighten your pencil marks.
- Paper: Select a smooth, heavyweight paper that is suitable for sketching or drawing.
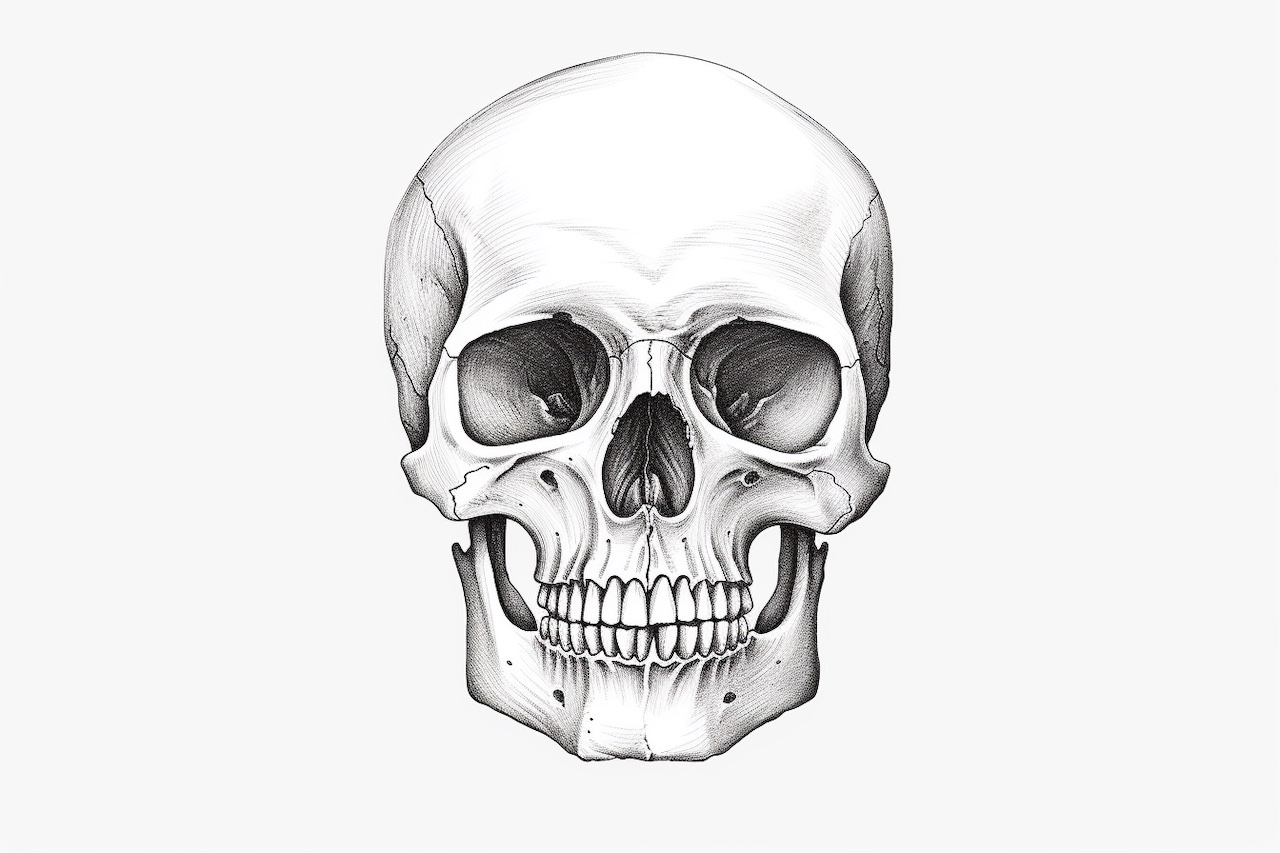
- Reference Image: Find a high-quality reference image of a human skull to guide your drawing.
Now that we have everything we need, let’s get started!
Step 1: Basic Shape and Proportions
Begin by lightly sketching a basic oval shape for the skull. This will serve as a guideline for the overall structure. Pay attention to the angle and direction in which you want the skull to face. Next, draw a vertical line in the center of the oval to indicate the midline of the skull. This will help you maintain proper proportions as you add more details.
Step 2: Eye Sockets and Nose
Using your reference image as a guide, carefully sketch the eye sockets on either side of the midline. Pay attention to the shape and size of the sockets, as they can vary depending on the gender and age of the skull you are drawing. Next, draw the triangular shape of the nose below the eye sockets, again referring to your reference image.
Step 3: Jawline and Teeth
Extend the bottom of the oval to create the jawline of the skull. The jawline should curve outward slightly and meet at a point near the center of the oval. Once you have established the jawline, draw a horizontal line to indicate the position of the teeth. Divide this line into equal sections to represent the individual teeth. Remember that the teeth should be symmetrical on both sides of the jaw.
Step 4: Cheekbones and Temples
Begin adding more definition to the skull by sketching the cheekbones. These should be positioned slightly below the eye sockets and curve outward to create a three-dimensional effect. Next, draw the temples on either side of the skull, paying attention to their shape and how they connect with the rest of the skull.
Step 5: Adding Details
Now that you have established the basic structure of the skull, it’s time to add more intricate details. Begin by carefully drawing the contours of the eye sockets, paying close attention to their shape and depth. Next, add the nasal cavity by sketching the openings on either side of the nose. Be mindful of the size and shape of the nasal cavity, as this can vary.
Step 6: Additional Features
Continue to add more details to your skull drawing. Sketch the shape and structure of the teeth, paying attention to their size, positioning, and overall symmetry. Don’t forget to add any additional features such as the sutures (lines) where the skull bones connect, or any unique characteristics specific to the skull you are drawing.
Step 7: Shading and Texturing
To bring your skull drawing to life, add shading and texture. Use your pencil to create varying tones and gradients, paying attention to the light source and how it interacts with the skull. Add shadows to the eye sockets, nasal cavity, and other areas where light may be blocked. Use hatching and cross-hatching techniques to create texture and depth.
Conclusion
Drawing a human skull is a wonderful way to enhance your drawing skills and learn more about human anatomy. By following these step-by-step instructions, you can create a realistic and accurate representation of this complex skeletal structure. Remember to be patient and practice regularly to improve your skills. Happy drawing!