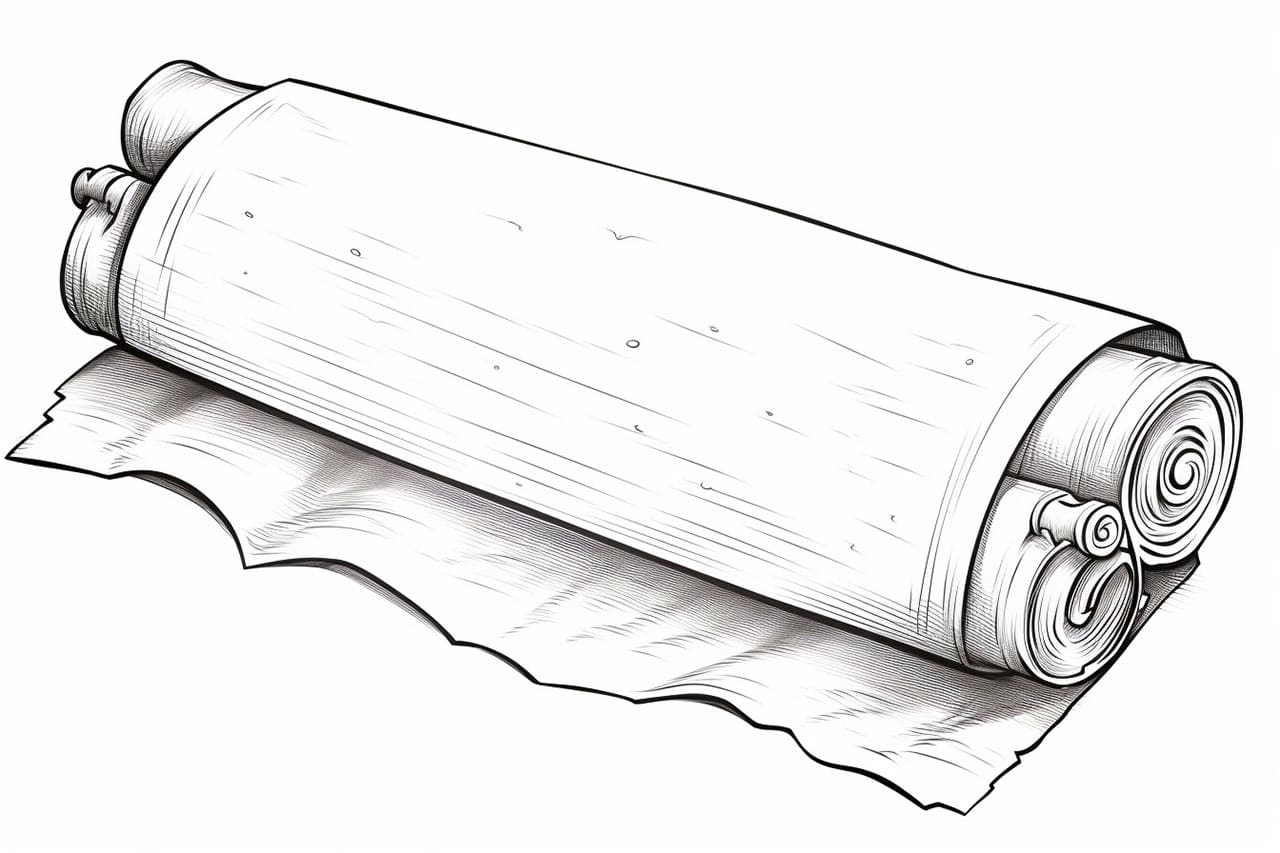
Welcome to this step-by-step guide on how to draw a scroll! Whether you’re an aspiring artist or simply looking to enhance your drawing skills, this tutorial will walk you through the process of creating a beautiful and intricate scroll design. So grab your materials and let’s get started!
Materials Required
To create your scroll drawing, you will need the following materials:
- Pencil
- Eraser
- Fine-tip pen or marker
- Paper
Now that you have your materials ready, let’s dive into the step-by-step instructions.
Step 1: Sketch the Outline
Start by lightly sketching the outline of your scroll. Begin with a vertical line in the center of your paper. This line will act as the main axis for your scroll. Then, draw two curved lines branching out from the center line, forming the sides of the scroll. Keep the lines loose and flowing, as scrolls often have organic and elegant shapes.
Step 2: Add Details to the Sides
Next, add some details to the sides of the scroll. Start by drawing a smaller curved line parallel to each side of the scroll. These lines will define the thickness of the scroll’s border. Then, draw a series of small curves along the outer edges of the side lines to mimic the rolled-up appearance of a scroll.
Step 3: Create the Top and Bottom Caps
Now it’s time to create the decorative top and bottom caps of the scroll. Begin by drawing two oval shapes, one at the top and one at the bottom of the scroll. These ovals will serve as the end pieces of the scroll design. Add some intricate details to these shapes, such as swirls, leaves, or other decorative elements.
Step 4: Design the Inner Panel
In the center of the scroll, draw a rectangular shape that will serve as the inner panel. This is where you can get creative and add your own unique design. You could draw a landscape, a quote, or any other image that you desire. Take your time to sketch out the details and ensure that they fit nicely within the inner panel.
Step 5: Refine the Outline
Once you are satisfied with the basic structure and design of your scroll, it’s time to refine the outline. Use your pencil to darken the lines, making them more prominent. Be sure to erase any unnecessary guidelines or mistakes along the way. Take your time during this step to ensure that your scroll looks clean and polished.
Step 6: Ink the Design
Now that your pencil outline is complete, it’s time to ink your scroll drawing. Grab a fine-tip pen or marker and carefully trace over the lines of your design. Pay close attention to the intricate details and try to keep your lines smooth and consistent. If you prefer, you can also use different line weights to add depth and dimension to your scroll.
Step 7: Add Shading and Texture
To enhance the realism and depth of your scroll, use your pen or marker to add shading and texture. This can be done by creating crosshatching or stippling effects on the scroll’s border and inner panel. Experiment with different techniques and strokes to add visual interest and make your scroll design more captivating.
Step 8: Finalize the Scroll
In this final step, take a moment to evaluate your scroll drawing. Make any necessary adjustments or touch-ups to ensure that it meets your artistic vision. Once you are satisfied with the result, erase any remaining pencil marks. You now have a beautifully drawn and intricately detailed scroll!
Conclusion
Congratulations on completing your scroll drawing! By following these step-by-step instructions, you have learned how to create a stunning scroll design from start to finish. Remember, practice makes perfect, so don’t hesitate to keep honing your skills and experimenting with different scroll variations. Have fun and enjoy the creative process!