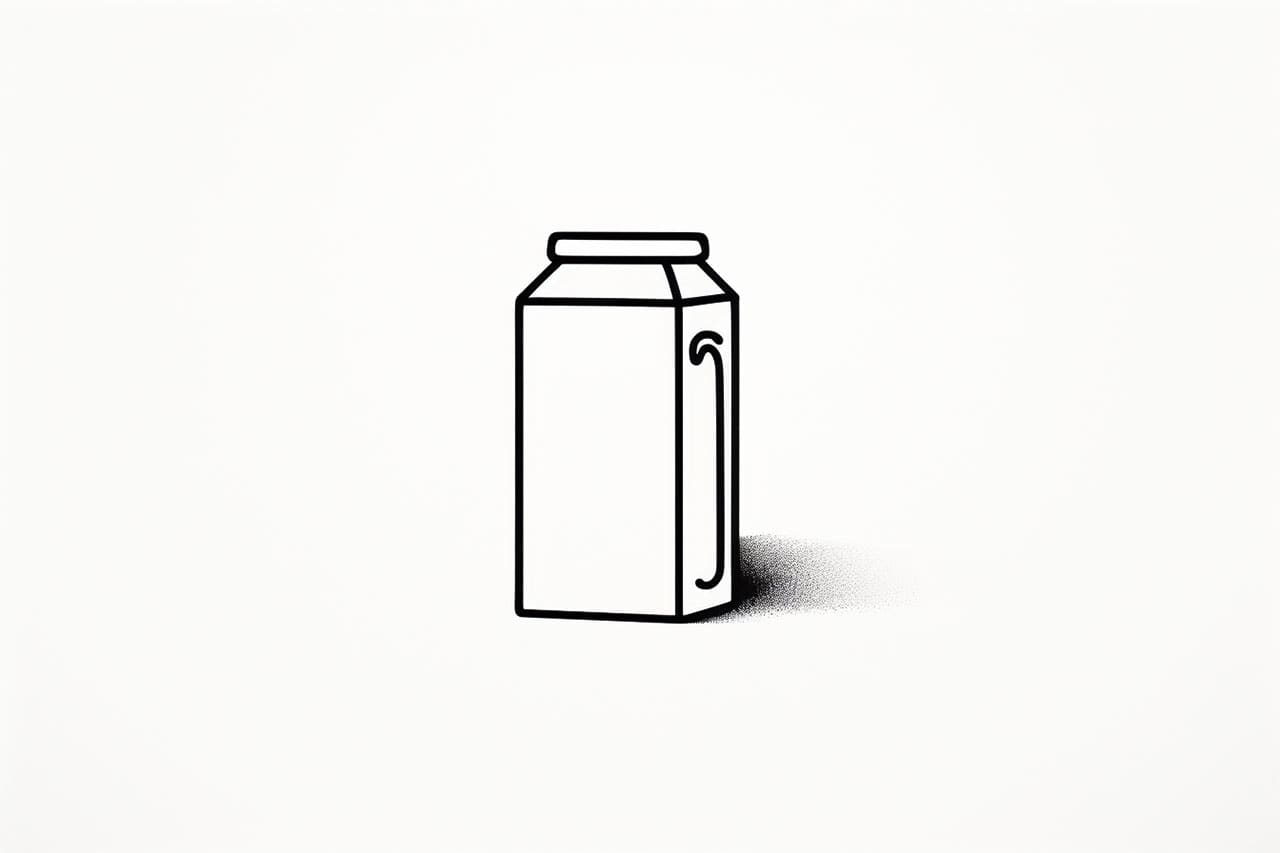
Do you want to learn how to draw a milk carton? Whether you are an aspiring artist or just looking for a fun and creative activity, this step-by-step guide will help you create a realistic and detailed drawing of a milk carton. With clear instructions and simple techniques, you will be able to bring your artwork to life. So, grab your art supplies and let’s get started!
Materials Required
Before we begin, make sure you have the following materials:
- Drawing paper: Choose a smooth surface paper that is suitable for your preferred drawing medium, such as pencil or pen.
- Pencils: Have a range of pencils in different hardness, such as 2B, 4B, and 6B, to create different shades and textures.
- Eraser: Use a soft eraser to correct any mistakes or lighten areas of your drawing.
- Ruler: A ruler will help you create accurate straight lines and measurements.
- Pencil sharpener: Keep your pencils sharp to achieve precise details in your drawing.
- Reference image: Find a photo or a real milk carton to use as a reference throughout the drawing process.
Now that you have all the necessary materials, let’s begin the step-by-step process of drawing a milk carton.
Step 1: Outline the Basic Shape
Start by lightly sketching the basic shape of the milk carton on your drawing paper. Use a pencil and make sure to create the outline with light and loose strokes. Pay attention to the proportions and angles of the carton. It may be helpful to compare the width and height ratios to ensure accuracy.
Step 2: Add the Details
Once you have the basic shape, add the details such as the spout, handle, and folds on the sides of the carton. Observe the reference image and carefully sketch these details, focusing on their placement and proportions. Take your time with this step to achieve a more realistic representation of a milk carton.
Step 3: Refine the Outline
Now, go over the initial sketch and refine the outline of the milk carton. Use a darker pencil or pen to create more defined lines. Pay close attention to the edges, corners, and curves of the carton. This step will give your drawing a more polished look.
Step 4: Add Texture and Shadows
To make your milk carton drawing look more realistic, it’s important to add texture and shadows. Start by shading the areas that are not reflecting light, such as the sides and folds of the carton. Use your darker pencil to create gradual shading and give the illusion of depth. Pay attention to the direction of the light source in your reference image and shade accordingly.
Step 5: Highlight and Enhance
Next, use a light pencil or an eraser to create highlights on the milk carton. Identify the areas that are reflecting the most light, such as the spout or the top edges. Carefully lighten these areas to create a sense of volume and make your drawing more visually appealing.
Step 6: Final Touches
Lastly, go over your drawing and make any necessary adjustments or final touches. Check for any areas that need more shading or highlight, and adjust the proportions if needed. Take a step back and look at your drawing from a distance to evaluate its overall appearance. Once you are satisfied with the result, you can consider your milk carton drawing complete.
Conclusion
Drawing a milk carton may seem like a challenging task, but with the right techniques and practice, you can create a realistic and detailed representation. By following these step-by-step instructions, you have learned how to outline the basic shape, add details, refine the outline, add texture and shadows, highlight and enhance, and add final touches to your drawing. Remember to be patient, take your time, and have fun with the process. So, pick up your art supplies and start creating your own masterpiece of a milk carton!