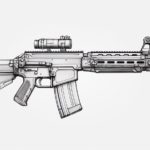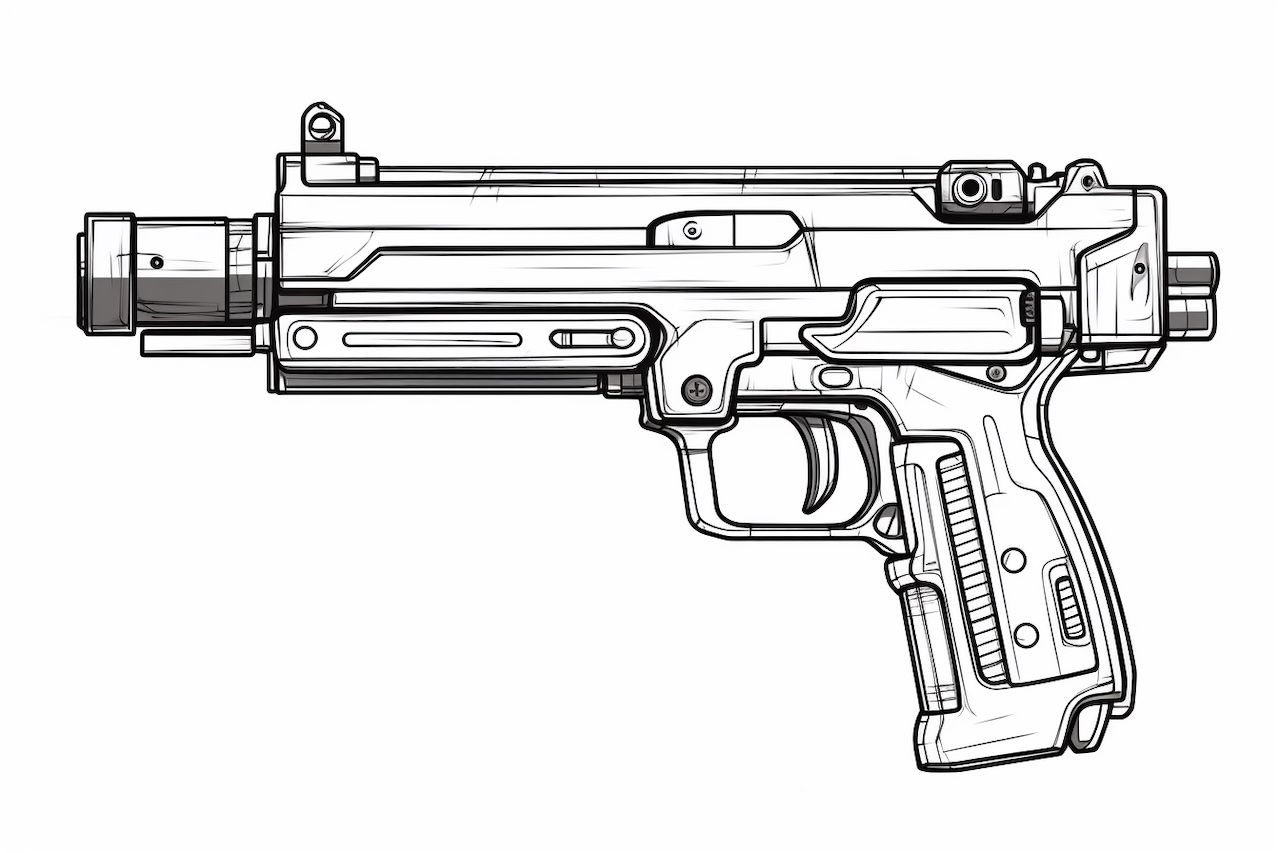
Welcome to this step-by-step guide on how to draw a Nerf Gun! In this article, we will walk you through the process of creating a realistic representation of this iconic toy weapon. Whether you are an aspiring artist looking to improve your skills or simply a fan of Nerf Guns, this tutorial is perfect for you. So grab your pencils and let’s get started!
Materials Required
Before we dive into the drawing process, let’s gather the materials you will need:
- Drawing paper: Choose a high-quality paper suitable for your preferred medium, such as graphite pencils or colored pencils.
- Pencils: A set of graphite pencils ranging from soft (B) to hard (H) grades. This range will provide you with the necessary shading options.
- Eraser: A kneaded eraser works best for pencil drawings, as it doesn’t leave any residue and can be easily molded to erase small details.
- Sharpener: Make sure to keep your pencils sharp for precise lines and details.
- Reference Image: Find a clear image of a Nerf Gun to use as a visual reference throughout the drawing process.
Now that we have our materials ready, let’s proceed to the step-by-step guide.
Step 1: Outline the Basic Shape
Start by lightly sketching the basic shape of the Nerf Gun. Focus on capturing the overall proportions and contours of the weapon. Pay attention to any distinctive features, such as the trigger, barrel, and handle. Use light, loose lines, as this is only the initial outline.
Step 2: Refine the Outline
Once you are satisfied with the basic shape, refine your outline by adding more detail. Take your time to carefully define the edges, curves, and angles of the Nerf Gun. Pay close attention to the placement and proportions of various components. This step is crucial for achieving a realistic depiction of the weapon.
Step 3: Add the Details
Now it’s time to add the intricate details that make a Nerf Gun unique. Begin by sketching the various buttons, switches, and dials that are present on the toy. Take a closer look at your reference image to ensure accuracy. Next, draw the grooves, lines, and patterns on the barrel and other sections of the Gun. Remember to keep your lines light and precise, gradually building up the desired level of detail.
Step 4: Shading and Texture
To give your drawing depth and dimension, it’s important to incorporate shading and texture. Start by identifying the light source in your reference image, and imagine how it would create highlights and shadows on the Nerf Gun. Use the softer pencils (B grade) to create darker areas and the harder pencils (H grade) for lighter areas. Gradually build up the shading, paying attention to the transition between light and dark areas. Additionally, use small strokes or crosshatching to create realistic textures, such as the grip pattern or metallic surfaces.
Step 5: Finalize the Drawing
In this final step, refine any remaining details and make any necessary adjustments. Take a step back and evaluate your drawing as a whole, ensuring that everything is in proportion and accurately represents the Nerf Gun. Erase any stray lines or smudges that may have appeared during the shading process. Once you are satisfied with the result, you can choose to add color using colored pencils or leave it as a black and white illustration.
Conclusion
Congratulations! You have successfully learned how to draw a Nerf Gun. By following these step-by-step instructions and utilizing the necessary materials, you can create a realistic and detailed representation of this iconic toy weapon. Enjoy the process of bringing your drawing to life and don’t hesitate to experiment with different techniques and styles. With practice, you’ll be able to enhance your artistic skills and create even more impressive drawings. So grab your pencil and start drawing your very own Nerf Gun masterpiece today!