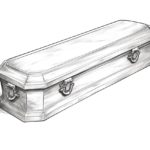
Learn how to draw a manger in a few easy steps with this comprehensive guide.
Welcome to this step-by-step tutorial on how to draw a manger. A manger is a simple and significant symbol associated with the nativity scene, representing the humble birthplace of Jesus Christ. By following this guide, you will learn how to recreate this iconic image with ease. So grab your pencils, paper, and let’s get started!
Materials Required
Before we begin, make sure you have the following materials:
- A pencil – preferably a medium softness (HB or 2B) for sketching and outlining.
- Paper – any type of paper will do, but sketch paper or drawing paper is recommended for better results.
- Eraser – a kneaded eraser or a vinyl eraser will come in handy for making corrections.
- Ruler – a straight edge ruler should be available for drawing straight lines and maintaining symmetry.
- Optional: Colored pencils or markers – you may want to add some color to your drawing for a more vibrant final result.
Now that we have everything we need, let’s dive into the step-by-step process of drawing a manger.
Step 1: Draw the Base
Start by drawing a rectangular shape for the base of the manger. Use your ruler to ensure straight and even lines. The size of the base will depend on how large you want your manger to be. Feel free to adjust the dimensions according to your preference.
Step 2: Add the Side Panels
On each side of the base, draw two vertical lines that extend upward, parallel to each other. These lines will serve as the side panels of the manger. Make sure they are symmetrical and of equal length.
Step 3: Outline the Roof
At the top of the side panels, draw a horizontal line connecting them. This line represents the roof of the manger. Add a gentle curve to the roofline to give it a more organic look. The curve should slightly descend towards the front of the manger.
Step 4: Create the Crossbars
Inside the manger, draw two horizontal lines parallel to the base. Place them at equal distances from each other and parallel to the roofline. These lines will act as crossbars that hold the hay or straw.
Step 5: Draw the Hay
Fill the space between the crossbars with a series of short, curved lines. These lines simulate the hay or straw that traditionally covers the interior of a manger. Crisscross the lines in a random pattern to create a textured appearance.
Step 6: Refine the Outline
Clean up the sketch by darkening the main outlines and erasing any unnecessary lines. Pay attention to the overall shape and proportions of the manger. Take your time to ensure that everything looks balanced and symmetrical.
Step 7: Add Details
Now it’s time to add some additional details to make your manger drawing more realistic. You can draw nails or screws on the crossbars and include some texture on the side panels to resemble wood. Be creative and add any other elements that you think would enhance the overall appearance of the manger.
Step 8: Color (Optional)
If you want to add color to your drawing, now is the perfect time. Use colored pencils or markers to bring your manger to life. You can select traditional earthly colors for the wood and hay, or let your imagination run wild with a vibrant color scheme.
Conclusion
Congratulations! You have successfully learned how to draw a manger. By following the step-by-step instructions provided in this guide, you should now have a beautiful representation of this iconic symbol. Remember to practice and experiment with different techniques to further develop your drawing skills. Happy drawing!