A bookshelf is a wonderful piece of furniture that not only serves a practical purpose but also adds charm and character to any room. If you are interested in learning how to draw a bookshelf, this step-by-step guide will walk you through the process. Whether you are a beginner or an experienced artist, with a little patience and practice, you will be able to create a beautiful bookshelf drawing.
Materials Required
Before we begin, let’s gather the materials you will need:
- Paper: You can use any type of paper, but it’s best to use a heavier weight paper such as sketch paper or drawing paper.
- Pencil: A regular graphite pencil will work fine, but if you prefer, you can use a mechanical pencil for more precision.
- Eraser: A good quality eraser will come in handy for making corrections and cleaning up your drawing.
- Ruler: A ruler or straightedge will help you draw straight lines and ensure accuracy.
- Colored pencils or markers (optional): If you want to add color to your drawing, you can use colored pencils or markers.
Now that we have our materials ready, let’s get started on drawing a bookshelf!
Step 1: Outline the Basic Shape of the Bookshelf
Begin by drawing a horizontal line towards the bottom of your paper. This will be the base of the bookshelf. Next, draw two vertical lines rising from each end of the base line to create the sides of the bookshelf. You can adjust the height of these lines based on how tall you want your bookshelf to be.
Step 2: Add Shelves to the Bookshelf
Divide the vertical lines into equal sections to represent the shelves. Draw horizontal lines across the sides of the bookshelf, making sure they are parallel to the base line. The number of shelves you include is up to you, but it’s common to have three or four shelves in a bookshelf.
Step 3: Draw the Back Panel of the Bookshelf
Now it’s time to draw the back panel of the bookshelf. Start by drawing a vertical line on the left side of the bookshelf, parallel to the sides. Then, draw a series of horizontal lines across the bookshelf, connecting the vertical lines on each side. These lines represent the back of the bookshelf.
Step 4: Add Details to the Shelves
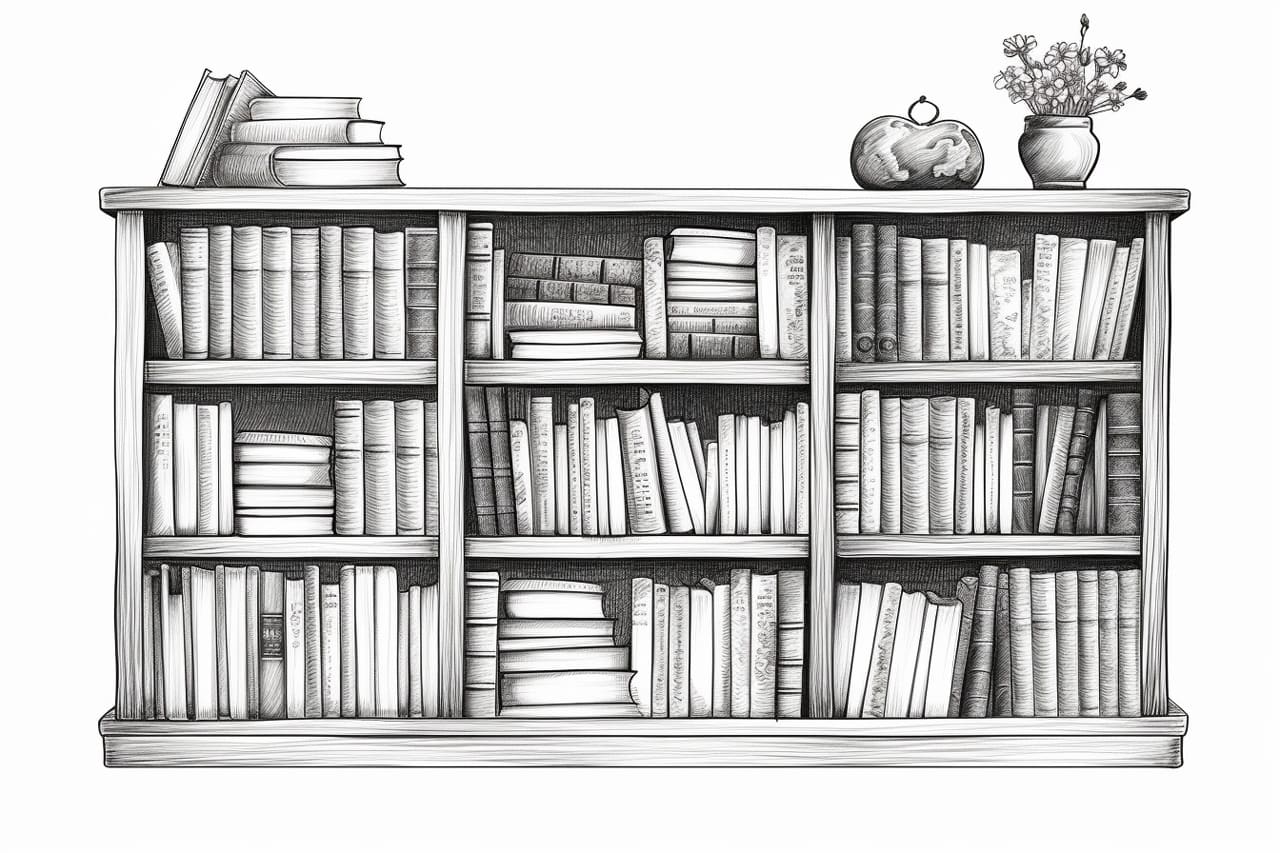
To make your bookshelf drawing more realistic, add some details to the shelves. Begin by drawing small rectangles or squares within each shelf to represent the books. You can vary the sizes and orientations of the books to add visual interest. You can also draw other items such as vases, picture frames, or figurines on the shelves to personalize your drawing.
Step 5: Refine the Lines and Add Depth
Now that you have the basic structure of the bookshelf, go over your drawing and refine the lines. Use your ruler to make straight lines where necessary, and erase any unnecessary lines or mistakes. To add depth to your drawing, you can use shading techniques to create highlights and shadows. Start by shading the areas where the shelves meet the sides and the back of the bookshelf, as these areas would naturally be darker.
Step 6: Optional – Add Color to Your Drawing
If you want to take your bookshelf drawing to the next level, you can add color using colored pencils or markers. Consider the materials of the books and the style of the room where the bookshelf is located when choosing your colors. Take your time and layer the colors to create depth and dimension. You can also add shading and highlights using colored pencils or markers to make your drawing more realistic.
Conclusion
Drawing a bookshelf can be a fun and rewarding experience. By following these step-by-step instructions and using your creativity, you can create a beautiful bookshelf drawing that showcases your artistic skills. Remember to practice and experiment with different techniques to improve your drawing abilities. So grab your pencils and paper, and let’s get started on your bookshelf masterpiece!