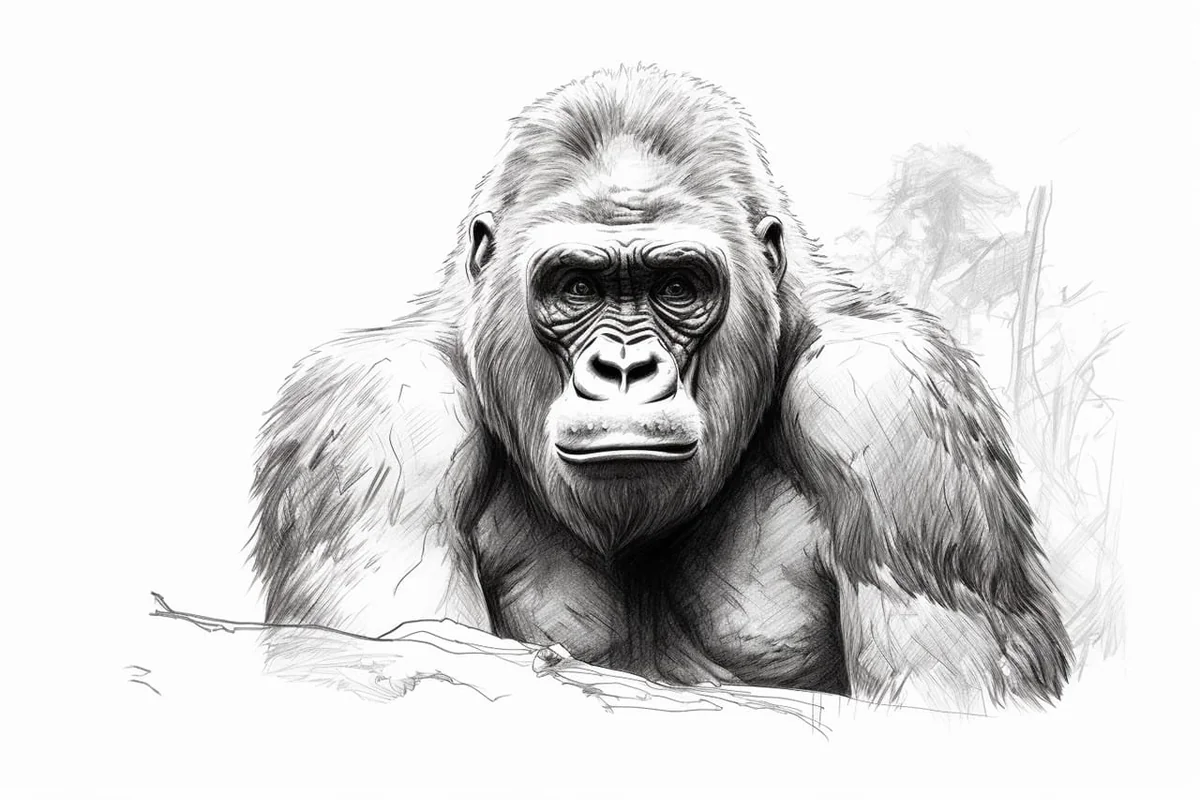
How to Draw a Gorilla in 10 Simple Steps
Learn how to draw with this step-by-step tutorial.
Materials You'll Need
- Drawing paper
- Pencil (HB or 2B)
- Eraser
- Blending stump
Welcome to this immersive guide where you'll learn how to draw one of the most powerful and awe-inspiring creatures in the animal kingdom—the gorilla! Known for their majestic presence, soulful eyes, and remarkable strength, gorillas are both a challenge and a joy to capture in art.
Whether you're a budding artist or a seasoned pro, this tutorial will guide you through the process of how to draw a gorilla. By breaking the steps into simple, manageable parts, we'll help you highlight the details that make these great apes extraordinary. From their massive shoulders, textured fur, and expressive faces, you'll gain techniques to showcase their character and majesty on paper.
So, gather your pencils, paper, and a bit of creative courage, and let's embark on this artistic adventure. Prepare to channel your inner explorer as we capture the spirit of the mighty gorilla in just a few easy steps!


Materials Required
Before we delve into the drawing process, let's gather the necessary materials:
-
Drawing paper or sketchbook: Choose a smooth and sturdy surface that can handle pencil and eraser without tearing or smudging.
-
Pencils: Collect a range of graphite pencils, such as 2H, HB, 2B, 4B, and 6B. These varying grades will allow you to achieve different tones and textures in your drawing.
-
Erasers: Have a kneadable eraser and a soft eraser on hand for correcting mistakes and achieving highlights.
-
Blending tools: Consider using blending stumps or tortillions to create smooth gradients and soften edges in your drawing.
-
Reference image: Find a clear and detailed photograph of a gorilla to reference throughout your drawing process. This will help you understand the gorilla's anatomy and capture its unique features accurately.
Now that we have everything we need, let's move on to the drawing steps.
How to Draw a Gorilla: Step-by-Step Instructions
Step 1: Sketch the Foundation
Start by lightly sketching the gorilla's basic structure. Begin with a large oval for the head, positioned slightly tilted to reflect the gorilla's posture. Beneath the head, draw an elongated oval for the body, slanting it slightly to capture the gorilla's hunched stance. These simple shapes form the framework for your drawing, so keep your strokes light and adjustable.
Step 2: Map Out the Facial Features
Focus on the gorilla's distinctive face. Inside the head oval, draw two small circles for the eyes, close together to reflect their anatomy. Within each circle, sketch the irises and pupils, leaving a small white highlight to bring the eyes to life. Add a larger oval beneath the eyes for the snout. Below the snout, outline the wide mouth and a rounded triangle for the nose. These shapes will guide you in refining the gorilla's expressive face.
Step 3: Add Ears and Begin the Fur
Draw two rounded shapes on either side of the head for the ears. Pay attention to their placement—they should be level with the eyes. Gorillas have small but noticeable ears, so don't exaggerate their size. Begin adding facial hair using short, quick strokes that follow the contours of the face. These strokes will give texture and direction to the fur.
Step 4: Refine the Body Structure
Turn your attention to the gorilla's powerful body. Add broad shoulders by sketching curved lines extending outward from the head. Draw the arms, making them thick and muscular, and connect them to a barrel-shaped torso. Keep the gorilla's hunched posture in mind as you refine the lines, curving the back slightly.
Step 5: Shape the Arms and Hands
Outline the gorilla's massive arms, starting with the upper arms and moving to the forearms. Add thickness to suggest muscle definition, using short lines for subtle texture. For the hands, sketch large, rounded palms with opposable thumbs. Gorillas' hands are one of their defining features, so emphasize their size and strength.
Step 6: Draw the Legs and Feet
Add the legs, keeping them shorter and stockier compared to the arms. Sketch the feet, ensuring they reflect the gorilla's anatomy, with long, curved toes designed for grasping. The toes should have slight curvature to give the feet a realistic, natural appearance.
Step 7: Add Fur Texture Across the Body
Now it's time to add the gorilla's iconic fur. Use short, overlapping strokes to create texture. Start at the top of the head, working your way down the shoulders, arms, and torso. Vary the stroke length to reflect the different fur densities across the body—longer strokes on the shoulders and shorter strokes on the face.
Step 8: Refine the Facial Features
Return to the face and add details to bring your gorilla to life. Refine the eyes, darkening the pupils and adjusting the shape for expression. Add prominent eyebrows above the eyes, and deepen the lines around the nose and mouth. Use shading to create depth, paying attention to the shadows around the snout and jawline.
Step 9: Add Shading and Depth
Bring dimension to your drawing with careful shading. Identify your light source and darken areas in shadow, such as under the chin, around the arms, and beneath the torso. Use a range of pencils (HB for lighter areas, 2B and 4B for shadows) to create smooth transitions between light and dark. Blend the shading with a blending stump or tissue for a polished look.
Step 10: Final Touches and Finishing Details
Step back and review your drawing. Adjust any areas that need refinement, such as uneven shading or unclear lines. Darken the outlines where necessary and erase stray marks to clean up the overall look. For a final touch, add highlights to the fur, particularly on the shoulders and head, to mimic the way light interacts with the gorilla's body.
Wrapping Up: Your Majestic Gorilla is Complete!
Congratulations, artist! You've successfully brought a gorilla to life on paper, showcasing its strength, intelligence, and character. Drawing a gorilla is a rewarding challenge that combines capturing its powerful physique with its subtle emotional depth.
Practice regularly to refine your technique, and don't be afraid to experiment with different poses, expressions, or even backgrounds as you practice how to draw a gorilla. Whether you imagine your gorilla in a lush jungle or striking a powerful stance, each drawing is an opportunity to improve and explore.
So keep sketching, keep experimenting, and enjoy the process of bringing the animal kingdom to life through your art.
Gallery of Gorilla Drawings


Fun Facts About Gorillas
-
Gorillas are the largest primates on Earth, with adult males—called silverbacks—sometimes reaching over 400 pounds in the wild.
-
Despite their strength and size, gorillas are gentle and mostly vegetarian, feasting on leaves, stems, fruits, and the occasional insect.
-
There are two species of gorilla—the Eastern and Western gorilla—and four subspecies, each adapted to their forested habitats in Central Africa.
-
Gorillas are incredibly intelligent and have been known to use tools, communicate with gestures, and even learn basic sign language in captivity.
-
Their social groups, known as troops or bands, are typically led by a dominant silverback who protects and guides the group.
-
Gorillas share about 98% of their DNA with humans, making them one of our closest living relatives.
-
A gorilla's nose is like a fingerprint—unique to each individual and used by researchers to identify them in the wild.
-
Gorillas communicate with over 20 different vocalizations, including hoots, grunts, and chest beats, which can signal excitement, warnings, or bonding.
-
Although they're known for chest beating, it's not always a sign of aggression—it can also be playful, attention-getting, or a display of strength.
-
Gorillas are critically endangered due to habitat loss, poaching, and disease—but conservation efforts, ecotourism, and awareness are helping protect them.
Tip: To effectively capture the essence of a gorilla in your drawing, focus on the contours of its muscular build and distinctive facial features. Begin with light, loose sketches to establish the proportions and main shapes, using simple geometric forms—like ovals for the head and cylinders for the arms and legs. Pay special attention to the placement of the eyes; gorillas have deep-set eyes that convey emotion, so ensure they are slightly lower than you might expect on your initial sketch.
Once you're satisfied with the basic outline, transition to a finer pencil or charcoal to add texture, particularly in the fur; short, quick strokes can create a sense of volume and movement. Finally, don't forget to include the gorilla's expressive eyebrows and mouth, as these features are crucial for conveying its character. With patience and practice, you'll bring this magnificent creature to life on your paper!
Suggestions for Scenes and Settings for Gorilla Drawings
-
Jungle Canopy Retreat: Draw a gorilla resting under thick jungle foliage, surrounded by vines, ferns, and dappled light filtering through the trees.
-
Silverback in Thought: Create a powerful portrait of a silverback gorilla sitting with arms crossed and a wise, contemplative expression.
-
Gorilla Family Moment: Illustrate a tender scene of a mother gorilla holding her baby, with other troop members nearby in a peaceful forest clearing.
-
Rainy Day in the Mist: Depict a gorilla walking through the misty mountains, rain lightly falling and clouds curling around the trees—a nod to Gorillas in the Mist.
-
Gorilla at Play: Show a young gorilla swinging from a tree branch or playing with leaves and sticks in a moment of joyful movement.
-
Nighttime Watcher: Picture a silhouette of a gorilla against the moonlit sky, with stars sparkling above the dark canopy.
-
Gorilla and Waterfall: Draw a serene mountain stream or waterfall with a gorilla peacefully sitting at its edge, maybe dipping a hand into the water.
-
Chest-Beating Display: Capture the raw power of a silverback mid chest-beat, surrounded by flying leaves and wide-eyed onlookers.
-
Sketchbook Study: Illustrate several poses of a gorilla on one page—standing, sitting, reaching, eating—as if drawn by a field biologist.
-
Gorilla on the Move: Show a powerful gorilla walking on all fours through a dense trail, with motion lines and perspective to emphasize size and strength.