Welcome to this step-by-step guide on how to draw a tarsier! In this tutorial, I will walk you through the process of creating a realistic and detailed drawing of this fascinating primate. With a few simple materials and a little bit of patience, you will be able to capture the essence of this unique creature on paper. So grab your pencils and let’s get started!
Materials Required
Before we begin, make sure you have the following materials ready:
- A drawing pencil (preferably 2B or 4B)
- An eraser
- A sharpener
- Drawing paper or a sketchbook
- Reference image of a tarsier (you can find one online or use a wildlife photography book)
Now that you have your materials ready, let’s dive into the steps to draw a tarsier.
Step 1: Outline the Basic Shapes
Start by lightly sketching the basic shapes that make up the tarsier’s body. Begin with a large circle for the head and two smaller circles for the eyes. Add a curved line below the head for the body, and sketch four lines extending from it for the limbs. Don’t worry about details at this stage; focus on capturing the proportions and overall form of the tarsier.
Step 2: Refine the Facial Features
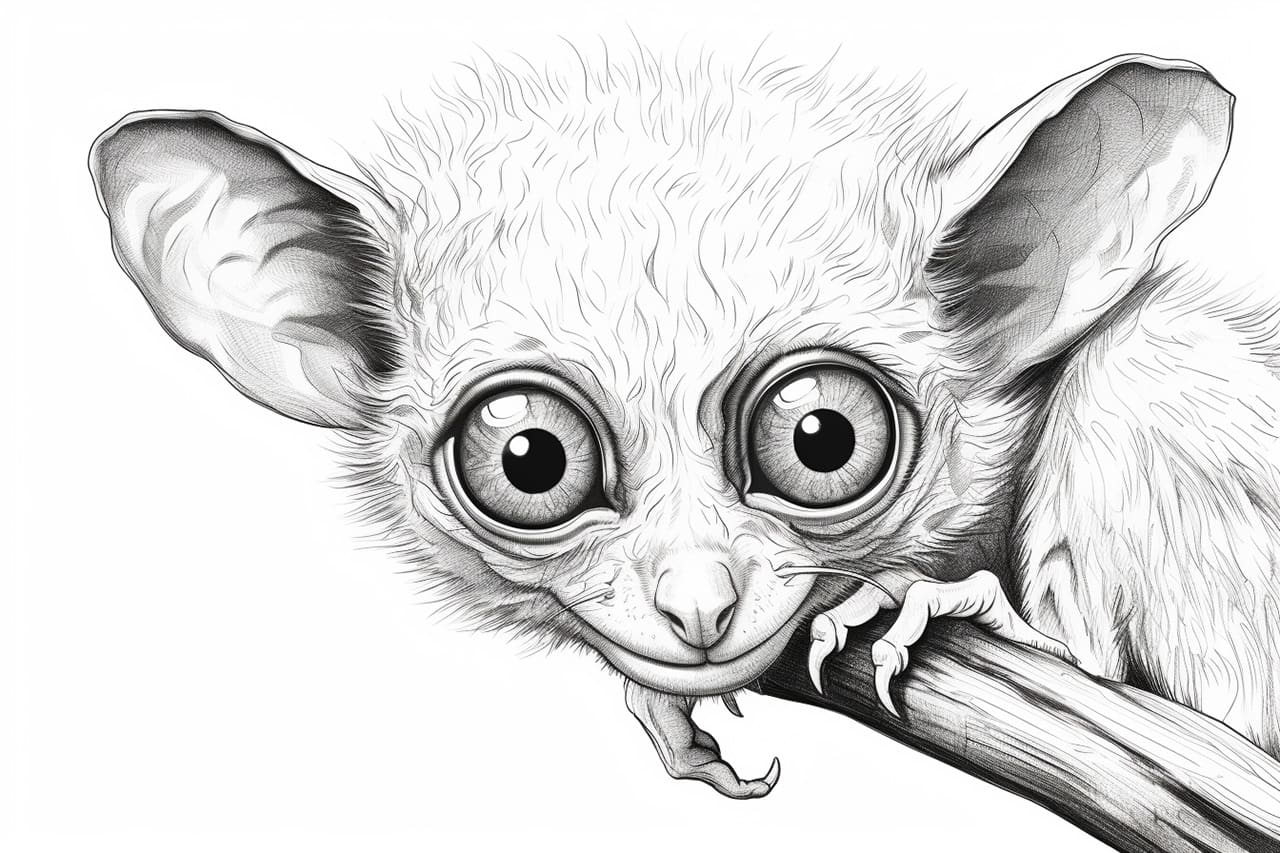
Next, let’s start refining the facial features of the tarsier. Using the reference image as a guide, carefully sketch the shape of the eyes, paying attention to the placement and size. Add a small circle within each eye for the pupils. Then, draw a rounded shape below the eyes to create the snout. Connect the snout with a curved line to form the mouth, and indicate the nostrils with two small dots.
Step 3: Add Ears and Fur
Tarsiers are known for their large ears, so let’s add them to our drawing. Sketch two triangular shapes on top of the head, pointing slightly upward. Pay attention to the placement and size of the ears in relation to the head and facial features. Once the ears are in place, lightly indicate the fur texture by adding short, soft strokes around the head and body.
Step 4: Outline the Limbs and Hands
Now it’s time to define the limbs and hands of the tarsier. Use the initial lines as a guide and refine them by adding more detail. Pay attention to the proportions and shape of each limb, making sure they are in proportion to the body. Tarsiers have long fingers, so show this by drawing the fingers slightly longer than the palm. Indicate the joints by using small ovals or circles.
Step 5: Refine the Body and Tail
With the limbs and hands complete, let’s focus on refining the body and tail. Use curved lines to define the shape of the body, making sure to capture the tarsier’s slim and agile build. Add details such as muscle definition or fur texture to make the drawing more realistic. Extend a long, thin tail from the back of the body, tapering it to a point at the end. Pay attention to the positioning and curvature of the tail, as it contributes to the tarsier’s balance and agility.
Step 6: Add Facial Details
Now that we have the basic structure in place, it’s time to add the finer details to bring our tarsier to life. Using more precise lines, sketch the shape of the eyes, paying attention to the placement, size, and curvature of the eyelids. Add a highlight to each eye to give it a sparkling look. Define the shape of the ears, adding some internal details such as folds or tufts of fur. Use short, diagonal strokes to indicate the fur texture around the face.
Step 7: Finalize the Details
In this final step, take the time to refine all the smaller details of your tarsier drawing. Add more fur texture throughout the body, using short strokes to create a soft and realistic appearance. Pay attention to the folds and wrinkles of the skin, especially around joints and the face. Use your eraser to clean up any stray lines or smudges, ensuring that your drawing looks polished and precise.
And there you have it! You’ve successfully completed a drawing of a tarsier. Remember, practice makes perfect, so don’t be discouraged if your first attempt isn’t exactly as you imagined. Keep practicing, experimenting with different techniques, and soon you’ll be able to capture the spirit of this amazing creature with ease.
Conclusion
Drawing a tarsier may seem challenging at first, but with the right approach and a little practice, anyone can create a stunning representation of this fascinating primate. By following the steps outlined in this tutorial, you have learned how to capture the proportions, details, and unique features of a tarsier on paper. So grab your pencils, let your imagination run wild, and enjoy the process of bringing these incredible animals to life through your art!