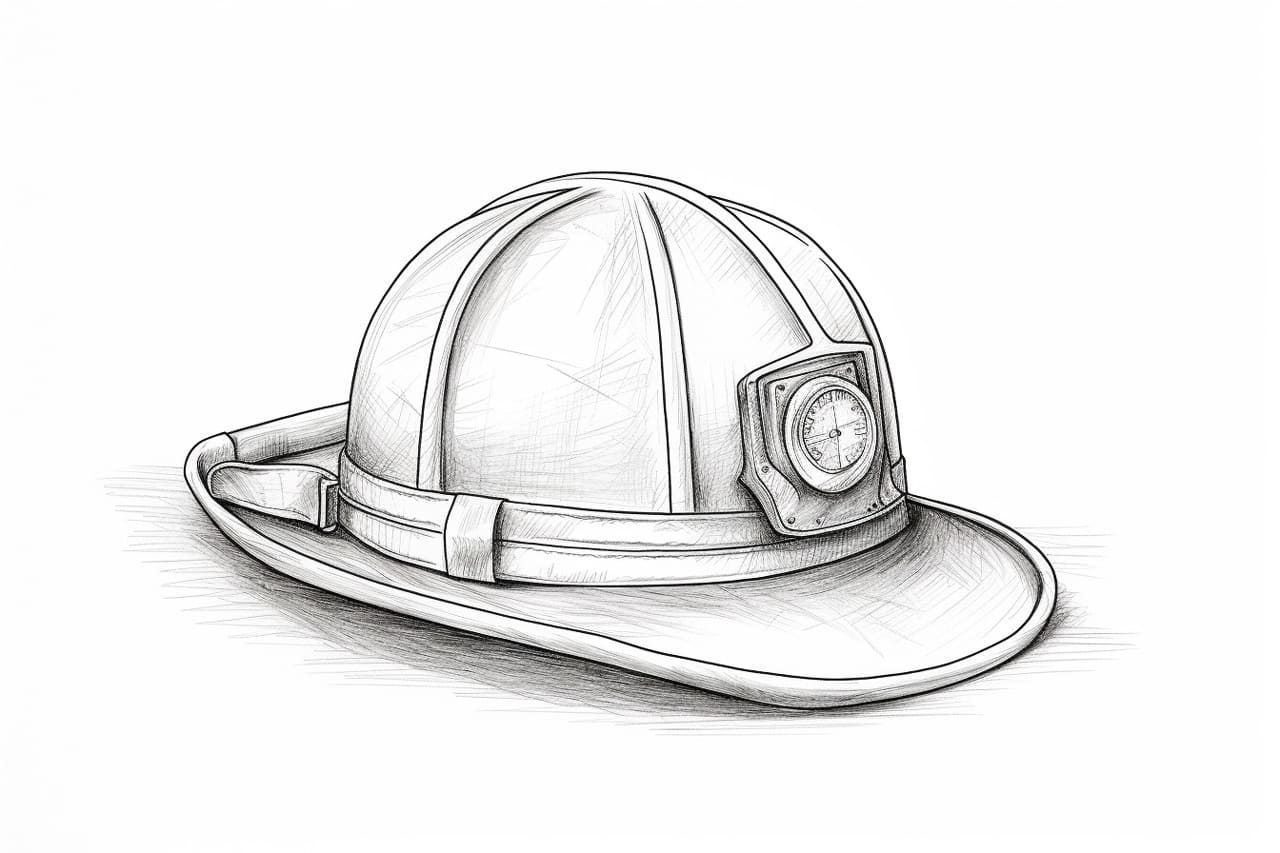
Firemen are everyday heroes who risk their lives to save others. Their iconic headgear, the fireman hat, is a symbol of their bravery and dedication. If you’re interested in drawing and want to capture the essence of a fireman hat on paper, you’ve come to the right place. In this step-by-step guide, we will walk you through the process of how to draw a fireman hat, ensuring that you can recreate this important symbol with ease.
Materials Required
Before we get started, it’s important to gather the necessary materials. Here’s what you’ll need:
- Pencil: A graphite pencil is perfect for sketching and creating the initial outlines.
- Paper: Choose a clean and smooth sheet of paper to ensure the best results. A sketch pad or drawing paper will work well.
- Eraser: Keep an eraser handy for fixing any mistakes or making adjustments as you go.
- Fine-tip marker or pen: This will be used for inking and adding final details to your drawing.
- Colored pencils or markers (optional): If you want to add color to your fireman hat, have colored pencils or markers ready.
Now that you have all your materials ready, let’s dive into the step-by-step process of drawing a fireman hat.
Step 1: Draw the Base Shape
Start by drawing an oval shape towards the center of your paper. This will serve as the base of the fireman hat.
Step 2: Add the Brim
From the bottom of the oval shape, draw a slightly curved line extending outward on both sides. These lines will form the brim of the fireman hat.
Step 3: Define the Brim
Next, draw another curved line parallel to the initial brim lines, slightly inside the hat’s brim. This creates depth and adds detail to the brim.
Step 4: Outline the Top Portion
Above the oval shape, draw a slightly curved horizontal line. This line will divide the fireman hat into the top portion and the brim.
Step 5: Shape the Top
Starting from the line you just drew, create a dome shape that extends upwards. Imagine a large semi-circle connecting to both ends of the dividing line, forming the top part of the fireman hat.
Step 6: Add Detail to the Top
To make the fireman hat more realistic, add a slightly curved line across the top portion, creating a crease or seam detail.
Step 7: Draw the Hat Strap
On each side of the fireman hat, extend two curved lines downwards from the brim. These lines will represent the hat strap that goes beneath the chin.
Step 8: Define the Hat Strap
Add detail to the hat strap by drawing a thin vertical line at the middle of each strap. This gives the impression of a buckle or fastening mechanism.
Step 9: Refine the Shape
Now, take a step back and assess your drawing. Use your pencil to refine any areas that need adjustment, ensuring that the proportions and curves are accurate.
Step 10: Ink Your Drawing
Once you’re satisfied with the pencil sketch, use a fine-tip marker or pen to ink your drawing. Start by outlining the entire fireman hat, making sure to include all the details you’ve drawn.
Step 11: Erase the Guidelines
Carefully erase any remaining pencil guidelines and smudges, taking care not to erase any of the permanent ink lines.
Step 12: Add Color (optional)
If you’re interested in adding color to your fireman hat drawing, now is the time to do so. Use colored pencils or markers to bring your drawing to life. Traditional fireman hats are typically red with a black brim, but feel free to use your imagination and choose any colors you prefer.
Congratulations! You’ve successfully drawn a fireman hat. With practice, you’ll be able to create an even more detailed and accurate representation.
Conclusion
Drawing a fireman hat can be a rewarding experience, allowing you to pay tribute to these brave individuals. By following the step-by-step instructions outlined above, you can create an impressive fireman hat drawing. Remember to gather all the necessary materials, take your time, and practice to improve your skills.
So grab your pencil, paper, and creative spirit, and start drawing your own fireman hat today!