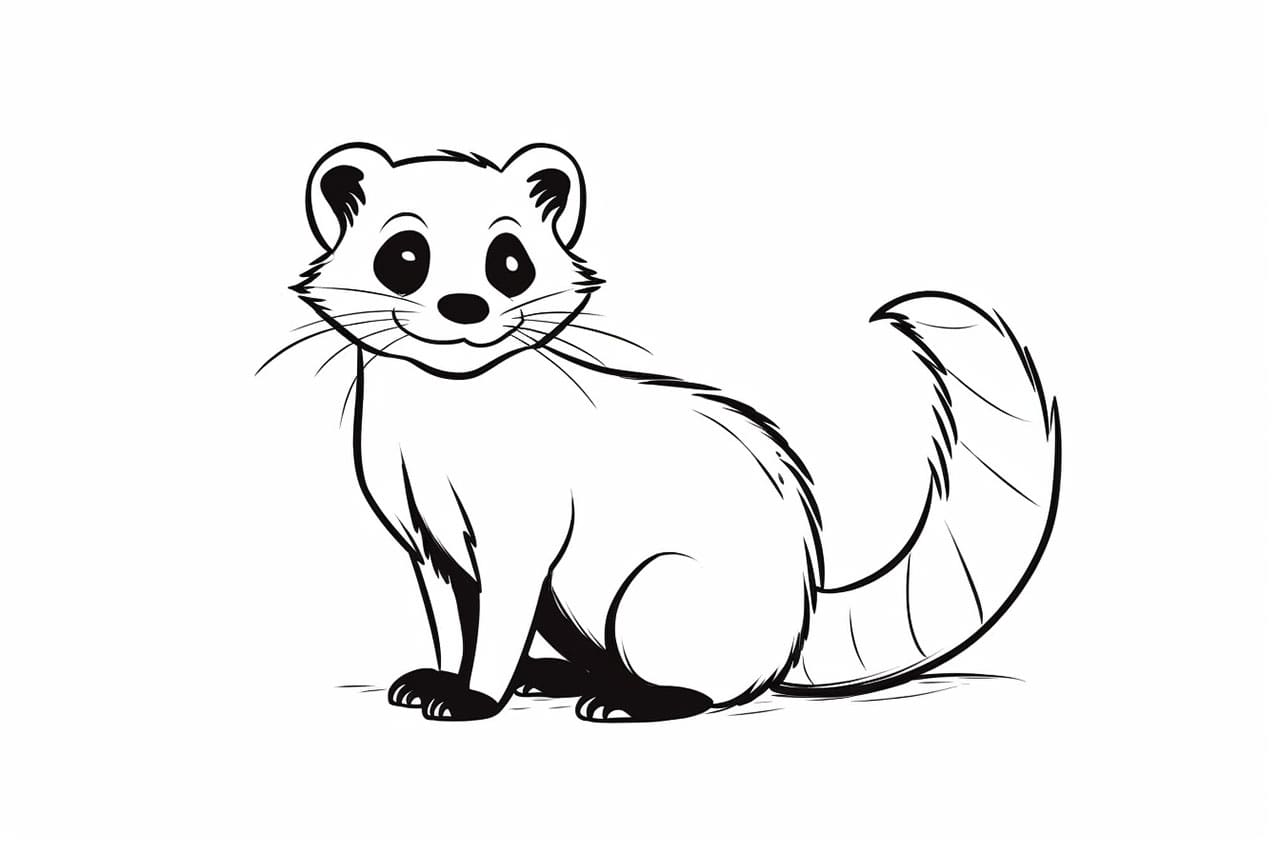
Ferrets are adorable and playful creatures that make for great drawing subjects. Whether you’re an experienced artist or just starting out, this step-by-step guide on how to draw a ferret will help you create a realistic and charming animal drawing. By following these instructions and using a few basic materials, you’ll soon have your very own furry ferret masterpiece.
Materials Required
Before we begin, gather the following materials:
- Drawing paper: Choose a smooth and sturdy paper suitable for pencil or ink drawings.
- Pencils: Use a range of pencils with different lead hardness (HB, 2B, and 4B are recommended).
- Eraser: Have a good quality eraser handy for correcting mistakes and adding highlights.
- Blending stump or cotton swabs: These tools are useful for blending and creating smooth textures.
- Colored pencils (optional): If you want to add color to your ferret drawing, have a set of colored pencils ready.
- A reference picture of a ferret (optional)
Now that you have all the necessary materials, let’s dive into the step-by-step process of drawing a ferret.
Step 1: Start with Basic Shapes
Begin by lightly sketching the basic shapes that make up a ferret’s body. Start with an oval shape for the head and a slightly elongated oval for the body. Add two smaller ovals for the ears and a curved line for the tail.
Step 2: Refine the Head and Body
Using the basic shapes as a guide, start adding more details to the head and body of the ferret. Sketch in the eyes, nose, and mouth, paying close attention to their placement and proportions. Refine the shape of the body, making sure to capture the slender and muscular structure of the ferret.
Step 3: Add Legs and Paws
Draw the ferret’s legs and paws, keeping in mind their proportions and positioning. Ferrets have small but nimble paws with sharp claws. Take your time to capture the details and shape of each leg accurately.
Step 4: Outline the Features
Once you’re satisfied with the overall shape of the ferret, use a darker pencil to outline the features and add more definition. Define the shape of the eyes, nose, ears, and mouth with more precision. Add fur details around the face and ears, using short and light strokes to imply the texture.
Step 5: Draw the Fur
Fur is an essential part of a ferret’s appearance, so dedicating time to draw it realistically is crucial. Start by observing reference images and noting the direction of fur growth. Use short, controlled strokes in the direction of the fur to create a sense of texture and depth. Pay attention to areas where the fur appears thicker or darker, and use darker pencil strokes accordingly.
Step 6: Add Shadows and Highlights
Shadows and highlights bring depth and dimension to your drawing. Observe your reference image and identify the areas where light hits and casts shadows on the ferret’s body. Use a darker pencil to lightly shade the shadows, gradually building up the intensity. Use an eraser or a blending stump to create smooth transitions between light and dark areas.
Step 7: Refine Details and Textures
Take a closer look at your drawing and refine any details that might need improvement. Pay attention to the shape and texture of the ferret’s fur, adding more definition where necessary. Use a sharp pencil for adding fine details like whiskers or facial expressions. Take your time with this step, as it can greatly enhance the overall appearance of your drawing.
Step 8: Optional Color
If you’d like to add color to your ferret drawing, now is the time to bring out your colored pencils. Start by applying light layers of color and gradually build up the intensity. Observe the nuances of the fur and use a variety of colors to create depth and realism. Remember to blend the colors smoothly using a blending stump or cotton swabs.
Conclusion
Drawing a ferret can be a fun and rewarding experience. By following these step-by-step instructions and using the right materials, you can create a realistic and charming ferret drawing. Remember to be patient, take your time, and don’t be afraid to make mistakes – they’re all part of the learning process. So, grab your pencils and paper, and let your artistic skills bring a ferret to life on the page!
Fun Facts About Ferrets
- Ferrets are part of the weasel family, which also includes animals like otters, minks, and polecats.
- The domesticated ferrets we know today were likely bred from European polecats around 2,500 years ago.
- A group of ferrets is called a “business,” and they often display playful and mischievous behavior.
- Ferrets have a natural musky odor, which can be reduced by regular cleaning but is always present to some extent.
- These clever creatures can sleep 18 to 20 hours a day, waking up with bursts of high energy.
- Despite their small size, ferrets are known for their curious nature and ability to play with a wide variety of toys.
- Ferrets communicate with various sounds, including dooking (a clucking noise), squeaking, and hissing.
- The word “ferret” comes from the Latin “furittus,” meaning “little thief,” an apt description given their tendency to stash away small objects.
- Ferrets have been used for hunting or “ferreting” for hundreds of years, helping humans to drive rabbits and rodents out of their burrows.
- In ancient times, ferrets were used on ships to help control rodent populations.
Suggestions for Scenes and Settings for Ferret Drawings
- Ferret Playtime: Draw a lively scene of ferrets in a room filled with tunnels, toys, and climbing structures, showcasing their playful nature.
- Forest Frolic: Illustrate ferrets exploring a woodland setting, darting among trees and rocks with curious expressions.
- Ferret Dreams: Picture a sleepy scene of ferrets snuggled together in a cozy pile, dreaming of adventures with thought bubbles overhead.
- Carnival Day: Imagine ferrets enjoying a miniature carnival complete with tiny ferris wheels, cotton candy, and funhouse mirrors.
- Undersea Adventure: Create a whimsical underwater world where ferrets swim alongside fish and explore coral reefs with scuba gear.
- Ferret Masquerade Ball: Draw a grand ballroom event with ferrets wearing elegant masks and capes, dancing under chandeliers.
- Space Exploration: Visualize ferrets in space suits aboard a spacecraft, discovering new planets and stars on their intergalactic journey.
- Medieval Quest: Depict ferrets as knights and squires on a quest through a mythical kingdom, complete with castles and dragons.
- Ferret Detective Agency: Sketch a scene where ferrets don detective hats and magnifying glasses, solving mysteries in a bustling city.
- Tropical Paradise: Illustrate ferrets basking on a sandy beach, sipping coconut drinks with palm trees swaying in the breeze.