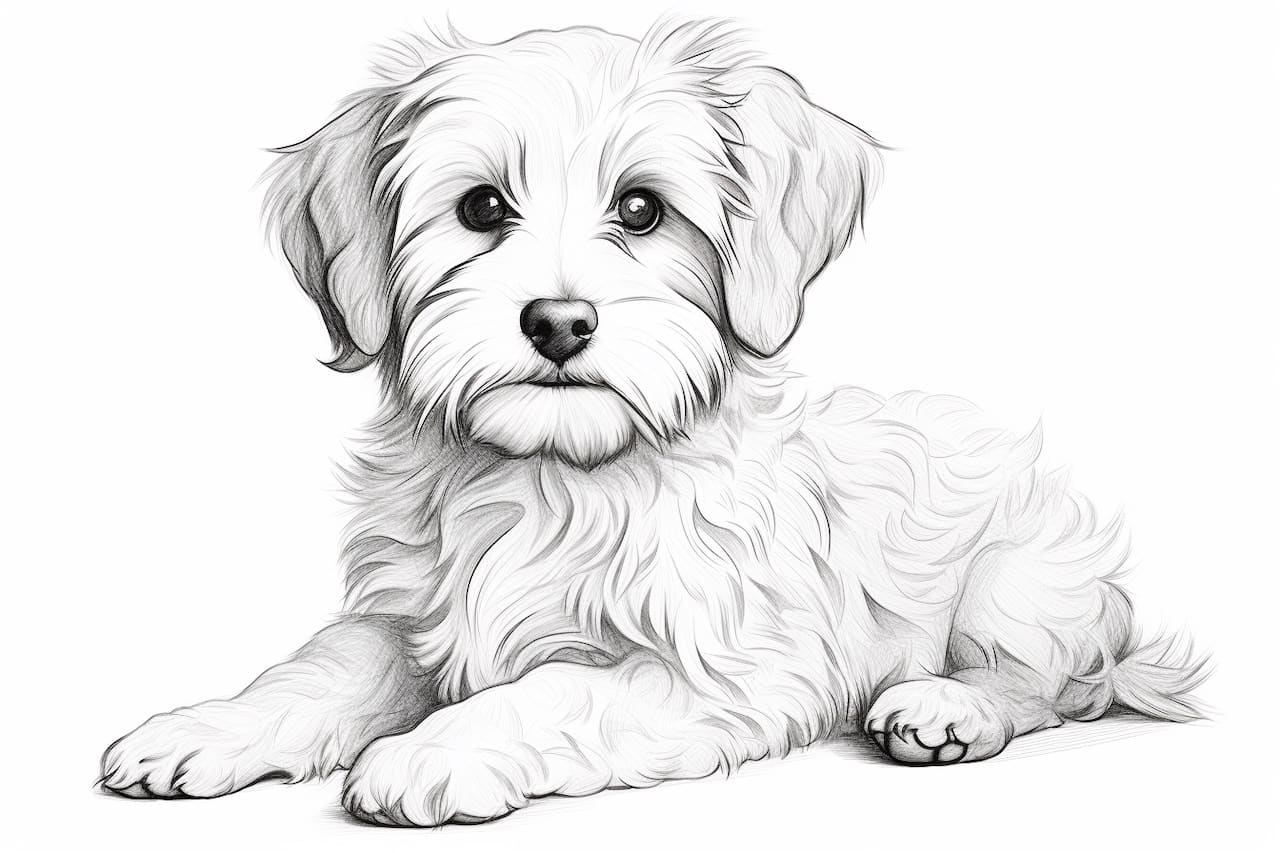
Welcome to this step-by-step guide on how to draw a Havanese! In this article, I will be your expert artist and drawing instructor, taking you through each step to create a beautiful illustration of this adorable dog breed. Whether you are a beginner or an experienced artist, I will provide clear and concise instructions to help you achieve a realistic and detailed depiction of a Havanese.
Materials Required
Before we begin, let’s gather the materials you will need for this drawing:
- Drawing paper: Choose a medium-weight paper that is suitable for your preferred drawing medium.
- Pencil: A graphite pencil with a range of hardness (2B, 4B, 6B, etc.) will work well.
- Eraser: A kneaded eraser is ideal for easily removing pencil marks without damaging the paper.
- Blending stump or tortillon: This tool will help you blend and smooth out your pencil strokes.
- Reference image: Find a clear and high-resolution photo of a Havanese to use as a reference for your drawing.
Now that we have our materials ready, let’s get started!
Step 1: Basic Guidelines
Begin by lightly sketching the basic shapes and proportions of the Havanese. Start with an oval shape for the head and add a rectangle for the body. Connect these shapes with a curved line to indicate the neck. Add circles for the eyes, a small triangle for the nose, and simple lines for the ears and legs. Don’t worry about adding too much detail at this stage; we are just establishing the overall structure.
Step 2: Refining the Head and Face
In this step, we will focus on the details of the Havanese’s head and face. Start by adding more definition to the oval shape, making it slightly wider at the bottom to represent the cheeks. Sketch the eyes, paying attention to the shape and placement in relation to the guidelines. Add the ears by drawing curves that follow the basic lines. Refine the nose by adding details such as nostrils, and sketch the mouth and tongue as well.
Step 3: Adding Fur Texture
One of the distinctive features of a Havanese is its long, flowing fur. To capture this texture, use light and feathery pencil strokes to create the illusion of fur. Start at the top of the head and work your way down, following the natural direction of the fur. Vary the pressure and direction of your strokes to add depth and dimension. Remember to be patient and take your time; this step requires some precision and attention to detail.
Step 4: Shading the Face
Now that we have established the fur texture, let’s add shading to give the face more depth and realism. Observe the reference image and identify areas of light and shadow. Use a softer pencil (e.g., 4B or 6B) to create darker shades and a blending stump to blend and smooth the tones. Start by shading the areas around the eyes, nose, and mouth, gradually building up the values to create a three-dimensional effect. Pay close attention to the subtle transitions between light and shadow.
Step 5: Drawing the Body and Legs
In this step, we will focus on drawing the body and legs of the Havanese. Start by refining the rectangular shape we sketched earlier to make it appear more organic and rounded. Add the details of the legs, keeping in mind the proportions and positioning in relation to the body. Use gentle curves to suggest the shapes of the paws, and add some fur texture by lightly shading the appropriate areas. Remember to refer to your reference image for accuracy.
Step 6: Adding Fur Texture to the Body
Similar to Step 3, we will add fur texture to the body of the Havanese. Use the same light and feathery strokes as before, following the direction of the fur. Pay attention to the different lengths and patterns of the fur on the body and the legs. Vary the pressure and stroke length to create a sense of realism and dimension. Take your time and gradually build up the texture, always referring to your reference image for guidance.
Step 7: Final Touches and Details
We are almost done! In this step, take a moment to evaluate your drawing and make any necessary adjustments. Add any final details, such as the facial expression, whiskers, and any other features that may enhance the overall realism of your drawing. Use your eraser to clean up any unwanted marks or smudges, and make sure your lines and shapes are well-defined.
Congratulations! You have successfully drawn a Havanese!
Conclusion
In this step-by-step guide, we have explored the process of drawing a Havanese. Starting with basic shapes and guidelines, we gradually added details and texture to create a realistic depiction of this lovely dog breed. Remember to be patient, practice regularly, and don’t be afraid to make mistakes. Drawing takes time and dedication, but with practice, you can achieve wonderful results.
So grab your drawing materials and let your creativity flow as you bring a Havanese to life on paper. Happy drawing!