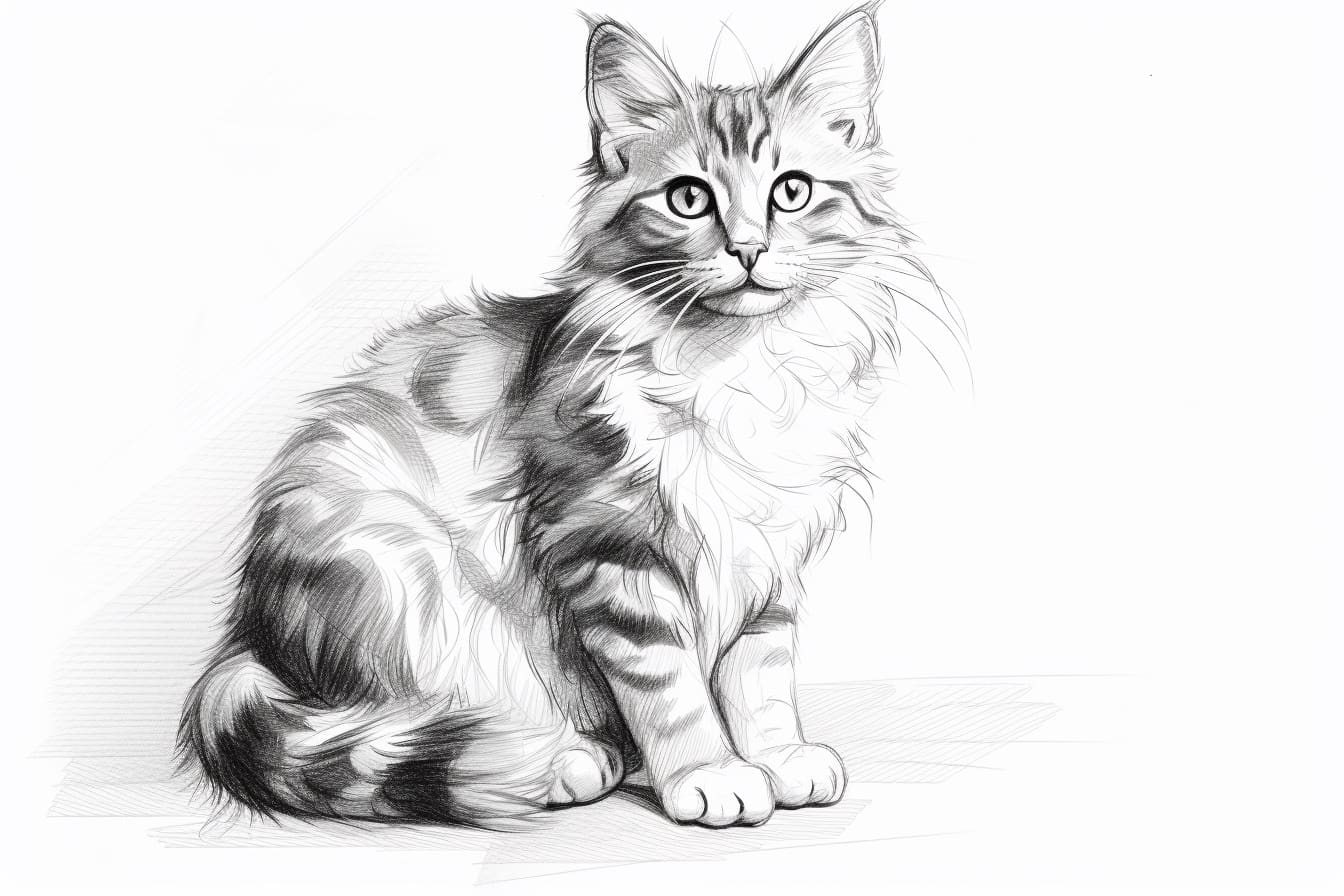
Drawing animals can be a fun and rewarding artistic endeavor. In this step-by-step guide, I will walk you through the process of drawing a calico cat. Calico cats are known for their beautiful tri-colored coats, which make them a unique and interesting subject to draw. So grab your pencil and paper, and let’s get started!
Materials Required:
To begin drawing your calico cat, you will need the following materials:
- Drawing paper: Choose a smooth, heavyweight paper suitable for pencil drawings.
- Pencils: Have a range of graphite pencils, such as an HB for light sketching and a 4B or 6B for darker shading.
- Eraser: A soft eraser will come in handy for making corrections and removing any unwanted pencil marks.
- Blending tool: Consider using a blending stump or a tortillon to create smooth, blended textures.
- Colored pencils (optional): If you want to add some color to your drawing, have a set of colored pencils handy.
Now that you have your materials ready, let’s move on to the step-by-step process of drawing a calico cat.
Step 1: Sketch the Basic Shapes
Start by sketching the basic shapes that will serve as the framework for your calico cat. Begin with a large oval shape for the cat’s head and a rectangle-shaped body beneath it. Add two smaller ovals for the ears and a long, curved line for the tail. Don’t worry about details at this stage; focus on getting the proportions and positioning right.
Step 2: Refine the Features
Now that you have the basic shapes down, it’s time to refine the features of your calico cat. Add two almond-shaped eyes near the top of the head and a small triangular shape for the nose. Sketch in the mouth slightly below the nose using a curved line. Next, add some gentle curves to indicate where the cat’s fur will be.
Step 3: Define the Face
To give your calico cat a more realistic look, start defining the face. Add details to the eyes by drawing the iris, pupil, and some eyelashes. Create a sense of depth by adding shading around the eyes. Add some fur-like texture by drawing short, curved lines around the cat’s face, especially around the cheeks and chin.
Step 4: Draw the Ears and Whiskers
Focus on the cat’s ears and whiskers next. Draw the inner details of the ears, using curved lines to indicate folds and contours. For the whiskers, draw several long, thin lines extending from either side of the cat’s mouth.
Step 5: Add the Body Details
Refine the body of your calico cat by adding more details. Sketch in the legs and paws, using curved lines to indicate the joints and individual toes. Add some rough indications of the fur texture on the body using short, jagged lines. Pay attention to the unique color patterns that calico cats have, and try to incorporate those into your drawing.
Step 6: Shade and Texture
Now it’s time to add depth and dimension to your drawing by shading and adding texture. Start by lightly shading the areas of the cat’s fur that are in shadow, using a softer pencil. Gradually build up the darkness by layering more pencil strokes. Use your blending tool to soften and blend the shading, creating a smooth transition between light and dark areas.
Step 7: Final Details
In this last step, focus on the finer details of your calico cat drawing. Add more definition to the eyes by darkening the pupils and adding highlights. Use your eraser to bring out some highlights in the fur by gently lifting off some pencil strokes. Take your time to observe references and make any necessary adjustments to achieve accuracy and realism.
Conclusion:
Drawing a calico cat can be a challenging yet rewarding experience. By following these step-by-step instructions, you can create a beautiful and lifelike representation of this unique feline. Remember to be patient and practice regularly to improve your drawing skills. So grab your art supplies, and let your creativity flow as you embark on the wonderful journey of drawing a calico cat!