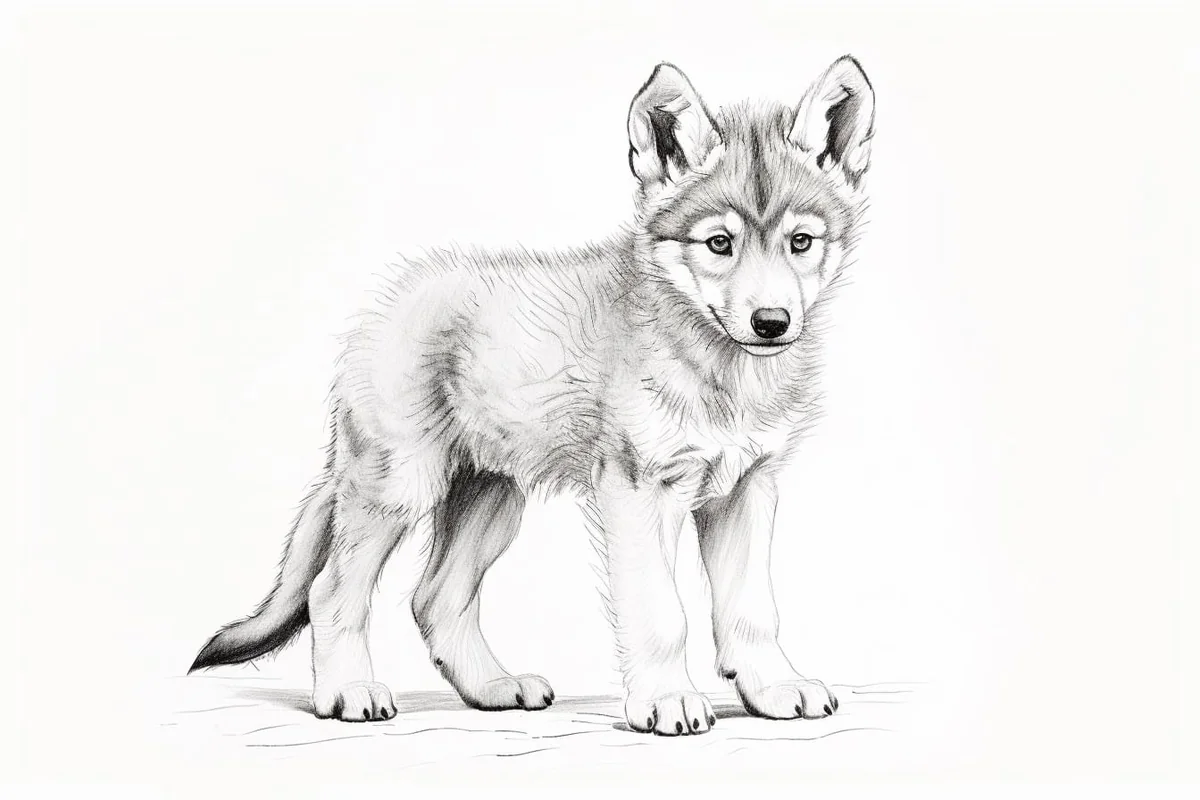
How to Draw a Wolf Pup in 9 Easy Steps
Learn how to draw with this step-by-step tutorial.
Materials You'll Need
- Drawing paper
- Pencil (HB or 2B)
- Eraser
- Blending stump
Welcome to this exciting step-by-step tutorial on how to draw a wolf pup! With their playful demeanor, curious eyes, and fluffy fur, wolf pups embody a mix of wild majesty and heart-melting cuteness. Capturing the essence of these young wolves in your artwork can be an enjoyable and rewarding experience, allowing you to bring their spirited charm to life on paper.
Whether you're a beginner eager to try your hand at drawing animals or a seasoned artist looking to expand your repertoire, this guide will walk you through the process. From sketching the basic shapes to adding intricate details like their soft fur and expressive eyes, you'll learn how to create a captivating wolf pup illustration. So gather your pencils, find a cozy spot, and let's dive into the wild world of wolf pups!
Materials Required:
Before we begin, gather the following materials:
-
Drawing paper or sketchbook
-
Pencils (HB, 2B, and 4B)
-
Blending stump or cotton swabs
-
Reference image of a wolf pup (optional)
Now that you have everything you need, let's dive into the drawing process.
How to Draw a Wolf Pup: Step-by-Step Instructions
Step 1: Begin with Basic Shapes
Start your wolf pup drawing by sketching the foundational shapes. Draw a medium-sized circle for the head and an oval beneath it for the body. Connect these shapes with a gentle curve to represent the neck. These guidelines will help establish the proportions and pose of your wolf pup, so keep your pencil strokes light and easy to erase.
Step 2: Outline the Facial Features
Move to the wolf pup's adorable face. Inside the head circle, draw two almond-shaped eyes slightly angled outward for that curious pup expression. Add a small triangular nose at the center bottom of the circle, and beneath it, sketch a curved line for the mouth. These simple shapes will anchor the wolf pup's endearing facial details.
Step 3: Add Ears and Fur Details
Draw two triangular ears on top of the head, slightly rounded at the tips for a soft, youthful appearance. Use light, feathery pencil strokes around the edges of the face to sketch the pup's fluffy fur. Pay attention to the direction of the fur, which radiates outward from the center of the face. These details will add personality and texture to your drawing.
Step 4: Sketch the Body and Legs
Using the oval as a guide, define the wolf pup's small, playful body. Draw curved lines from the sides of the oval to shape the chest and back. Sketch the front legs extending downward from the chest and the hind legs curling back slightly beneath the body. Keep the legs short and chunky to emphasize the youthful proportions of the pup.
Step 5: Draw the Tail
Add a long, fluffy tail extending from the back of the oval. Use quick, curved strokes to give the tail a soft and bushy appearance. Let it taper gently at the tip for a natural look. Adjust its position to fit the pose, such as curled around the body or wagging upward.
Step 6: Refine the Facial Details
Return to the face to add more personality. Darken the eyes, leaving a small white highlight in each pupil to give them life. Shape the nose into a slightly rounded triangle and add small lines to indicate texture. Define the mouth further by including a hint of a tongue or slightly parted lips for a playful expression.
Step 7: Enhance the Fur and Textures
Fur is a defining feature of a wolf pup, so focus on building its texture. Use short, overlapping strokes to create soft, fluffy fur along the body, legs, and tail. Gradually build up layers of fur detail, darkening areas where shadows naturally fall, such as under the chin, along the belly, and around the legs. A blending stump or cotton swab can help soften lines for a realistic effect.
Step 8: Add Shadows and Highlights
Bring depth to your wolf pup drawing by adding shadows and highlights. Identify your light source and shade areas that would naturally be darker, such as under the ears, along the sides of the body, and beneath the paws. Use lighter pencil strokes or an eraser to add highlights on the fur, emphasizing areas where the light hits directly, like the top of the head and back.
Step 9: Final Refinements
Step back and review your drawing. Refine any uneven lines, add final details to the fur, and adjust the shading to enhance the sense of depth. If desired, include a simple background, such as grass or a forest setting, to place your wolf pup in its natural habitat.
Pawsome Work! Your Wolf Pup Awaits Adventure
Congratulations! You've brought a playful wolf pup to life on your canvas. Drawing animals is a rewarding journey that hones your skills and connects you to the beauty of nature. By practicing regularly, you'll not only improve your technique but also develop your unique artistic style.
Now that you've mastered the basics, why not experiment with different poses, expressions, or even add a pack of pups? Let your imagination run wild as you continue your artistic adventure. Keep drawing, keep exploring, and most importantly, have fun!
Tip: To create a lifelike wolf pup, focus on the textures of its fur and the shape of its face. Start with a soft pencil, like a 2B or 4B, for sketching the basic outlines, as this will allow you to easily erase and refine your work. When detailing the fur, use short, quick strokes to mimic the fluffy texture; varying the pressure on your pencil can create depth and dimension. For the eyes, pay special attention to the reflection of light; adding a small white dot will bring your pup to life. Lastly, don't rush the shading—layer it gradually to achieve a soft, realistic look that captures the essence of this adorable creature.
Gallery of Wolf Pup Drawings


