How to Draw a Dinosaur in 9 Easy Steps
Learn how to draw with this step-by-step tutorial.
Materials You'll Need
- Drawing paper
- Pencil (HB or 2B)
- Eraser
- Colored pencils
- Markers
Welcome to this exciting step-by-step guide on how to draw a dinosaur! Dinosaurs have fascinated people for centuries, from their towering presence to their mysterious extinction, making them a favorite subject for artists of all skill levels. Whether you want to sketch a friendly cartoon dino or a fierce, roaring T-Rex, this tutorial will help you bring your prehistoric vision to life.
This guide is designed to be easy to follow, breaking the process down into simple shapes and lines so that even beginners can create an impressive dinosaur drawing. You'll learn how to structure the body, add powerful legs and a long tail, and refine details to give your dinosaur personality and movement.
So grab your pencils, sharpen your creativity, and let's journey back to the Mesozoic Era as we learn how to draw a dinosaur step by step! ✨
Materials Required
Before we begin, make sure you have the following materials handy:
-
Drawing paper or sketchbook
-
Colored pencils or markers (optional)
Having these materials ready will ensure a smooth drawing experience, allowing you to make any necessary adjustments as you go along.


How to Draw a Dinosaur Step-by-Step
Step 1: Sketch the Basic Shapes
To begin, start with simple shapes to build the foundation of your dinosaur. Draw a large oval in the center of your paper—this will form the main body. Next, sketch a smaller oval near the rear of the first oval to represent the base of the tail. For the head, add a small circle towards the front of the body. Connect the head and body using a slight curve to define the neck. These shapes will act as guidelines for the final drawing, so keep your pencil strokes light.
Step 2: Outline the Body
Now that the basic framework is in place, it's time to refine the body shape. Start with the head—extend a curved line from the top of the circle to create the snout and another curved line underneath for the mouth. Sketch the neck by connecting two smooth lines from the head to the larger oval body. Continue outlining the body, following the shape of the oval but adjusting to create a more natural look.
At this stage, you can also extend a long, curved line from the smaller oval at the back to create the tail. The tail should be thicker at the base and gradually taper to a point, adding balance and movement to your dinosaur.
Step 3: Add the Limbs
Dinosaurs are known for their strong legs and unique front limbs, so let's add those in.
-
Front Limbs: Draw two slightly curved lines extending from the upper part of the body for the arms. At the ends, add smaller oval shapes for the hands or claws. Depending on the dinosaur you're drawing, you can give it tiny, short arms (like a T-Rex) or longer, more developed arms (like a Velociraptor).
-
Hind Legs: Draw two long, curved lines extending from the bottom of the body for the legs. Since dinosaurs have strong, muscular legs, make these thicker at the top and gradually thinner towards the feet. Add oval shapes at the bottom for the feet, and draw three-toed claws at the ends.
Make sure the limbs are proportionate to the body and positioned to suggest movement or balance.
Step 4: Define the Head and Facial Features
Now, let's give the dinosaur some personality!
-
Eyes: Draw two almond-shaped eyes slightly above the middle of the head. Inside each eye, sketch a smaller circle for the pupil and leave a tiny white spot to create a lively, glossy effect.
-
Nose: Add a small, rounded triangle or oval shape near the tip of the snout to represent the nostril.
-
Mouth: Draw a smooth, curved line beneath the nose to form the mouth. If you want your dinosaur to look friendly, give it a small grin; if you want it to look fierce, add jagged teeth along the upper and lower jaw.
-
Eyebrows: For extra character, sketch a slight curved line above each eye to define the brow ridge.
Step 5: Draw the Tail and Spikes
Many dinosaurs had spikes, ridges, or plates along their backs for protection or display. Let's add some details to make your dinosaur stand out!
-
Extend the tail from the smaller oval at the rear, curving it naturally based on how you want the dinosaur to be posed.
-
Along the back and tail, sketch a series of triangular spikes, ridges, or plates. These can be sharp and jagged (like a Stegosaurus) or small and rounded (like a baby dino), depending on the type of dinosaur you want to create.
-
Space the spikes evenly to maintain a balanced and dynamic look.
Step 6: Refine the Outline
Now that the major features are in place, it's time to finalize the outline of your dinosaur.
-
Go over your light sketch with smoother, darker lines to refine the shape.
-
Adjust curves on the limbs, tail, and back to ensure they look natural.
-
Define the edges of the feet, claws, and hands for a more polished appearance.
-
Make any necessary changes to the proportions, ensuring your dinosaur looks balanced and believable.
At this stage, you can erase any extra guidelines that you no longer need.
Step 7: Add Texture and Details
To give your dinosaur drawing more depth, add skin texture and surface details:
-
Use short, curved lines to suggest rough, scaly skin along the body.
-
Draw small, overlapping bumps or ridges across the back for extra realism.
-
Add subtle wrinkles and folds around the joints, such as the knees, elbows, and neck.
-
For a cartoon-style dinosaur, keep the details minimal and focus on smoother, rounded shapes.
Step 8: Shading for Depth
Shading helps bring your dinosaur to life by creating a sense of depth and dimension.
-
Identify a light source—for example, imagine sunlight coming from the top left.
-
Shade the opposite side of the body, focusing on the underside of the tail, belly, and limbs to create natural-looking shadows.
-
Use hatching or cross-hatching techniques to add subtle gradients to areas like the back and around the eyes.
-
Darken the creases between the spikes, ridges, or scales for added contrast.
For cartoon dinosaurs, use soft, simple shadows to maintain a friendly and approachable appearance.
Step 9: Coloring Your Dinosaur (Optional)
Now comes the fun part—bringing your dinosaur to life with color!
-
Choose your color palette: Dinosaurs can be any color you imagine! Go for earthy greens and browns for realism, or bright blues and purples for a more playful, fantasy look.
-
Use light shading on the top of the body and darker tones along the belly and legs to create depth.
-
Add spots, stripes, or patterns along the back and tail to make your dinosaur unique.
-
If using colored pencils, layer your colors gently for a smooth effect. If using markers, blend your tones for a professional finish.
Final Thoughts on How to Draw a Dinosaur
Congratulations! You've successfully drawn your own dinosaur from start to finish! By following this step-by-step guide, you've learned how to break the drawing down into simple shapes, refine the details, and bring it to life with shading and texture.
Drawing dinosaurs is a fantastic way to practice anatomy, texture, and imagination all at once. Don't be afraid to experiment with different species, poses, or creative designs—maybe try drawing a flying Pterodactyl or a long-necked Brachiosaurus next!
The more you practice, the more confident you'll become in capturing the majestic and mysterious creatures of the prehistoric world. So keep drawing, have fun, and let your creativity roam free like a dinosaur in the wild! ✨
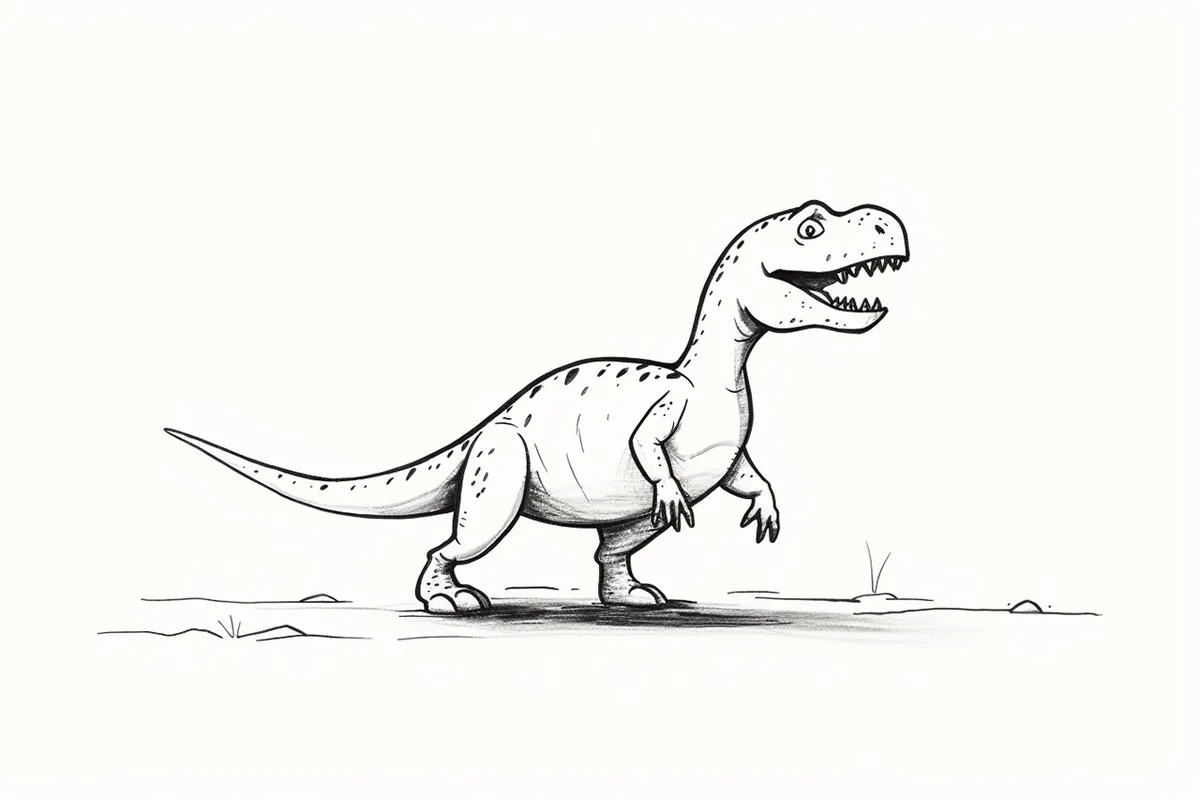
Gallery of Dinosaur Drawings


Fun Facts About Dinosaurs
-
The word "dinosaur" comes from the Greek words "deinos" and "sauros," which together mean "terrible lizard."
-
Some dinosaurs, like the Velociraptor, had feathers. These feathers were likely used for insulation or display rather than flight.
-
The largest dinosaur ever discovered is the Argentinosaurus, which measured up to 100 feet long and weighed as much as 100 tons.
-
The fastest dinosaur was the Ornithomimus, which could run at speeds of up to 40 miles per hour.
-
Some dinosaurs were herbivores, while others were carnivores, and some were omnivores, meaning they ate both plants and meat.
-
The Stegosaurus had a brain the size of a walnut, while the largest dinosaur brain belonged to the Troodon, which was about the size of a banana.
-
The first dinosaur fossil was discovered in 1824 by Mary Anning, a fossil collector and paleontologist from England.
-
The T-Rex had the strongest bite force of any land animal that has ever lived, estimated to be between 8,000 and 12,000 pounds per square inch.
-
Some dinosaurs, like the Triceratops, had horns and frills on their heads that may have been used for display or defense against predators.
-
Dinosaurs lived on Earth for over 160 million years, from the Late Triassic period around 230 million years ago until the end of the Cretaceous period around 65 million years ago.
Tip: When drawing your dinosaur, begin with light pencil strokes to establish basic shapes and proportions before committing to darker lines. Use simple geometric forms—ovals for the body, circles for the head, and rectangles for legs—to create a solid framework that can be easily adjusted. This approach not only makes it easier to visualize the overall structure but also allows for corrections along the way. Once you're satisfied with the proportions, gradually refine your lines, adding details like scales, claws, and facial features to bring your dinosaur to life. Remember to keep your references nearby; studying images of different dinosaur species can inspire unique characteristics in your drawing!
Suggestions for Scenes and Settings for Dinosaur Drawings
Certainly! Here are some specific suggestions for scenes and settings you can use for drawing dinosaurs:
-
Prehistoric Jungle: Draw a dense, lush jungle filled with towering ferns, palm trees, and other prehistoric plants, with dinosaurs like the Tyrannosaurus rex, Triceratops, and Velociraptors peeking out from the foliage.
-
Volcanic Landscape: Illustrate a dramatic scene with an active volcano in the background, spewing lava and ash into the sky, while dinosaurs roam the rocky terrain below.
-
Swampy Marsh: Create a murky, swampy setting with murky waters, twisted trees, and eerie mist, where dinosaurs like the Spinosaurus and Suchomimus lurk in the shadows.
-
Desert Oasis: Depict a desert oasis with a tranquil watering hole surrounded by palm trees and lush vegetation, where dinosaurs like the Brachiosaurus and Stegosaurus gather to drink.
-
Arctic Tundra: Draw a frozen landscape with icy cliffs, snow-covered plains, and glaciers, where dinosaurs like the Woolly Mammoth and Troodon brave the harsh conditions.
-
Coastal Cliffs: Illustrate a scene with towering coastal cliffs overlooking the ocean, where Pteranodons soar overhead and marine reptiles like the Plesiosaurus swim in the waters below.
-
Mountain Range: Create a majestic mountain range with snow-capped peaks and rocky slopes, where dinosaurs like the Allosaurus and Ankylosaurus traverse the rugged terrain.
-
Ancient Ruins: Draw a scene with overgrown ruins of an ancient civilization, where dinosaurs have made their homes among the crumbling temples and statues.
-
Cretaceous Seas: Depict an underwater scene with a diverse array of marine reptiles and prehistoric sea creatures swimming in the warm, shallow waters of the Cretaceous seas.
-
Dinosaur Battle: Illustrate an epic showdown between two rival dinosaurs, such as a fierce battle between a Tyrannosaurus rex and a Triceratops.
