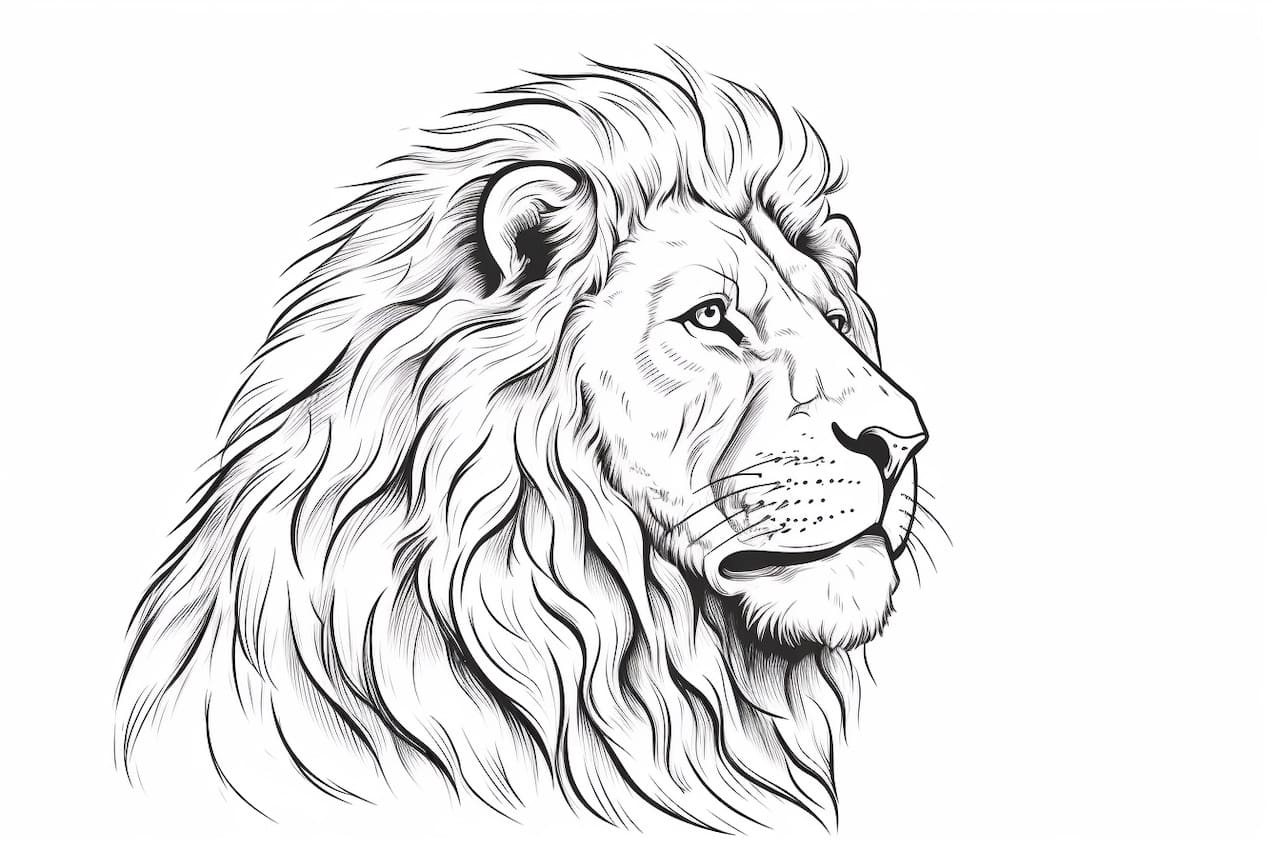
Welcome to this step-by-step tutorial on how to draw a lion’s head. In this article, we will explore the techniques and processes involved in creating a realistic and captivating lion’s head drawing. Whether you are a beginner or an experienced artist looking to refine your skills, this guide will provide you with the necessary tools to create a stunning representation of this majestic creature.
Materials Required
Before we dive into the step-by-step instructions, let’s gather the materials you will need for this drawing tutorial. Here’s a list of the essential supplies:
- Paper: It is recommended to use a sturdy drawing paper that can handle different mediums, such as charcoal or graphite.
- Pencils: A set of graphite pencils ranging from HB to 6B will be suitable for shading and adding details.
- Eraser: A kneaded eraser is ideal for lifting graphite and creating highlights.
- Drawing Board: You will need a drawing board to provide a stable surface for your artwork.
- Reference Image: Find a clear and high-resolution image of a lion’s head that will serve as a reference for your drawing.
Now that you have your materials ready, let’s begin the drawing process.
Step 1: Outline the Basic Shape
To start, lightly sketch a rough circle to establish the overall shape of the lion’s head. This basic shape will serve as a foundation for the rest of the drawing. Remember to keep the lines light and loose, as they will be refined later on.
Step 2: Add the Facial Features
Using the reference image as a guide, add the important facial features of the lion. Begin with the eyes, placing them symmetrically within the circle. Pay close attention to the shape and proportions of the eyes, as they play a significant role in capturing the lion’s expression. Next, add the nose, mouth, and ears, ensuring they align with the reference image.
Step 3: Refine the Facial Structure
Now it’s time to refine the shape of the lion’s face. Use light, curved lines to outline the contours of the cheeks, muzzle, and jawline. Pay attention to the underlying bone structure to create a realistic representation. Take your time during this step to achieve the desired proportions and symmetry.
Step 4: Develop the Mane
The lion’s mane is one of its most distinctive features. Begin by lightly sketching the general shape and flow of the mane around the head. Use long, flowing strokes to create the illusion of hair. Gradually build up the volume and texture of the mane by adding more layers of lines. Take care to vary the direction and length of the strokes for a more natural look.
Step 5: Add Details to the Face
Now that the basic structure of the lion’s head is in place, it’s time to add details to bring it to life. Focus on the eyes, nose, and mouth, paying attention to the intricate patterns and textures. Use a darker pencil or shading technique to create depth and shadows. Remember to observe the reference image closely for guidance.
Step 6: Refine and Shade
With the main features and details established, it’s time to refine the drawing further and add shading. Start by deepening the shadows and adding contrast to create a three-dimensional effect. Use a range of pencils with varying degrees of hardness to achieve different shades. Gradually build up the layers of graphite, blending where necessary, to create smooth transitions and realistic textures.
Step 7: Finalize the Drawing
Once you are satisfied with the overall look of your lion’s head drawing, take a step back and assess it as a whole. Make any necessary adjustments or refinements to ensure the accuracy of the proportions and details. Erase any remaining guidelines or stray lines, and add any final touches to enhance the overall quality of the artwork.
Conclusion
Congratulations! You have successfully learned how to draw a lion’s head. By following these step-by-step instructions, you have honed your skills in capturing the intricate features and majestic nature of this magnificent creature. Remember to be patient, practice regularly, and don’t be afraid to experiment with different techniques and styles. Enjoy your artistic journey as you continue to develop your drawing abilities.