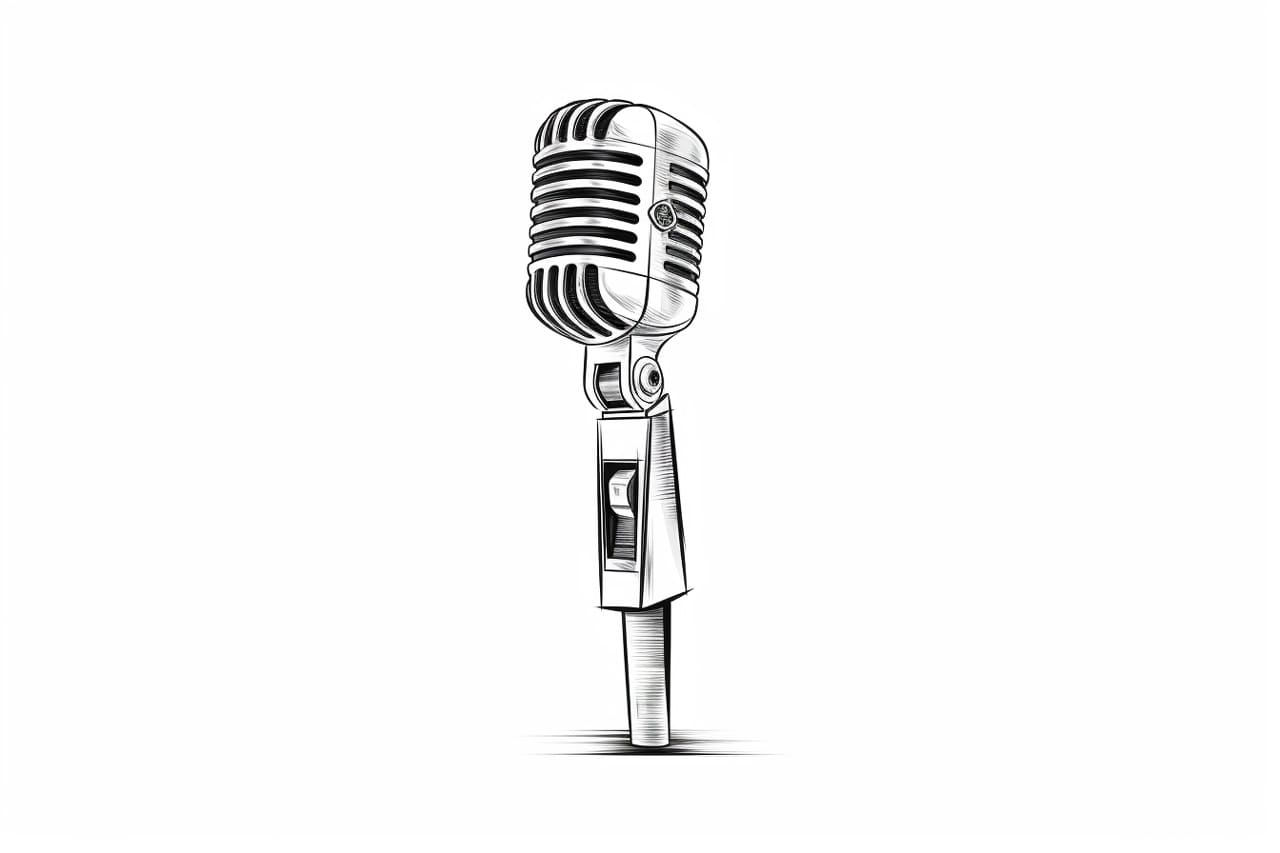
If you’ve ever wanted to learn how to draw a mic, you’ve come to the right place! In this step-by-step tutorial, we will guide you through the process of drawing a realistic microphone. Whether you’re an aspiring artist or just looking for a fun project, grab your pencil and paper and let’s get started!
Materials Required
To get started, you’ll need the following materials:
- Drawing paper
- Pencil
- Eraser
- Fine-tip black pen or marker
- Colored pencils or markers (optional)
Now that you have all your materials ready, let’s dive into the step-by-step process of drawing a mic!
Step 1: Draw the Outline
Begin by drawing the outline of the microphone. Start with a slightly curved line in the middle of your paper. This will serve as the handle of the mic. Then, draw a larger oval shape at the top of the handle. This will be the microphone head. Make sure to leave enough space on the sides for the details.
Step 2: Add Details to the Handle
Next, let’s add some details to the handle. Start by drawing a couple of horizontal lines near the top of the handle. These lines will give the handle a ribbed texture. Then, add a few more curved lines to create a more realistic shape. Don’t forget to add a small circular button near the top as well.
Step 3: Draw the Grille
The grille is the part of the microphone head that captures the sound. Start by drawing a horizontal line near the bottom of the microphone head. Then, draw a series of slightly curved vertical lines across the head. These lines should intersect with the horizontal line, creating a grid-like pattern. This grid will give the illusion of a mesh grille.
Step 4: Add Details to the Grille
To make the grille look even more realistic, let’s add some additional details. Start by drawing smaller lines within each square of the grid. These lines should be diagonal and intersect with each other, creating a crisscross pattern. Then, draw a few more horizontal and vertical lines across the grille to add depth and texture.
Step 5: Add Shadows and Highlights
Now it’s time to add shading to your drawing to make it look more three-dimensional. Imagine a light source coming from one direction and add shadows accordingly. Shade the areas of the microphone that are away from the light source, such as the bottom of the handle and the sides of the grille. Use your pencil to darken those areas gradually, creating a smooth gradient. Don’t forget to leave some areas lighter to represent highlights.
Step 6: Ink Your Drawing
Once you’re satisfied with the shading, it’s time to ink your drawing. Use a fine-tip black pen or marker to trace over the pencil lines and add more definition to your mic. Be careful not to smear the ink as you work. You can erase any remaining pencil lines once the ink has dried.
Step 7: Add Color (Optional)
If you want to add some color to your drawing, now is the time to do so. Use colored pencils or markers to bring your microphone to life. You can experiment with different colors for the handle and the grille. Don’t forget to add shadows and highlights with your chosen colors to enhance the three-dimensional effect.
Conclusion
Congratulations! You have successfully learned how to draw a microphone. Adding this skill to your repertoire opens up endless possibilities for your artistic endeavors. Whether you want to create music-themed artwork or simply enjoy the process of drawing, this tutorial has provided you with the foundation to create your very own microphone masterpiece.
Remember to practice regularly and have fun with your drawings. The more you practice, the better you’ll become. So grab your pencil and keep exploring the world of art!