How to Draw a Bridge in 6 Simple Steps
Learn how to draw with this step-by-step tutorial.
Materials You'll Need
- Drawing paper
- Pencil (HB or 2B)
- Eraser
- Ruler
Welcome to our engaging step-by-step tutorial on how to draw a bridge! Drawing a bridge is not only an enjoyable activity but also a fantastic way to explore your creativity while celebrating the beauty of architecture. Bridges stand as symbols of connection, seamlessly linking two landmasses and fostering a sense of unity in their surroundings.
In this tutorial, we will walk you through the process of creating a stunning and realistic representation of a bridge. From the initial outlines to intricate details, every step is designed to help you develop your artistic skills, regardless of your current level of experience. So, gather your drawing materials, find a comfortable space, and prepare to embark on an artistic journey that will enhance your appreciation for these architectural marvels.
Get ready to unleash your imagination as we guide you through each stage of this drawing adventure. Whether you envision a simple pedestrian bridge or a grand suspension structure, this tutorial will provide you with the foundational techniques you need to bring your vision to life. Let's dive in and start creating a masterpiece together!
Materials Required
-
Pencil
-
Drawing paper
Step-by-Step Guide: How to Draw a Bridge ✏️
Bridges are not only functional structures but also symbols of unity, connection, and engineering marvels. Whether spanning over a river, a highway, or a deep canyon, bridges come in a variety of designs—from simple footbridges to grand suspension bridges. Learning how to draw a bridge will help you improve your perspective skills, line work, and structural detailing.
Follow this step-by-step guide to create a realistic and well-proportioned bridge drawing!
Step 1: Draw the Base Structure
✅ Start by drawing a straight horizontal line across the middle of your paper—this will be the base of your bridge. ✅ At each end of the bridge, draw two vertical lines to act as the main supports or pillars. ✅ Depending on the style of bridge you're drawing, the base structure can be a flat roadway (for modern bridges) or slightly arched (for older stone bridges).
Tip: Use light pencil strokes so you can adjust the structure as you refine your drawing.
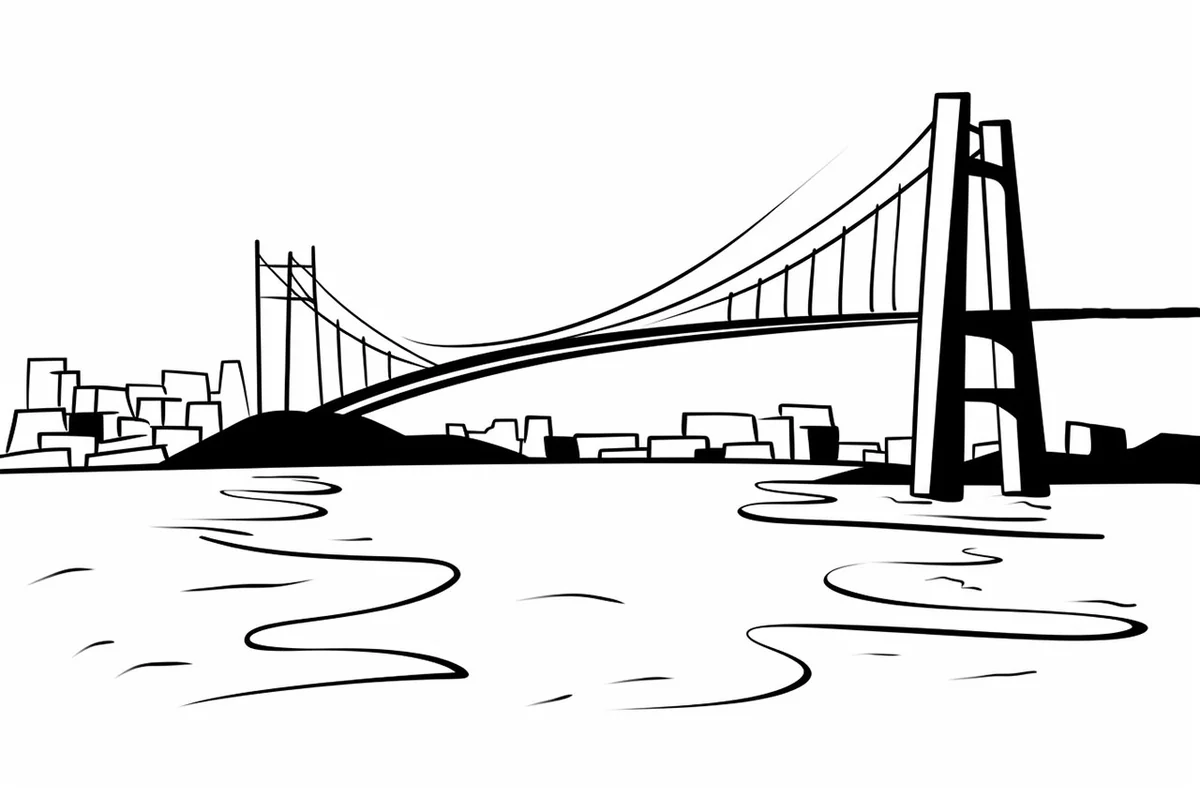
Step 2: Add the Arches or Suspension Elements
Now let's define the bridge's design by adding arches or suspension elements:
✅ If you're drawing an arched bridge, sketch a large semi-circle over the horizontal base line. ✅ For added complexity, draw smaller arches beneath the main one to create depth and detail. ✅ If drawing a suspension bridge, add two tall vertical towers extending from the base and connect them with curved cables draping between them. ✅ Make sure the arches or cables are evenly spaced and symmetrical.
Tip: If you're working with one-point perspective, ensure that the curves of the arches diminish in size as they recede into the background.
Step 3: Sketch the Railings and Supports
✅ Draw two parallel lines along the length of the bridge—these will be the top railings. ✅ Add vertical support beams connecting the railings to the bridge's base. These should be evenly spaced for a balanced look. ✅ If drawing a suspension bridge, extend cables downward from the main curved suspension cables to connect with the bridge deck. ✅ Consider adding intricate designs to the railings, such as ornate metalwork for historical bridges or simple modern railings for contemporary ones.
Tip: Use ruler-assisted straight lines for modern bridges and more fluid, organic curves for classic stone bridges.
Step 4: Add Structural and Roadway Details
Now that the main framework is in place, let's add more architectural details:
✅ Draw a road surface within the bridge by adding horizontal lines or a subtle perspective grid to indicate a walkway or lanes for vehicles. ✅ Sketch lampposts along the bridge for a classic cityscape look. ✅ If you're drawing a stone or brick bridge, add small, repeating shapes along the base to create the illusion of masonry or brickwork. ✅ For a modern bridge, add steel framework details, rivets, or cross-beams to give it a sturdy, engineered look.
Tip: Bridges often curve gently with the landscape—add gentle perspective adjustments to make it feel grounded.
Step 5: Add Shading and Texture for Depth
✅ Identify the light source in your drawing—shade the underside of the bridge, railings, and arches where shadows naturally fall. ✅ Use hatching and cross-hatching techniques to create the illusion of texture on stone bridges. ✅ For metal bridges, use smooth gradients to show reflective surfaces. ✅ If the bridge is over water, add gentle ripples and reflections underneath to show the bridge's presence in the environment.
Tip: Shadows should be darker closer to the structure and fade out gently to create a natural, realistic look.
Step 6: Final Touches and Enhancements
✅ Go over your final lines to enhance clarity and definition. ✅ If needed, erase any construction lines for a cleaner look. ✅ Consider adding a background—such as a city skyline, forest, or riverbanks—to complete the scene. ✅ If you're using ink or fine liners, carefully trace over your final drawing for a crisp, defined appearance.
Tip: If coloring, use deep grays and browns for stone bridges, or cool blues and metallic hues for modern structures.
Final Thoughts on Drawing a Bridge ✏️
Congratulations! You've successfully drawn a detailed and realistic bridge! Bridges are not just architectural marvels, but also symbols of connection and unity.
Experiment with different bridge styles—try drawing a wooden footbridge, a modern suspension bridge, or a historical stone bridge. Practice perspective—drawing bridges at different angles will help improve your depth perception in art. Incorporate storytelling—add people, vehicles, or dramatic weather effects to bring your bridge to life.
With practice and creativity, you can create stunning architectural drawings that capture the beauty and function of bridges in landscapes and urban settings.
So, grab your pencils and let your imagination span new horizons! ✨
Gallery of Bridge Drawings


Fun Facts About Bridges
-
Bridges have been used for thousands of years, with the earliest bridges made from fallen trees and stones.
-
The oldest known bridge is a slab-stone crossing over the River Meles in Turkey, dating back more than 3,000 years.
-
Suspension bridges, like the Golden Gate Bridge, are known for their strength and flexibility, making them ideal for long spans.
-
The world's longest bridge is the Danyang–Kunshan Grand Bridge in China, which stretches over 100 miles (about 165 kilometers).
-
Some bridges are designed to be movable, such as drawbridges or tilt bridges, to allow ships to pass through underneath.
-
Iconic bridges around the world, such as the Tower Bridge in London, often become symbols and landmarks of their cities.
-
Bridges can be made of different materials, including wood, stone, steel, and modern composites, each suited to different environments and uses.
-
In ancient cultures, bridges were sometimes considered sacred structures, believed to connect the earth with the heavens.
-
Covered bridges were prevalent in 19th century America to protect the wooden trusses from the elements, increasing their lifespan.
-
There are approximately 600,000 bridges in the United States alone, each serving a vital role in transportation infrastructure.
Tip: When drawing a bridge, begin by lightly sketching the basic shapes and lines that define its structure, using a pencil for easy adjustments. Pay special attention to the perspective; if your bridge is arched, ensure that the curves are smooth and symmetrical. Use a ruler for straight lines, especially for the supports and roadbed, as they often require precision to look realistic. As you refine your drawing, gradually build up details like railings and textures, but remember to keep your lines light until you're satisfied with the overall composition. Lastly, don't hesitate to step back frequently to assess your work from a distance; this will help you catch any proportion issues early on and make your final adjustments easier!
Suggestions for Scenes and Settings for Bridge Drawings
-
Historic Stone Bridge: Illustrate an ancient stone bridge arching over a serene river with small boats passing underneath.
-
Golden Gate Inspired: Capture the iconic red suspension cables of a bridge stretching across a foggy bay at sunrise.
-
Bridge During Sunset: Draw a bridge silhouetted against a vibrant sunset, with its reflection shimmering on the water below.
-
Rural Covered Bridge: Create a peaceful rural scene with a quaint, wooden covered bridge surrounded by autumn foliage.
-
City Skyline Overpass: Design a futuristic bridge with sleek lines and glowing lights weaving through a bustling cityscape.
-
Island Connector: Picture a series of small bridges linking tropical islands with clear waters below and palm trees around.
-
Bridge in Winter: Show an arched bridge blanketed in snow, with icicles hanging from its sides and footprints crossing it.
-
Fantasy World Crossing: Invent a mystical stone bridge guarded by statues and illuminated by magical orbs in an enchanted forest.
-
Bridge with Wildlife: Illustrate a natural bridge where animals such as deer and foxes cross a stream in a woodland setting.
-
Artistic Reflection: Depict a bridge stretching over a lake, capturing the perfect mirror image of its structure in the water.