Are you interested in learning how to draw a baseball cap? Whether you are an aspiring artist or just looking to improve your drawing skills, this step-by-step guide will walk you through the process of how to draw a baseball cap in a creative and realistic fashion. So grab your drawing materials and let’s get started!
Materials Required
Before we begin, gather the following materials:
- Pencil: Choose a pencil with a medium hardness, such as an HB or 2B, for sketching and shading.
- Eraser: Have a good quality eraser on hand for correcting mistakes.
- Paper: Use a smooth, heavyweight paper or a sketchbook that can withstand erasing and shading.
- Ruler: A ruler will help you achieve straight and accurate lines.
- Colored pencils or markers (optional): If you want to add color to your drawing, have some colored pencils or markers ready.
Now that you have your materials ready, let’s dive into the step-by-step process of drawing a baseball cap.
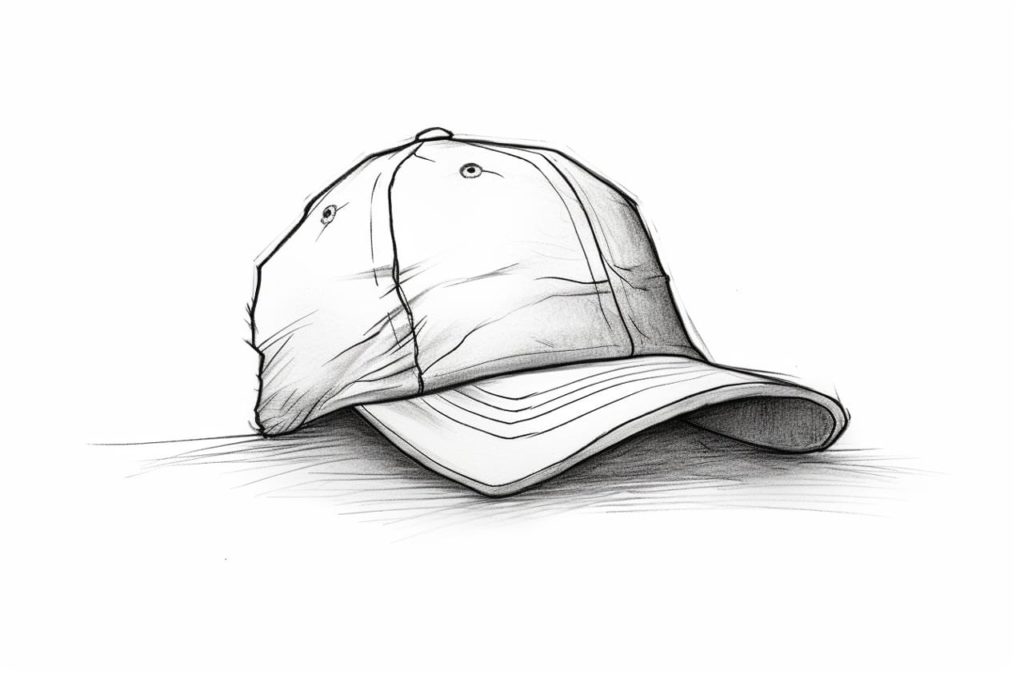
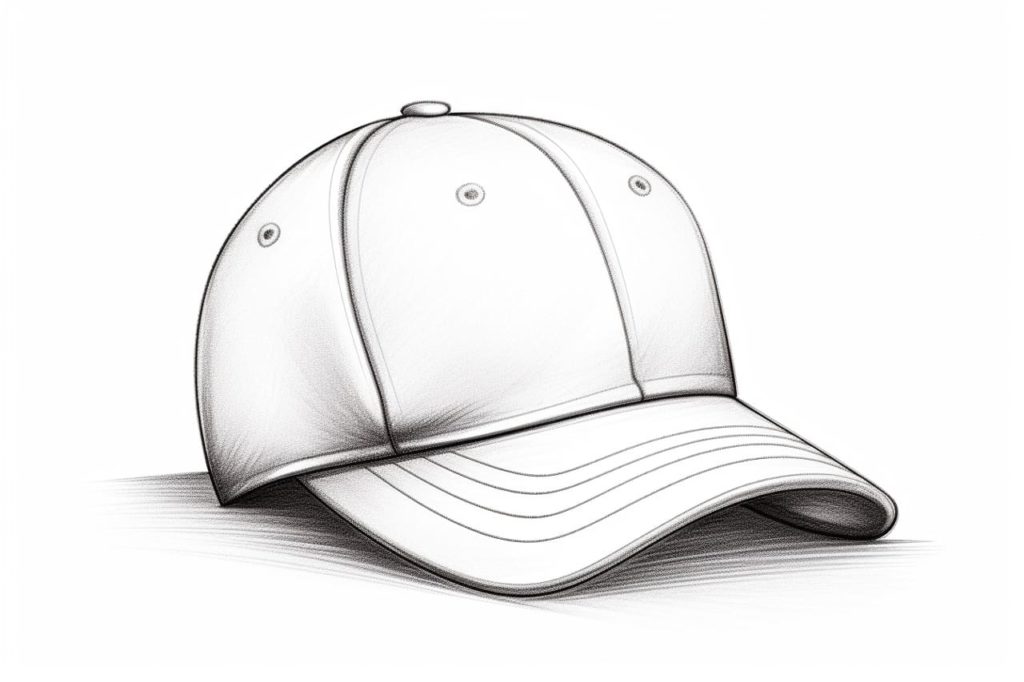
Step 1: Draw the Outline
Start by lightly sketching a vertical oval shape for the cap’s crown. This shape will serve as the foundation for the cap’s structure.
Step 2: Add the Brim
Draw a curved line at the bottom of the oval to create the cap’s brim. Make sure the brim is evenly curved and extends slightly beyond the oval shape on both sides.
Step 3: Define the Crown
Next, draw a horizontal line across the oval shape, slightly above its center. This line will give the crown of the cap more definition and make it appear more three-dimensional.
Step 4: Add Details to the Crown
To make the cap look more realistic, add a few curved lines on the crown. These lines represent the stitching and add texture to the drawing. Start by drawing a slightly curved line from the left side of the brim to the top of the cap. Repeat this process on the right side, making sure the lines are parallel and evenly spaced.
Step 5: Draw the Logo or Design
If the baseball cap you are drawing has a logo or design on the front, this is the time to add it. Use reference images or your imagination to sketch the desired logo or design on the center front of the cap. Take your time to ensure accuracy and detail.
Step 6: Outline the Cap
With the main structure and details in place, it’s time to outline the cap with more defined lines. Trace over the initial sketch, refining the shape and adding more depth and detail. Use a ruler for straight lines and guide your hand with light, confident strokes.
Step 7: Erase Unnecessary Lines
Now that you have a clean outline of the cap, erase any unnecessary lines, such as the initial oval shape and construction lines. Be careful not to erase the important details and outlines you’ve drawn.
Step 8: Add Shadows and Highlights
To make your baseball cap drawing appear more realistic and three-dimensional, it’s essential to add shadows and highlights. Determine the direction of the light source and imagine where the shadows and highlights would fall on the cap. Shade the areas that would be in shadow with a darker pencil or use cross-hatching techniques. Use a lighter pencil or leave areas blank for the highlights.
Step 9: Add Texture and Details
To add more depth and texture to your drawing, enhance the stitching lines on the crown. Darken the stitching lines with a darker pencil or add small dashes to represent the stitching. You can also add texture to the brim by lightly shading it in the direction of the fabric fibers.
Step 10: Optional – Add Color
If you want to take your drawing to the next level, you can add color to your baseball cap. Use colored pencils or markers to bring your drawing to life. Observe the colors and patterns of the cap and apply them accordingly. Use light layers and build up the colors gradually for a more realistic effect.
Congratulations! You have successfully learned how to draw a baseball cap. With practice, you will continue to improve your drawing skills and create even more detailed and realistic drawings.
Conclusion
Drawing a baseball cap may seem challenging, but by following these step-by-step instructions, you can achieve impressive results. From outlining the cap to adding details, shadows, and color, each step helps bring your drawing to life. Remember to be patient, practice regularly, and have fun with your artwork. So grab your pencil, paper, and imagination, and start creating amazing drawings of baseball caps!
Ready for more baseball-related drawings? Try learning how to draw a baseball, how to draw a baseball player, and how to draw a baseball bat. Batter up!
Gallery of Baseball Cap Drawings