How to Draw a Baseball Field
Learn how to draw a baseball field step-by-step with this easy-to-follow tutorial. Create a realistic and accurate depiction of your favorite sport in no time.
Materials You'll Need
- Pencil
- Paper
- Eraser
Drawing a baseball field is a fantastic way to combine your love of sports with your artistic skills. Baseball fields have a unique and recognizable layout, featuring elements such as the diamond-shaped infield, the pitcher's mound, bases, and the outfield that stretches beyond. Understanding the proportions and spatial relationships between these components is key to creating a realistic and engaging drawing. Whether you're an artist fascinated by sports illustrations or simply want to capture the essence of a classic American pastime, learning how to draw a baseball field will add a dynamic subject to your portfolio.This tutorial on how to draw a baseball field is designed for artists of all skill levels, from beginners eager to learn basic shapes and perspective, to more advanced creators interested in refining details and textures. Throughout the process, you'll work on techniques such as sketching geometric shapes, managing symmetry, and adding depth through shading and line variation. By breaking down the field into manageable sections, you'll gain confidence in constructing complex scenes and improve your overall spatial awareness. The step-by-step instructions ensure you can follow along at your own pace and develop your skills incrementally.Ready to bring the excitement of the ballpark to life on your paper? With patience and practice, you'll soon be able to craft a detailed and accurate representation that captures the spirit of the game. So, gather your pencils, erasers, and paper, and dive into this comprehensive guide on how to draw a baseball field. Remember, every great artist started with simple lines—your masterpiece is just a few strokes away!
Materials Required
Before we begin, gather the following materials:
- Paper: Start with a blank piece of paper or choose a sketchbook that suits your preferences.
- Pencil: A medium-soft graphite pencil is ideal for initial sketches and guidelines.
- Eraser: Have a soft eraser handy to correct any mistakes or remove unwanted lines.
- Ruler: A straight edge is essential for drawing straight lines and measuring accurate proportions.
- Compass: Use a compass to draw the curves of the bases and pitching mound accurately.
- Colored Pencils or Markers: If you'd like to add color to your drawing, have some colored pencils or markers available.
Now that you have your materials ready, let's move on to the step-by-step instructions.
Tip: To enhance your drawing of a baseball field, consider incorporating various textures and shading techniques to bring depth and realism to your artwork. For instance, use lighter strokes for the grass and darker tones for the dirt areas, and experiment with cross-hatching or stippling to define shadows on the bases and pitcher's mound. This attention to detail will not only elevate your drawing but also add a dynamic quality that captures the spirit of the game.
Step 1: Setting the Layout
Begin by setting the layout of your baseball field. Use your ruler to draw a horizontal line across the middle of the paper, representing the ground. This line will serve as a guide for the other elements of the field.
Step 2: Marking the Bases
Draw a series of four equidistant points along the horizontal line to represent the bases. These points should form a square shape, with the first base located on the left, the second base at the top, the third base on the right, and the home plate at the bottom.
Step 3: Outfield and Foul Lines
From each corner of the square formed by the bases, use your ruler to draw lines extending outwards. These lines will represent the outfield and foul lines. The outfield lines should be curved, indicating the boundary of the field.
Step 4: Drawing the Infield
Using your ruler, connect the bases with straight lines to form the diamond shape of the infield. Make sure the lines meet at right angles to each other. This will define the inner edge of the baseball diamond.
Step 5: Pitching Mound
Draw a small circle at the center of the diamond to represent the pitching mound. Use your compass to achieve a perfect circle. The pitching mound is a raised area where the pitcher stands to throw the ball.
Step 6: Adding the Batter's Box
On each side of the home plate, draw two small rectangles to represent the batter's box. These boxes are where the batter stands during a game.
Step 7: Baseball Field Features
Now it's time to add the essential features of a baseball field. Draw a rectangle behind the home plate to represent the backstop. This is a protective net or wall that prevents wild pitches and foul balls from hitting spectators. Also, draw two parallel lines extending from the home plate to the backstop. These lines indicate the path for the runners.
Step 8: Outfield Fence and Dugouts
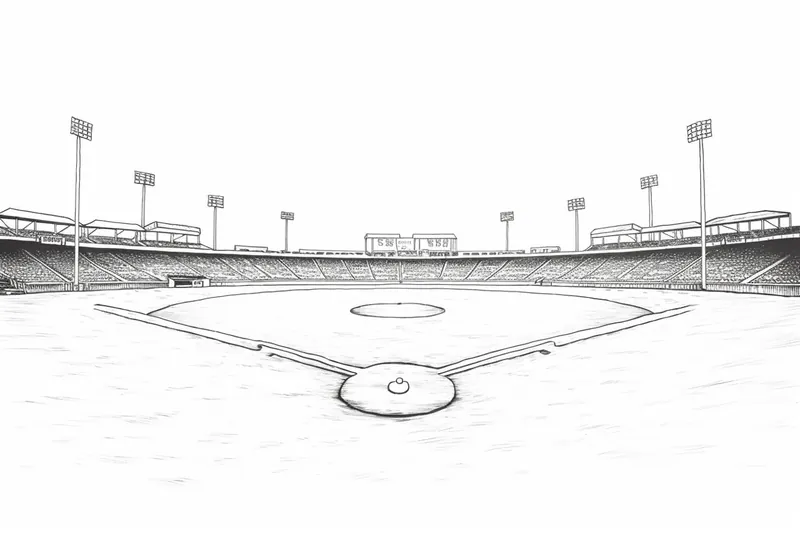
To complete the drawing, add a curved line to represent the outfield fence, enclosing the entire field. You can also draw two small rectangles to depict the dugouts, where the players and coaches sit during the game. Customize your drawing by adding details such as seating areas, scoreboards, or even fans in the stands.
Conclusion
Congratulations! You have successfully drawn a baseball field. By following each step of this guide, you've learned the fundamentals of creating an accurate representation of a baseball field. Don't be afraid to experiment with different colors or shading techniques to bring your drawing to life. Now that you have the skills, practice and create your own unique baseball field artwork.
We hope you enjoyed this tutorial on how to draw a baseball field. Remember, practice makes perfect, so keep honing your drawing skills. Happy sketching!
Fun Facts About Baseball Fields
- The distance between each base on a standard baseball field is exactly 90 feet, creating the iconic diamond shape.
- The pitcher's mound is 60 feet 6 inches from home plate, a distance that has remained unchanged since 1893.
- The infield is a perfect square rotated 45 degrees to form the diamond, with each side measuring 90 feet.
- The outfield fence distance varies by ballpark but typically ranges from 300 to 400 feet from home plate.
- Grass and dirt are the traditional surfaces of a baseball field, but some modern fields use artificial turf for durability.
- The batter's box is a rectangle 4 feet wide and 6 feet long, positioned on either side of home plate.
- Foul lines extend from home plate past first and third base to the outfield fence, defining fair and foul territory.
- The backstop behind home plate is designed to protect spectators and catch wild pitches, typically made of netting or fencing.
- The pitcher's mound is raised 10 inches above the level of home plate to give pitchers a strategic advantage.
Suggestions for Scenes and Settings for Baseball Field Drawings
- A bustling baseball game in progress with players mid-action on the field, capturing dynamic movement and energy.
- An aerial view of the baseball field during sunset, highlighting shadows and the warm glow over the diamond and outfield.
- A quiet, empty baseball field early in the morning with dew on the grass and the empty stands in the background.
- A vintage baseball field setting from the early 1900s, complete with period-appropriate uniforms and wooden bleachers.
- A close-up of the pitcher's mound and home plate area, focusing on textures like dirt, chalk lines, and worn bases.
- A nighttime game under bright stadium lights, emphasizing contrasts between illuminated areas and dark surroundings.
- A whimsical or fantasy-themed baseball field with unusual elements like floating bases or a field set on another planet.
- A panoramic scene showing the entire baseball complex including dugouts, scoreboard, concession stands, and cheering fans.
- A practice session on the field featuring players warming up, coaches giving instructions, and scattered equipment.
- A detailed study of the outfield fence adorned with advertisements, ivy, or a scenic natural backdrop like mountains or trees.