Welcome to this step-by-step guide on how to draw a softball! Whether you’re an aspiring artist, a sports enthusiast, or simply looking to improve your drawing skills, this tutorial will walk you through the process of creating a realistic representation of a softball. So grab your drawing supplies, follow along, and let’s get started!
Materials Required:
- Drawing paper or sketchbook
- Pencil
- Eraser
- Fine-tip black pen or marker
- Gray markers or colored pencils (optional)
Now that you have your materials ready, let’s dive into the process of drawing a softball.
Step 1: Draw a Circle
Begin by lightly sketching a perfect circle in the center of your paper. This circle will serve as the outline of the softball. You can use a compass or a circular object with the desired size to help you achieve a neat and accurate circle. Don’t worry about making it perfect in your initial sketch; you can always refine it later.
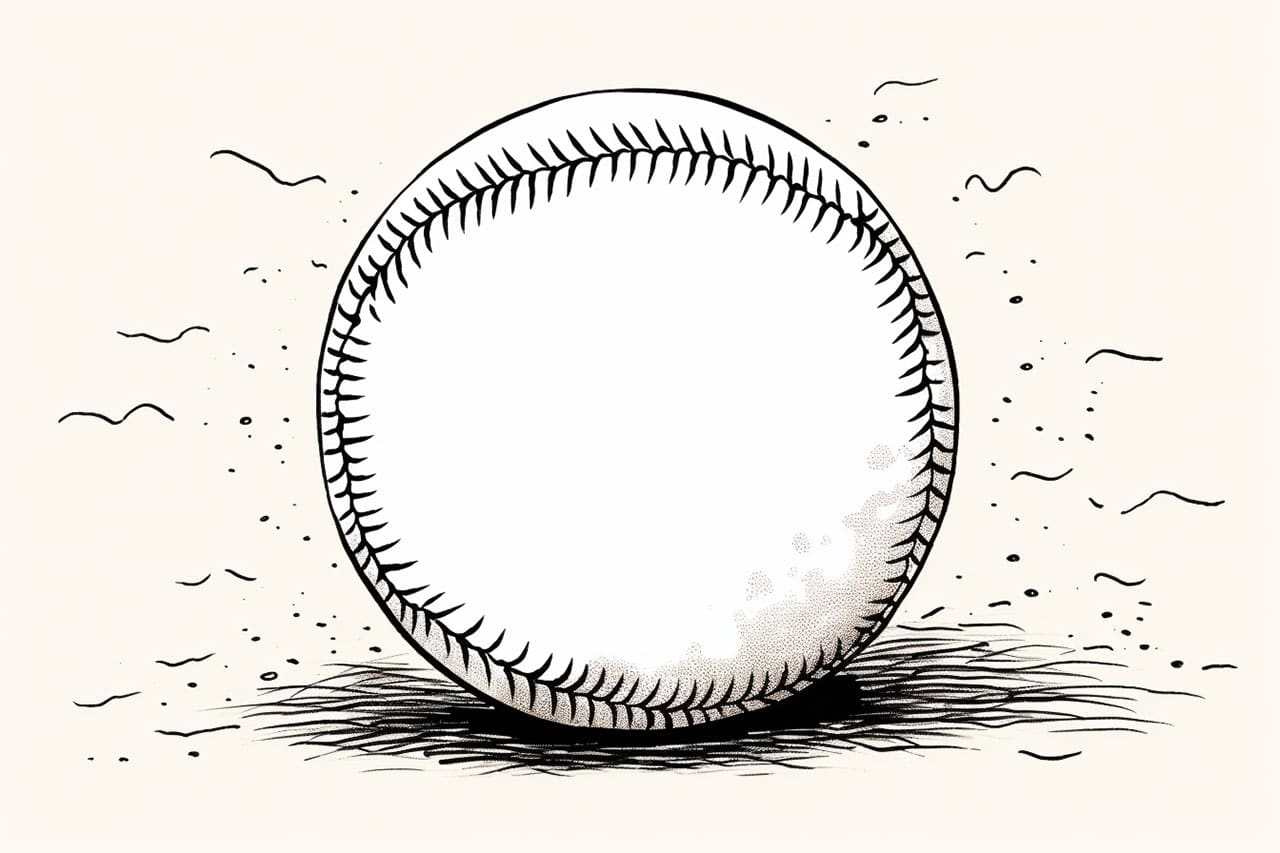
Step 2: Add Stitching Details
Next, draw the stitching details of the softball. These stitches are what give the softball its distinctive appearance. Start by drawing a curved line that cuts across the top portion of the circle. This line should extend slightly beyond the boundaries of the circle on both ends. Then, draw several short, curved lines that intersect the first line, creating a series of stitched segments. Repeat this process until you’ve covered the entire circumference of the softball.
Step 3: Refine the Outline
With the stitching details in place, it’s time to refine the outline of the softball. Carefully go over your initial circle sketch, using smooth and confident strokes to create a clean and well-defined shape. Pay attention to the curves and proportions of the softball, working towards achieving a realistic and symmetrical appearance.
Step 4: Shade the Softball
Now that the basic structure of the softball is defined, it’s time to add shading to give it a three-dimensional look. Before starting, determine the direction of your light source. This will influence where the shadows fall on the softball. Using a pencil or gray marker, shade the areas of the softball that are away from the light source, creating a gradual transition from dark to light. Pay attention to the folds and creases caused by the stitching, as they will affect the shading.
Step 5: Enhance the Stitching
To make the stitching details stand out, use a fine-tip black pen or marker to carefully trace over the stitched segments. This will give them a more defined and crisp appearance. Take your time and follow the curvature of each segment, ensuring that the lines are smooth and consistent.
Step 6: Add Highlights
To further enhance the realism of your drawing, add highlights to the softball. Identify the areas where the light source would reflect off the surface of the ball and use an eraser to gently lighten those areas. This will create the illusion of shiny spots, making the softball appear more tactile and lifelike.
Step 7: Optional – Color the Softball
If you prefer a colored representation of a softball, you can use gray markers or colored pencils to add a touch of vibrancy to your drawing. Gradually layer the colors, starting with a lighter shade and gradually building up to darker tones. Pay attention to the shading and reflections, using blending techniques to create a smooth and realistic appearance.
Conclusion
Congratulations! You have successfully learned how to draw a softball. By following these step-by-step instructions, you can now create your own softball drawings with confidence and skill. Whether you’re drawing for fun or honing your artistic abilities, practice is key, so keep experimenting and refining your technique. With time and patience, you’ll be able to create even more dynamic and detailed drawings of softballs and other subjects. Enjoy the process and happy drawing!